Sunday, July 28, 2013

Maple Brown Sugar Cookies (grain-free : Primal : gluten-free : unrefined sweeteners)


The flavor of maple syrup partners well with brown sugar and butter in these tasty cookies.  Everyone in our family loves these cookies, and I like having such a healthy, homemade treat on-hand for the kids. Since two of us like our cookies with nuts and two like them without, I added nuts to the second half of the batter before scooping up the cookies for baking.

Maple Brown Sugar Cookies
Makes 40-50 cookies

  1. Set your oven racks so that none are in the bottom third of the oven.  Preheat the oven to 325 F.
  2. In a medium bowl, combine the salt, baking soda, and coconut flour. Whisk well to combine and break up any lumps of coconut flour.
  3. In another bowl (or stand-mixer), beat the butter, maple syrup, and sucanat together for a few minutes, until the mixture is light and fluffy. If you are using a stand-mixer, make sure you scrape the sides and bottom a couple times with a spatula to get everything incorporated well.
  4. In a small bowl or pourable glass measuring cup, combine the eggs, vanilla extract, and almond extract. Don't worry about stirring this up.
  5. Pour the eggs into the sweet butter mixture one at a time while the mixer is running.  Let each egg get incorporated before adding another one. (Note: the batter may look curdled during this process, but don't worry about it!)
  6. While the mixer is running, add the dry ingredients a little at a time.  Since coconut flour does not contain gluten, there is no worry of over-mixing it.
  7. Stir in the optional pecans. 
  8. Scoop the cookies onto greased cookie sheets (or line the cookie sheets with exopats, which are wonderful since the cookies never stick and are less likely to burn).  I like to use a 1-Tb scoop for consistently pretty cookies, but you could just use a spoon. Press/flatten the cookies slightly using your fingers or the back of a spoon.
  9. Bake the cookies at 325 F for about 15-18 minutes (or a few minutes longer if you are cooking them on stoneware). They are done when they are golden brown on top and a little darker brown on the edges.
  10. Remove from oven and allow to cool for about 5-10 minutes.  Then use a spatula to move them to a cooling rack.
  11. Once cool, store these cookies in an airtight container.  They can be stored in the refrigerator or freezer if you won't be eating them all in the next few days.  They are nice and chewy straight from the fridge, and even soft enough to eat straight out of the freezer!  Storing them in the freezer will also remove the pressure of having to eat them all in a week or so, as they will last for months in the freezer. 
Links to Amazon are affiliate links. If you use these links, your price remains the same, but I earn a small commission. Thanks for supporting this site!

Tuesday, July 23, 2013

The Houseplant That Will Keep All Your Other Houseplants Alive

My History With Houseplants Is Littered With Dead Plants

My mother seems to have been born with a green thumb.  She has the most beautiful yard I've ever seen, despite the fact that we live in the hot, dry desert. Her house has always been filled with thriving, beautiful plants, and she even still has some houseplants that she has owned since the early 1980's! I aspired to have the same when I began setting up my own home.

Back in the late 1990's and early 2000's, I had terrible success in keeping houseplants alive.  I seemed to buy a new houseplant every month or two, yet they mostly looked awful and would eventually get tossed into the trash.  I tried many different types of plants, but they all failed to thrive.  I would forget to water them - their leaves would turn yellow or brown - I would remove the dead leaves - soon enough the whole plant would be threadbare and unattractive - bound for the trashcan.

Enter the Peace Lily.  When I bought this plant, I figured it was just another in my long string of houseplant failures.  Little did I know that this little plant would single-handedly keep the rest of my houseplants alive and give me a chance at having healthy, long-lived houseplants. 

How Does the Peace Lily Keep the Rest of My Plants Alive?

The Peace Lily keeps the rest of my houseplants alive because it comes with a built-in watering signal.  When the Peace Lily starts to dry out, its leaves start to droop.  Day by day, the leaves start to droop more, and more, and more, until I finally notice and realize it is time to water houseplants.
A drooping Peace Lily. It can droop much more than this if neglected.
With other houseplants, the leaves start yellowing and dying if deprived of water, but the Peace Lily is different.  Its leaves start to droop, and can get downright flat if I still keep forgetting to water it.  But then, once it gets watered, the leaves perk right back up. Keeping my plants watered is now just a matter of waiting for that characteristic droop in my Peace Lily. 
Peace Lily all perky and happy after getting watered

A Few Notes About Caring for Peace Lilies

  • My Peace Lilies (and all of my other houseplants) do best when planted in pots that have a hole in the bottom. The hole allows for drainage in case of over-watering.  I also make sure there is a saucer under each pot to hold the extra water, and this allows the plant to suck up the remaining water as the dirt starts to dry out.
  • If you wait for drooping leaves to signal that it is time to water the Peace Lily, beware that the water may travel very quickly through the pot when you water it.  If the saucer under the pot is small, it can very quickly overflow in this scenario. For this reason, when my Peace Lily is drooping, I make sure to give it just a bit of water at first, and then water it again in a few hours once the water in the saucer has been soaked up.
  • Peace Lilies are one of the few houseplants that bloom indoors.  I keep my Peace Lilies in areas of moderate sunshine (and never in a very sunny spot), and they both bloom periodically.  The flowers are white and pretty, but they do drop little bits of pollen around.  I often just snip the blooms off with scissors rather than deal with the pollen mess.
  • Over time, a few leaves near the bottom of the plant will slowly die.  I just remove these periodically, and that keeps my plants looking attractive.
  • It may sound obvious, but Peace Lilies can only help your other plants if you make sure to water all of your plants whenever you water the Peace Lilies.  On busy days, I have sometimes been tempted to only water the Peace Lilies due to their obvious distress, but I have to make sure not to forget to water the rest of my plants as well.

I've had my Peace Lilies for over 5 years now, and the rest of my houseplants now have a fighting chance at living a long time in my house.  In fact, I haven't had to buy any houseplants in the last couple of years!

Do you have success in keeping houseplants alive and thriving?


Friday, July 19, 2013

Quick and Easy Sausage Links (GAPS : grain-free : Primal : gluten-free)

I made up a batch of these sausages today, and they were super tasty.  My 3-year-old finished his serving and called out "More, please!" I'm excited to have a recipe that for sausages that is so easy to make and tastes so delicious.

This recipe comes from the Beyond Grain and Dairy eCookbook by Starlene Stewart.  My notes are in RED.
 
Quick and Easy Sausage Links

  • 1 pound fatty ground pork (you could also use beef, chicken, turkey, separate or mixed, and you can also sneak in organ meats!) (I used grassfed ground beef.)
  • generous scoop of leftover bacon grease (Since my meat was not very fatty, I added some leftover bacon grease. This added a wonderful flavor to the sausages.) 
  • 1/2 teaspoon granulated garlic OR 1 clove garlic, crushed
  • 1 teaspoon granulated onion OR 1 Tablespoon onion, crushed
  • 1 teaspoon sea salt (I doubled the amount of salt to 1 tsp since we like our sausages nice-and-salty.) 
  • 1/2 teaspoon pepper
  • 1/2 teaspoon oregano
  • 1/4 teaspoon cayenne, optional (I left this out.)
  1. Mix all ingredients together. I used my hands to mix it all together.
  2. Form into sausage links. At this point you can refrigerate overnight so the spices can marry, or you can fry them immediately. I let mine sit for about 10 minutes before cooking them up.
  3. Fry in your favorite healthy fat until well done, turning frequently to brown on all sides, about 10 minutes. I used a 10-inch cast iron skillet. Because of the added bacon grease in my sausages, I only melted a touch of butter in the pan before adding the sausages.  A good amount of the bacon grease did melt out of the sausages as they cooked, so a splatter screen was necessary to prevent making a huge, splattery mess.
This recipe and many more can be found in the Beyond Grain and Dairy eBook, which is part of this week's Real Foods eBook Bundle only until July 22nd. Whether you are new to real foods and looking for resources, or an experienced real foodie who just needs a bit more variety, this bundle of Real Food books is sure to help!

Click here to buy 5 eBooks, retail value of $63.82, for only $13.95! This sale is for ONE WEEK ONLY, ending on July 22nd! (This bundle sale has now ended.)

This eBook bundle includes:
  • Nourished Cooking (121 pages / Retail Value: $11.95): My newest cookbook is a comprehensive cookbook that contains over 60 nutrient-dense, gluten-free recipes. This cookbook is perfect for those who eat traditional, real foods, as well as people on grain-free diets such as Primal, GAPS, and SCD. The recipes in this book are sure to please the whole family, and even people who don’t follow a traditional foods diet will rave over these foods. This cookbook includes recipes for:
    • 8 Breakfasts, such as Lemon Coconut Muffins and Mushroom & Cheddar Crustless Quiche,
    • 20 Main Courses, such as Italian Wedding Soup and Double Cheese Burgers,
    • 10 Side Dishes, such as grain-free Cheesy Bread and Zucchini Spaghetti Noodles,
    • 18 Desserts, such as grain-free Strawberry Chocolate Layer Cake and Chocolate Chip Cookies, as well as
    • 7 Condiments/Sauces/Fermented Foods, such as Quick & Easy Pizza Sauce and Tartar Sauce.
  • Beyond Grain and Dairy (166 pages / Retail Value:$16.97): This cookbook by Starlene Stewart contains 113 delicious recipes to tantalize your taste buds, made with no grains, gluten, dairy, gums, corn, soy or processed sugar. And even if you don’t need to avoid any of these items, the recipes are still delicious! Move beyond grain and dairy and you may find that you feel better than you have for years or maybe in your entire life! Photos included for every recipe, a clickable Table of Contents plus an Ingredients Index so you can easily find recipes by ingredient.
  • Adventures with Kids! In the Kitchen (79 pages / Retail Value: $14.95): Author Chara Shopp encourages and teaches you when, how and why to bring your kids into the kitchen. Chara uses her sense of humor and practical experience as a teacher and mother of 3 to help you and your family succeed with real food cooking. Whether you are a gourmet cook or just learning, you will find practical ideas and suggestions for how to get your kids cooking, culturing, cleaning and celebrating their time in the kitchen! You will learn:
    • Why you want your kids in the kitchen with you (more reasons than you might suspect), there are big benefits!
    • When to train your children
    • The step by step process for teaching culinary skills to your children
    • How to pass on the skills used in a real food kitchen- soaking, sprouting, culturing, and more! (Don’t worry, she’ll teach you first!)
    • Age appropriate ideas for things kids can do in your kitchen (printable)
    • A printable list of over 140 kitchen skills to learn and practice!
    • And more…

  • Real Food Party Menus (22 pages/Retail Value: $7.95): Picking recipes to please a crowd can be difficult and time consuming. KerryAnn Foster has created three gluten-free and dairy-optional party menus, ranging from casual to more formal meals, that are only made with ingredients that non-foodies would recognize while staying on a real food diet. It’s the best of both worlds- they don’t complain about the food and you don’t have to go off of your eating style or be exposed to allergens.

  • Just Making Ice Cream (113 pages / Retail Value: $12.00): This eBook by Marillyn Beard is more than just a recipe book! In this ebook, Marillyn offers practical ice cream-making tips such as choosing an ice cream maker, how to make ice cream without an ice cream maker and the basic principles of delicious homemade ice cream. You’ll also find more than 30 ice cream & gelato recipes, 9 cultured milk recipes, 10 sherbet recipes and 10 sorbet recipes along with natural sweetener & milk alternatives that will keep you busy taste-testing all summer long!

5 eBooks, retail value of $63.82, for only $13.95!

Remember – this sale is for ONE WEEK ONLY! It disappears forever on July 22nd at 11:59pm PST! (This bundle sale has now ended.)

This post contains Amazon affiliate links.  If you use these links, your price will be the same but I may earn a small commission.

Sunday, July 14, 2013

Kid-Pleasing Beef and Red Pepper Hash (grain-free : Primal : GAPS : SCD : gluten-free)

Looking for a new way to eat ground beef (our go-to, easy dinner base), I came up with this recipe for beef and red pepper hash (based on this recipe for stuffed peppers).  This delicious meal was devoured by everyone in my family, and my 3-year-old even asked for seconds.  This pairs wonderfully with fried potatoes, but it would also be good with rice or even on top of cheesy bread for an open-faced, grain-free sloppy joe.

Beef and Red Pepper Hash
Serves 4-6
  1. Melt the butter in a large, heavy bottomed skillet over medium heat. Add the onion and sprinkle with salt.  Saute for about 10 minutes, until the onion is starting to soften and becoming translucent.  The onion will taste especially good if you let it get a little bit browned.
  2. Crumble the ground beef into the skillet.  Sprinkle the chopped bell peppers over the top. Season with a teaspoon of salt and about 1/4 tsp freshly ground pepper. Saute for 5-8 minutes, until the meat is mostly browned.
  3. Add the garlic, parsley, allspice, and paprika. Stir to combine, and continue to cook just until the garlic is fragrant (about 1 minute).  
  4. Add the tomato sauce, and stir. Cover the skillet, reduce the heat, and simmer for about 12 minutes.
  5. Uncover the pot, and taste for salt.  Add more salt and pepper as needed.  Continue to cook uncovered for a few minutes to allow some of the moisture to evaporate.
  6. Turn off heat and serve!  This pairs well with fried potatoes, white rice, or a side salad with homemade ranch dressing drizzled over the top.
This post contains Amazon affiliate links.  If you use these links, your price will be the same but I may earn a small commission.

Thursday, July 11, 2013

Simple Yet Special: Real Food Afternoon Tea Party (grain-free : gluten-free)

I often find it hard to take the time to leisurely enjoy activities with my kids.  There always seems to be one more thing on my to-do list, yet I know that being present with my kids, really connecting with them, is something that should take precedence over most other things on my list. Today my kids were asking for a tea party, and I thought it was a great opportunity to slow down a bit. 

Since this was a spur-of-the-moment activity, I didn't have any fancy tea party foods.  Nonetheless, I pulled together several different items that were on-hand, and took the time to lay them out nicely so that it felt like a special occasion. The kids placed flowers on the table and set our places with cups, saucers, and spoons.

More Tea, Please!
I chose Passion Tea because of it's beautiful pink color and aroma.  Rather than heating up the house, I chose to make cold tea; Passion Tea is wonderful because it can be "brewed" by just placing a tea-bag in cool water and allowing it to sit for 5-10 minutes.

My kids delighted in pouring their own tea and adding in milk and sugar (or sucanat).  We sweetened our second glasses of tea with maple syrup, and it was delicious!

Savory Plate
My goal in putting together the savory plate was to combine lots of different flavors and textures: salty & sweet, crispy & soft, tangy & creamy, juicy & dry.


Sweet Plate
The sweet plate combined different textures and flavors that all complimented each other.  I included the chocolate chips as a treat that my kids would be very excited to see. Bananas dipped in the chocolate chips were superb.


We read from the Treasury of Children's Poetry during the tea party, and had fun trying to remember some of the poems without looking at the pages.  My 3-year-old astounded me by reciting most of a poem he only heard one night a few weeks ago. My daughter relished reading some of her favorite poems aloud for everyone.


After the first few minutes, I put the camera away and got down to the business of enjoying the tea party with my children. 

What special activities do you enjoy with your children?

Sunday, July 7, 2013

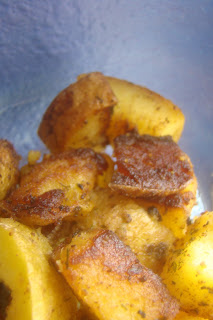
Crispy Fried Potatoes (grain-free : gluten-free : nutrient-dense)


Back when I was suffering from extreme adrenal crash on GAPS, I found potatoes to be crucial to recovering my energy levels. While potatoes are not GAPS-legal, they are one of the first foods to be reintroduced when transitioning off GAPS. We now eat potatoes regularly, and they don't give any of us any problems (whereas we still have a hard time with many grains).

Crispy fried potatoes are one of our staple side dishes these days.  These are crispy, buttery, and delicious.  They pair well with almost any other food, from baked bacon and eggs to double cheese burgers to brisket with carrots and onions to tacos to honey-glazed pork chops, and anything in between!  They are even great sprinkled over a salad or onto a bowl of soup.

Still on GAPS? Don't worry; more GAPS-friendly recipes are coming your way soon.

Fried Potatoes
Serves 6-8
  1. This recipe uses potatoes that have already been cooked and then cooled. (If you are in a pinch and don't have time to pre-cook the potatoes, skip to Step 4. You can use raw potatoes but you will need to increase the cooking time in Step 7 to 35 minutes, starting with a relatively cool skillet, and increasing the heat once the potatoes have cooked most of the way. )
  2. Bake the raw potatoes until they are fully cooked. During these hot summer months, I like to just put the potatoes into my toaster oven on 225 degrees for 3-4 hours, until I can squeeze them slightly (with a towel-wrapped hand).  You could easily bake these a day or two in advance, perhaps whenever you are using the oven for something else. I don't even wrap the potatoes or oil them; I just bake them plain.
  3. Chill the whole potatoes well in the fridge.  Frying the potatoes will work best with cold potatoes, but if necessary they can be just cool or slightly warm (but NOT hot, else they will completely fall apart in the pan).
  4. About 25 minutes before mealtime, roughly chop the cooled potatoes into chunks.  If some of the skin is loose, go ahead and pull it off to discard.  I leave on the skin that is well-adhered to the potatoes, but you could remove it all if desired.
  5. Melt the butter in a large cast iron skillet over medium-high heat. Don't skimp on the butter, as it is wonderfully healthy and will make the potatoes taste great! 
  6. Add the potatoes to the melted butter, arranging them evenly. Sprinkle with salt.
  7. The trick to getting nicely browned potatoes is to make sure not to stir them too often.  Leave the potatoes alone, and just let them cook for several minutes before you stir them. A bamboo spatula works wonderfully for stirring the potatoes and scraping any bits that get stuck to the pan. Continue cooking for about 10-15 minutes, stirring occasionally until the potatoes are nicely browned.  You may need to reduce the heat during this process if the pan starts to get too hot.
  8. Sprinkle the potatoes generously with salt and pepper.  Sprinkle the dill over the potatoes, stir them a bit to mix the dill in, and then cook for a few more minutes. Taste for salt, and add more as necessary. Turn off heat.
  9. Serve and enjoy!
*I use Frontier brand spices because they are non-irradiated.

What is your favorite way to eat potatoes?

This post may contain Amazon affiliate links.  If you use these links, your price will be the same but I may earn a small commission. 

Monday, July 1, 2013

July 4th Recipe Round-up Including a Recipe for Fried Rats (GAPS : grain-free : Primal : gluten-free)

The 4th of July has always been one of my family's favorite holidays.  Here in the hot dry desert, the arrival of early July ushers in the monsoon season, when we will get the majority of our 8.5-inches of annual rainfall.  We finally start to see a break from the 100+ degree days, and the 4th of July is a great time to celebrate the change.

We spend time with family, watch the kids play in water, and enjoy a great meal.  Our July 4th is usually a potluck, so no one has to spend too much time cooking.  Then the evening is topped off with lots of fireworks.

July 4th Recipes

All of these recipes are grain-free, and the majority are GAPS-legal, too. The recipe for fried rats is below under "Side Dishes".

Main Courses
Side dishes
  • Grilled zucchini or summer squash - Simply slice squash lengthwise about 1/3-inch thick.  Drizzle with oil, sprinkle with salt and pepper, and grill them!
  • Probiotic potato salad
  • Lemon basil chopped summer salad - This salad showcases the flavors of summer's bounty.
  • Fermented bread and butter pickles - This fermented recipe keeps everyone coming back for more, even people who don't usually eat fermented foods.
  • Kale chips - These salty, crispy snacks are a yummy addition.
  • Creamy cukes with beautiful salmon roe - This recipe is extremely simple and delicious. 
  • Raw veggie sticks with homemade ranch dip
  • Summer roasted vegetable medley
  • Fried rats - My friend Linda is always requested to bring this delicious dish to every potluck. And no, this recipe doesn't actually include rats, but the jalapeno stems look like little rat tails. Fried rats are unbelievably scrumptious, and not too spicy if prepared properly.
    • Ingredients: 
      • jalapenos (of roughly the same size), with stems attached and preferably straight rather than curved
      • cream cheese
      • bacon, preferably thick-sliced
    • Method: 
      • Slit the jalapenos down one side, and remove the seeds/membranes/veins using a small spoon. The more of those bits that are left in the jalapenos, the spicier they will be. Be careful, those seeds and bits are so hot that any residual oil on your skin will burn your eyes for days afterwards. I like to wear disposable latex gloves to prevent that, and be very careful not to touch my skin (and especially not lips or eyes) with the spicy stuff.
      • Stuff the jalapenos with cream cheese.  A small butter knife with rounded ends would work well for this. 
      • Wrap a slice of bacon around each jalapeno.  Place them in a baking dish, and bake in a 400-450 degree oven for about an hour, until the jalapenos are fully cooked and the bacon has started to crisp up.
Desserts

What foods will be gracing your Independence Day table?

This post may contain Amazon affiliate links.  If you use these links, your price will be the same but I may earn a small commission.

Tuesday, June 25, 2013

Update on My Natural Hair Care Routine

I originally posted about using baking soda and apple cider vinegar for haircare over a year ago.  Am I still using this method? Have I made any modifications to the method? What other products and methods do I use on my hair?

Am I Still Using Baking Soda and Apple Cider Vinegar on My Hair?

Yes!  It has now been nearly two years since I ditched shampoo and started using baking soda/apple cider vinegar (ACV) to wash and condition my hair.  I am still loving this method of natural and frugal hair care.

My hair and scalp are healthier than they have been any time in my adult life, so using baking soda/ACV has allowed me to grow my hair out much longer than previously.  Even without a hair cut in over a year, I do not have any split ends.  My hair is soft, shiny, and seems to resist tangles with this method. 

Have I Made Any Modifications to the Method?

For all of my adult life, my hair has been relatively short (sometimes super short), and has never reached shoulder length.  Right now, I am growing my hair long, and it is longer than it has been in over 20 years.  My hair is now a few inches past my shoulders.

With my new longer hair, I noticed that my hair was getting to be a bit dry.  I changed the mixtures of baking soda and apple cider vinegar a bit, and this has remedied the problem. (You can read more about how to modify the baking soda and apple cider mixtures to accommodate dry or oily hair here.)

Additionally, thanks to a tip from my sister-in-law, I sometimes add a couple drops of essential oils to the ACV conditioner for a nice fragrance.  While I actually like the smell of the plain apple cider vinegar conditioner, I am also really enjoying mixing things up a bit with the essential oils. 

I am currently using the following shampoo and conditioner mixtures (which I premix in old shampoo and conditioner bottles for ease of use):
  • Shampoo: 1/2 Tb baking soda for every 8 oz (one cup) of water
  • Conditioner: 2 Tb apple cider vinegar for every 8 oz (one cup) of water plus a couple drops of optional essential oil (lavender and/or jasmine oil are my current favorites)
With my longer hair, I have also changed the method of applying the baking soda and apple cider vinegar mixtures slightly.  The method I am using is as follows:
  1. Wet your hair.  Apply the baking soda mixture to your scalp, roots, and hair (only as far down as hair may be oily).  I run the shampoo bottle all along the roots on the top and back of my head, which lets a trickle of the solution out.  I only apply the baking soda mixture just as far down as my hair may be oily. There is no need to apply it all the way to the ends of my hair. Then I use my fingertips to scrub my scalp.
  2. Thoroughly rinse the baking soda mixture from your hair.
  3. Apply the apple cider vinegar mixture to the scalp, roots, and hair.  With my longer hair, I find that I need to apply the apple cider vinegar mixture to the full length of my hair. I let it stay on for a few minutes.  
  4. Thoroughly rinse your hair.  Then rinse it some more. Sometimes, the vinegar solution will grow some tiny SCOBY strands (these are like what is used to make kombucha), so I need to rinse my hair very well to make sure no little bits get left behind.

Other Hair Products and Methods I am Using

The rest of my hair care routine includes the following:
  • Curly Girl Method: I am using the Curly Girl Method which allows me to get the most curl out of my wavy hair. (The Curly Girl book gives detailed instructions for all different types of curly hair, from kinky curly on down to wavy hair.) The method I'm using for my wavy hair includes:
    • scrunching up my hair while using my baking soda and ACV mixtures in the shower to prevent the water from over-straightening my hair, 
    • drying my hair with a microfiber towel after showering, 
    • letting my hair air dry most of the time, and
    • protecting my hair from being over-straightened by the blow dryer by using a diffuser on days when I blow dry my hair. 
  • Dry Shampoo: I typically wash my hair once every two days, and my hair does not look oily on the second day.  Sometimes, though, I don't have time to wash my hair on the 3rd day, and to combat oil on those days I use dry shampoo made from equal parts of cocoa powder and arrowroot (the link recommends using cornstarch, but I use arrowroot in mine).
  • Giovanni Sunset Styling Lotion: Most of the time, the only product I use on my hair after showering is Giovanni Sunset Styling Lotion.  This is a very lightweight product that contains essential oils, and has a watery consistency.  I use it because it reduces frizz and flyaways in my very fine, wavy hair. I apply a small amount of Giovanni Sunset Styling Lotion right after towel-drying my hair.  Giovanni Sunset Styling Lotion has a score of 3 on the Skin Deep Website. (I have yet to find a homemade or frugal alternative to this, as all hair gels I've tried are far too heavy for my very fine hair.  However, I use such a small amount that one bottle of Sunset Styling Lotion lasts me nearly a year. If my hair had a more robust curl that wasn't so easily weighed down, I would try using plain aloe vera gel on my hair.)
  • Giovanni L.A. Hold Hair Spritz: On days when I want to look a bit more polished, I use a bit of Giovanni L.A. Hold Hair Spritz to smooth out any frizz in my hair and help hold my curl. I apply this by spraying it onto my palm, rubbing my hands together lightly, and then smoothing/scrunching it into my hair.  This results in a very soft hold that doesn't feel crunchy or hard. With the small amount of Giovanni L.A. Hold Hair Spritz I use, one bottle will last me around 6 months. Since I don't use much hairspray, I've never looked much into homemade alternatives; but in looking up the Giovanni Hair Spritz for this article, I was surprised to see it is given a score of 5 (moderate hazard) on the Skin Deep Website (whereas I prefer to use products that rank 0-2 if possible).  So I will be experimenting with these homemade hairspray recipes in the coming months to see how they compare:

What natural hair care products do you use?

This post is part of Traditional Tuesdays!

Friday, June 21, 2013

Coconut Chocolate Candy (GAPS : gluten-free : primal : SCD : paleo)

With only a few ingredients, this is a simple and delicious chocolate candy recipe.  Making this candy is very easy to do, and a great way to get the kids involved in the kitchen.  We all enjoyed the flavor and texture of this candy.  This recipe comes from the Cooking with Coconut Oil eBook. My notes on this recipe are in RED.

Coconut Chocolate Candy
  • 1 cup coconut oil, melted (I used unrefined coconut oil)
  • 1 cup unsweetened cocoa powder
  • 1/2 cup honey (I used mild-flavored local honey)
  • pinch of fine-ground celtic sea salt
  1. Pour the coconut oil into a bowl, and sift in the cocoa, stirring to blend evenly.
  2. Stir in the honey and salt, and mix until smooth. (I tasted it after adding the honey, and found that I wanted it to be a bit sweeter, so I added a bit more honey.)
  3. You can pour it into a glass dish (lightly coated with coconut oil) or silicone mini muffin cups and refrigerate until hard.
  4. If using a glass dish, cut into one-inch squares. (This candy melts easily, so keep it refrigerated until just before it will be consumed.)
This recipe and many more can be found in the Cooking with Coconut Oil eBook, which is part of this week's Real Foods eBook Bundle only until June 24th. Whether you are new to real foods and looking for resources, or an experienced real foodie who just needs a bit more variety, this bundle of Real Food books is sure to help!


Click here to buy 5 eBooks, retail value of $69.80, for only $14.97! This sale is for ONE WEEK ONLY, ending on June 24th! (This bundle sale has now ended.)

Whole Food ReveloutionThis bundle of eBooks includes:
  • The Whole Food Revelation by France Morissette is a revolutionary book that combines the very best of gourmet, healthy, real food cookbooks, meal planning, and meal prepping into one simple, easy to use book. The layout of the book is designed to teach, organize, and prioritize kitchen tasks so you don’t have to fret about the what, when or how of making amazing whole food meals. Whether you are an expert or a newbie in the kitchen, you’ll appreciate the simplicity of it all. You just buy the groceries on the conveniently included grocery lists and show up with your pretty face. Unlock your inner cooking rockstar and save yourself mad amounts of time and money in the process by meal prepping one day a week. Gourmet whole food meals have never been tastier or faster. 100 pages / Retail Value:$19.95Cooking with Coconut Oil_Ecover400px
  • Adding more coconut oil to your diet doesn’t have to be difficult.  Cooking With Coconut Oil by Jennifer Saleem, is a collection of 68 nourishing recipes that are simple, family-friendly, and gluten free. You will learn tips and tricks for cooking with coconut oil and create mouth watering dishes that will have your friends and family begging for more! 120 pages / Retail Value: $14.95
    Nourishing Eats Cookbook cover
  • The Nourishing Eats cookbook by Sarah Smith is packed with 60 nutrient-dense, grain-free, delicious recipes. Filled with full-color photos and lots of tips, this cookbook is a must-have item for those following real foods diets. The cookbook includes 16 breakfast recipes, 16 snack/dessert recipes, 18 main course recipes, and 10 dressings/sauces/fermented foods. This book is perfect for the GAPS Diet since 57 of the recipes are legal for the Full GAPS Diet. It is also suitable for Primal/Paleo eating. The book comes in PDF format, and is ready to print for those who prefer to have something they can easily refer to in the kitchen. 71 pages / Retail Value: $5.00
  • Real Food Hits The RoadAre you planning a road trip this summer? Does the idea of eating out three meals ago not work for your budget or your health? Would you like to continue with a traditional foods style of eating while away from home? Real Food Hits the Road by Millie Copper is just what you need! This eBook will be your guide to saving the budget, keeping your digestion working well and enjoying real food away from home while letting you enjoy your trip and not be ‘cooking’ all of the time. You’ll love the tips and ideas plus menu plans and recipes provided in Real Food Hits the Road. 140 pages / Retail Value: $14.95Divine Dinners
  • Divine Dinners by Lydia Shatney includes over 80 recipes to help you make the transition to gluten free simple with real food in mind. No need for packaged gluten free products that are just as unhealthful as processed foods with gluten. Plus if you need ideas for pairing a main dish with sides there are plenty of suitable recipes and suggestions for sides in this book. 104 pages/Retail Value: $14.95

5 eBooks, retail value of $69.80, for only $14.97!

Remember – this sale is for ONE WEEK ONLY!
It disappears forever on June 24th at 11:59pm!

Wednesday, June 19, 2013

Picking and Preserving Cherries

Each June, my family has a tradition of driving up into the mountains to pick cherries. We live in the very hot, very dry desert of southern New Mexico where it is too hot for cherries to grow. With just a 1&1/2 hour drive, we can pick cherries in a much cooler climate up in the mountains.  With temperatures at our house topping out over 100 degrees most days right now, it is a wonderful treat to drive up into the forest and enjoy the cooler weather.


This year, a late frost made the cherry harvest much smaller than usual, so that the U-Pick farm we usually visit was not open for regular hours. However, we were able to make an appointment to pick cherries there, and in a few hours we picked about 16 pounds of cherries.  Because these cherries were picked at the peak of ripeness, their flavor is far superior to anything we could buy in the store.


Now most of the cherries are in the freezer so we can enjoy them for the next few months.  In the past, I would often pit many cherries to freeze, but it was very time consuming and very messy.  Nowadays, I just pack the cherries (with stems still attached) into quart-sized freezer bags.  We thaw them a few at a time whenever we want to eat some, and they are most often eaten with some plain, whole milk yogurt. 


Do you have any family traditions for harvesting foods during their peak season?


--------------------------------------------------------------------------------------------------------

This week, my grain-free eCookbook, Nourishing Eats, is featured in a real foods eBook bundle from my affiliate partner, the Nourished Living Network. From June 17-24 only, you can get 5 eBooks with a retail value of $69.80 for only $14.97. Click here to see more details about this eBook bundle.