Showing posts with label desserts. Show all posts

Friday, December 15, 2017

Hot Cocoa Mix - 3 ingredients and NO refined sweeteners!

Things have been pretty quiet here on the blog lately, as I am in the process of creating a new website! This will be the last new content on this site, and I'm trying to get a bunch of the content from this site moved over to the new website. I will let you all know when it is ready!

In the meantime, I wanted to share this super simple recipe for hot cocoa mix. With only 3 ingredients, and no unrefined sweeteners, this hot cocoa mix is great to have on-hand for the cold months.  This mix, when combined with whole milk, makes for a delicious, not-too-sweet cup of hot cocoa

Hot Cocoa Mix

Combine all ingredients in a jar with a lid. Shake well to combine.

Hot Cocoa 

Makes 1 cup of hot cocoa
  • 1 cup of whole milk, preferably raw milk
  • 3 Tb hot cocoa mix
  1. Put the milk in a small saucepan over medium heat. Whisk in the hot cocoa mix until it is well-dissolved into the milk.
  2. Heat the cocoa, stirring occasionally, until it reaches the desired temperature. NOTE: If you want to keep your milk "raw", make sure you don't heat it past 110 degrees F. This also ensures that the milk is the perfect temperature for kids to drink without having to blow on it or burn their tongues.  You can check the temperature of the milk with a thermometer, or just by testing it with your finger. It will be getting close to 110 degrees when it is just starting to feel quite warm (but not burning hot) when tested with a finger.* 
  3. If you aren't concerned about keeping the milk raw, then go ahead and heat until nice and hot.
  4. Serve immediately.  If you find that the warm cocoa cools too quickly for slow drinkers, try serving it in a thermos.
  5. If desired, this hot cocoa can be topped with homemade whipped cream.
*If you decide to test the temperature with your finger, please use common sense and be careful. If the milk is anywhere near to simmering or boiling, it can absolutely burn you.


Affiliate Disclosure - Links to Amazon are affiliate links. If you use these links, your price remains the same, but I earn a small commission. Thanks for supporting this site!

Wednesday, May 24, 2017

Blini - Russian Pancakes - With Savory or Sweet Toppings (gluten-free : nutrient-dense)

Blini - I had never heard of these thin Russian pancakes before our homeschool world studies last fall.  Now blini are an adored recipe in our household, and everyone is excited for Blini Night. On Blini Night, I work at the stove, cooking the blinis, while everyone keeps coming back for more. We have both savory and sweet toppings ready, and it feels like a simple feast.

For the savory blini, we use sour cream with smoked salmon, thinly-sliced cucumbers, capers, and green onions. Our sweet blinis are topped with sour cream and jam, honey, or strawberries. Sour cream, salmon, and honey are all traditional Russian foods, so these toppings work well for our Russian-inspired meals.   

Traditionally, blini are made with either buckwheat or wheat flour. Since two members of our household are still most often avoiding gluten, and tolerate other grains to varying degrees, I make our blini primarily with white rice flour. Tapioca starch is used to give the blini a bit of holding power, since blini made with only rice flour break very easily. Milk kefir gives these blini a fantastic taste.

Blini - Russian Pancakes

Makes 12-14 blini

For the Blini:
  1. Combine the white rice flour, tapioca starch, baking soda, sugar, and salt in a medium-sized bowl. Whisk to combine. 
  2. In a small bowl, beat two eggs with a fork.  Add the milk kefir and stir well to combine.
  3. Using a hand mixer or whisk, mix the kefir mixture into the flour mixture.
  4. Mix in the 2 Tb melted butter.
  5. Set aside the blini batter for 10 minutes.
  6. In the meantime prepare the toppings (ingredients listed below).
  7. Heat a heavy-bottomed skillet over medium heat. I like to use a cast iron skillet to cook the blini.
  8. Melt some butter in the skillet, coating the bottom of the skillet well. Use a 1/4 cup of batter for each blini (a 1/4 measuring cup works well for this). Immediately after pouring the batter into the skillet, give the skillet a gentle swirl to allow the batter to spread out. 
  9. Cook the blini until golden brown on one side (about 2 minutes), then add more butter to the skillet and flip the blini. Cook an additional 1-2 minutes until golden brown.
  10. Top the blini with savory or sweet toppings and enjoy!
Savory Blini Toppings:
  • sour cream
  • smoked salmon
  • green onions, green parts only, sliced thinly
  • thinly sliced cucumbers
  • capers
  1. Start by spreading the sour cream over the blini, then add the rest of the toppings. 
  2. If desired, fold the blini over the toppings.

Sweet Blini Toppings:
  • sour cream
  • honey
  • jam
  • strawberries
  1. Start by spreading the sour cream over the blini.
  2. Add jam or honey, and fresh strawberries if desired.  
  3. If desired, fold the blini over the toppings.


Affiliate Disclosure - Links to Amazon are affiliate links. If you use these links, your price remains the same, but I earn a small commission. Thanks for supporting this site! 

Sunday, May 21, 2017

Scotcheroos (gluten-free)

I have fond memories of one particular item that was part of the school lunch program when I was a kid. It was a peanut butter bar, covered in chocolate, and I was always so happy on the days it was served. I never knew the name this dessert until recently, when I was researching recipes for the midwestern United States. I kept seeing Scotcheroos mentioned, and I was gleefully surprised to see that Scotcheroos were the treasured relic from my childhood cafeteria!

Most Scotcheroo recipes are loaded with high fructose corn syrup combined with butterscotch chips, peanut butter, sugar, rice crispies, and chocolate chips. I initially tried to dismiss the idea of making Scotcheroos, as they obviously are not a healthy item. High fructose corn syrup plus butterscotch chips (made with even more undesirable ingredients, such as partially hydrogenated vegetable oil); not for my family!

But yet, I kept thinking about Scotcheroos, remembering how much pleasure they brought to me as a child and thinking how sweet it could be to share that with my own children. So I finally decided to embark on creating a healthier Scotcheroo, one that was devoid of those uber-processed ingredients and instead made with healthier ingredients such as honey, sucanat, and butter.  I'm not claiming these Scotcheroos are healthy and perfect; they do still have some processed ingredients, but they are much healthier than the typical Scotcheroos.

It has been fun to share this food-from-my-childhood with my kids. Oh, and did I forget to mention? These Scotcheroos are DELICIOUS! Rich, sweet, creamy, crispy, and oh so yummy.

Scotcheroos

Serves 20-30 
Make the Peanut Butter Mixture
  1. In a med-large pot (4-qt), combine the honey, sugar, sucanat, peanut butter, and salt. 
  2. Cook over medium heat for about 8 minutes, stirring frequently. 
  3. Turn off heat. Allow to cool slightly, and then stir in the rice crisps cereal.
  4. Use butter to grease a 9X13 glass baking dish.
  5. Spread the peanut butter mixture evenly in the 9X13 dish.
  6. Place the dish in the fridge to cool for at least 30 minutes before adding the chocolate topping.
Make the Chocolate Butterscotch Topping
  1. In a medium-sized pot, combine the butter, sucanat, milk, vanilla, and salt. Cook over low heat, stirring frequently, until the butter has melted and all is well-mixed.
  2. Add the chocolate chips and continue to cook over low heat. Stir frequently, until the chocolate has melted and the mixture is smooth and well-combined.
Bring It All Together:
  1. Drizzle the chocolate mixture over the peanut butter layer. Use a spatula or the back of a spoon to spread out the chocolate as evenly as possible.
  2. Place the 9X13 dish back in the fridge to cool for at least 1.5 hours.
  3. Once cool, slice the Scotcheroos into squares and serve with a glass of raw milk. These Scotcheroos are quite rich, so we generally get ~30 servings out of one batch. 
  4. Leftovers can be stored in the freezer so there is no pressure to consume them all quickly. Parchment paper works well to keep the Scotcheroos from sticking to each other.

What is your favorite childhood dessert?


Affiliate Disclosure - Links to Amazon are affiliate links. If you use these links, your price remains the same, but I earn a small commission. Thanks for supporting this site! 

Thursday, January 5, 2017

Cherry Cranberry Sauce

I was inspired to try a new recipe for cranberry sauce for the holidays when I saw Elana's recipe for cranberry sauce that included cherries. I normally make my cranberry sauce with the addition of apples, but since I still have sweet cherries in the freezer from last summer's harvest, I was intrigued to try making cranberry sauce with cherries. 

This Cherry Cranberry Sauce recipe uses fresh-squeezed orange juice and honey to balance the super tartness of the cranberries. The cinnamon stick adds a nice depth of flavor to the sauce, and this recipe resulted in a yummy sweet-tart cranberry sauce that made an excellent addition to our holiday meals. While I typically only make cranberry sauce around the holidays, my children enjoyed this recipe so much that they have begged me to make it several more times. This cherry cranberry sauce makes a yummy side dish any time of day, and is also great with granola or stirred into plain whole-milk yogurt.

Cherry Cranberry Sauce
Makes ~3 cups

  • 2 cups cranberries
  • 2 cups pitted sweet cherries
  • 1 cup freshly-squeezed orange or tangerine juice
  • 5 Tb mild-flavored honey (or more if you like your sauce sweeter)
  • one cinnamon stick
  1. Combine all ingredients in a medium pot. I use frozen cherries and cranberries in this recipe.  A lemon reamer works well for juicing the oranges/tangerines.
  2. Bring to a simmer and continue to cook for about 30 minutes, until the sauce has reduced and the fruit has gotten rather soft. Stir occasionally.
  3. Use a potato masher or fork to lightly mash the fruit, and cook a few minutes more.
  4. Turn off heat and remove the cinnamon stick.
  5. Allow to cool, then refrigerate in air-tight containers.
  6. Enjoy this cranberry sauce as a side dish, with granola, or stirred into some plain, whole-milk yogurt.


Does your family enjoy cranberry sauce? Do you eat it only around the holidays?


Links to Amazon are affiliate links. If you use these links, your price remains the same, but I earn a small commission. Thanks for supporting this site!

Sunday, December 18, 2016

Chocolate Orange Shortbread Cookies

My family enjoys delivering cookies to our neighbors in the days leading up to Christmas.  Since we live on an acreage, we don't often see our neighbors unless we intentionally visit them. The holidays are a good time to make those visits a priority, and we like to bring cookies along.

Looking for a change from my usual Christmas cookies, I created this recipe for Chocolate Orange Shortbread Cookies. These cookies are mildly sweet, beautiful, and tasty. The subtle orange flavor plays nicely off the chocolate flavor. These cookies are made with Einkorn flour, which is an ancient variety of wheat that is naturally higher in protein and lower in gluten than modern wheat. The nutrient-content of these shortbread cookies is increased through the use of nutrient-dense butter and sucanat.

Chocolate Orange Shortbread Cookies
Makes about 20 cookies
  1. Preheat the oven to 350 degrees F.
  2. Cream together the butter, sucanat, and sugar using a mixer or stand-mixer, until a bit fluffy and slightly lighter in color. (I love to use my Kitchen-Aid stand mixer anytime I am making cookies.) 
  3. Mix in the vanilla extract. Make sure to scrape down the sides of the bowl once or twice to get everything incorporated well.
  4. In a separate bowl, whisk together the flour and salt.
  5. Zest the tangerines (or orange). A microplane zester works fantastically to zest any citrus.
  6. Whisk the zest into the flour mixture, making sure to break up any clumps.
  7. Mix the flour mixture into the butter mixture until well-mixed. Since this recipe contains gluten, make sure not to overmix the cookie batter.
  8. Scoop the cookies onto greased cookie sheets (or line the cookie sheets with silpats, which are wonderful since the cookies never stick and are less likely to burn).  I like to use a 1-Tb scoop for consistently pretty cookies, but you could just use a spoon.
  9. Flatten the cookies a bit with your fingers.
  10. Bake for ~15-20 minutes, until the edges are a nice golden-brown color. If you are baking more than one cookie sheet at a time, you may need to swap the position of the cookie sheets for the last ~5 minutes to achieve even cooking of both sheets. 
  11. Remove from the oven and allow to cool to room temperature.
  12. Melt the chocolate chips in a small pot over low heat, stirring occasionally.  Don't rush this process, as you don't want to burn the chocolate. 
  13. Once the chocolate is melted, use a fork to drizzle the chocolate over the cookies. I found that a relatively rapid back-and-forth motion of my hand worked well to make the chocolate drizzles look pretty.
  14. Allow the chocolate to fully cool to room temperature and harden. 
  15. Serve and enjoy!


Links to Amazon are affiliate links. If you use these links, your price remains the same, but I earn a small commission. Thanks for supporting this site!

Sunday, November 20, 2016

Thanksgiving Recipe Round-Up

Here is a round-up of recipes for Thanksgiving.  Some are from my site, and others are from around the 'net. Happy Thanksgiving!

Main Course

 Mmmm, roasted turkey is one of my favorite things about Thanksgiving.
image from finecooking.com

  • Slow roasted turkey - This recipe from Nourished Kitchen looks fabulous.
  • Brined turkey - My mom has based her own turkey recipe on this one from Alton Brown. She leaves out the allspice and ginger in the brine. Her turkey is moist and delicious!
  • Herb gravy - Elana uses cooked onions to thicken the gravy instead of flour, for a grain-free gravy. 

Side Dishes

 Part of what makes the Thanksgiving meal so special to me is the abundance of side dishes. 
  • Caramelized beets and carrots - This recipe is loved by both of my kids and would make a great Thanksgiving side dish. 
  • Simple buttered veggies - Broccoli, peas, or cauliflower are great this way.
  • Roasted cauliflower with garlic and lemon juice - I adore this recipe from Emeril. I cook it at a lower temperature for longer, and substitute a combination of butter and refined coconut oil for the olive oil (since I prefer not to cook with olive oil because most of its benefits are lost with heat).
  • Caramelized green beans - Caramelized green beans are a staple item at every Thanksgiving feast for my family.  For our holiday, I'll use chicken stock in this recipe.
  • Mashed butternut squash - Mashed butternut squash is a great alternative to potatoes or even sweet potatoes.  My favorite ways to season mashed butternut squash are savory (with butter, garlic, and thyme) or sweet (with ginger, garlic, nutmeg, cinnamon, and a touch of honey). 
  • Mashed potatoes - My family likes this recipe, which adds whole garlic and bay leaves to the cooking water and results in great flavor for the mashed potatoes. I double the amount of butter called for in the recipe.
  • Ginger-dill sauerkraut - Sauerkraut is a delicious, digestion-promoting ferment that pairs well with lots of foods.
  • Cranberry sauce with apples and ginger - My family has enjoyed this cranberry sauce for over 4 years now. This cranberry sauce is wonderfully tart, and spiced with ginger and orange. 
  • Cranberry cherry sauce - For something new, I will be trying this recipe from Elana this year. I'm not a fan of the flavor of stevia, so I will substitute honey as the sweetener.

Dessert

Thanksgiving desserts for our family always revolve around pumpkin.  A family tradition from my own childhood is to have pumpkin pie for breakfast on Thanksgiving, and I have continued that tradition with my own children. I make homemade pumpkin puree to use in any of these recipes.
 

Sunday, October 2, 2016

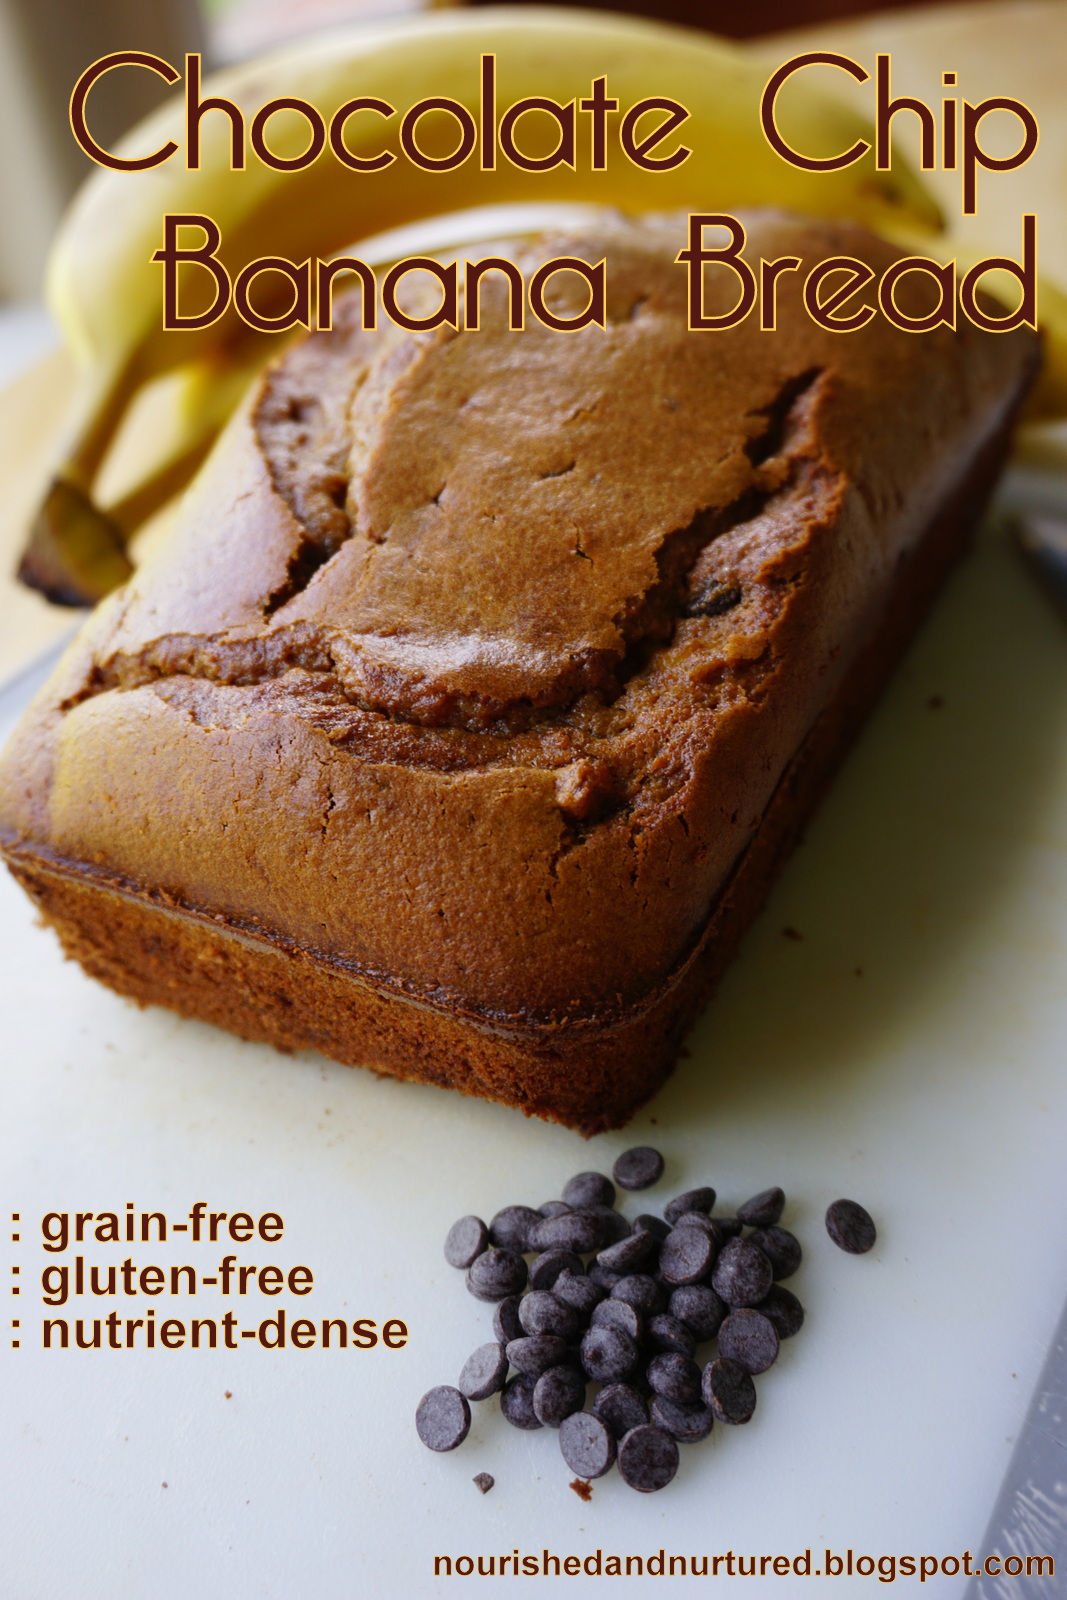
Chocolate Chip Banana Bread (grain-free : gluten-free : nutrient-dense)

Although my daughter's tolerance for grains has improved to where she can now eat several servings per week of non-gluten grains, I still like to create grain-free recipes that she can enjoy without limitations.  My latest grain-free recipe is Chocolate Chip Banana Bread.

This recipe includes coconut flour, nut butter, plenty of eggs and butter, and a touch of sucanat (unrefined sugar).  The bananas and chocolate chips give this bread a moist punch of yummy flavor. We all loved eating this bread, and devoured over half the loaf in one sitting.


Chocolate Chip Banana Bread
  1. Preheat the oven to 325 degrees F.
  2. Melt the butter in a small saucepan over low heat.  Turn off heat and let cool for a few minutes.
  3. In the meantime, combine the sucanat, eggs, salt, baking powder, vanilla, cinnamon, and nutmeg in a medium bowl.
  4. Add the butter to the bowl and blend it all together well using an immersion blender.
  5. Add the coconut flour and almond butter.  Blend well with an immersion blender.
  6. Stir in the mashed banana and chocolate chips with a spoon or spatula. 
  7. Pour the batter into a well-buttered loaf pan.  I used a 9X5 glass pan.
  8. Bake at 325 degrees for about 40-50 minutes.  It will be done when it is set in the middle and no longer wet-looking.  You can check for doneness by inserting a toothpick in the middle; when the toothpick comes out with just some tiny crumbs, the bread is done.
  9. Remove from the oven and let cool a few minutes. Then you can use a trick I learned from my days as a baker that helps ensure that bread loaves will be easily released from the pan: let the loaf cool while the loaf pan is lying on its side, and switch it to the other side about halfway through cooling.  This allows gravity to aid in the process of liberating the bread from the side of the pan. 
  10. Once the bread is no longer hot, use a spatula or knife to go around the edges of the pan. Cool completely and then invert the pan to release the bread.
  11. I like to slice the bread with a Rada bread knife, which works superbly for this type of bread. Leftovers can be stored in the refrigerator or freezer. I place parchment paper between the slices, and store it in the freezer. 
 
 
Links to Amazon are affiliate links. If you use these links, your price remains the same, but I earn a small commission. Thanks for supporting this site!

Monday, June 20, 2016

Einkorn Chocolate Chip Cookies

Chocolate chip cookies are such a classic recipe, and for good reason. The chocolate is melty, in a chewy, sweet base of cookie dough. Mmmm.

I like baking cookies with Einkorn flour. Einkorn is an ancient variety of wheat that has never been hybridized. It is naturally lower in gluten and higher in protein than modern wheat. Combined with butter, sucanat, sugar, and chocolate, this is an stupendous cookie.

I make these cookies using a combination of sucanat and sugar for the sweetener, for classic chocolate chip cookie flavor. However, sucanat can be used exclusively if you prefer to stick with only unrefined sweeteners.

Einkorn Chocolate Chip Cookies
Makes about 32 cookies
  1. Preheat the oven to 350 F.
  2. In a medium bowl, combine the salt, baking soda, and Einkorn flour. Whisk it all together to break up any lumps.
  3. In another bowl (or stand-mixer), beat the softened butter, sucanat, and sugar together for a couple minutes, until well mixed and slightly lighter in color.
  4. In the meantime, combine the egg and vanilla extract in a small bowl. (I find that a Pyrex glass measuring cup works great for this because the pour spout makes it easy to add these ingredients to the mixer while it is running.) Do NOT mix up the egg at this point.
  5. Once the butter, sucanat, and sugar have become lighter in color, mix in the egg. With my stand-mixer, I can just pour in the egg while the mixer is still running.  Make sure to scrape down the sides of the bowl once or twice to get everything incorporated well.
  6. Add the dry ingredients and mix just until everything is combined. Do not overmix this recipe, since there is gluten in the Einkorn flour and overmixing gluten results in tough baked goods.
  7. Mix in the chocolate chips. 
  8. Scoop the cookies onto greased cookie sheets (or line the cookie sheets with exopats, which are wonderful since the cookies never stick and are less likely to burn).  I like to use a 1-Tb scoop for consistently pretty cookies, but you could just use a spoon. Flatten the cookies slightly with the back of a spoon (or your fingers).
  9. Bake the cookies at 350 F for about 10-12 minutes. They are done when the edges are golden brown. Watch these closely, as extra time in the oven will make these cookies crunchy instead of chewy. If you have to cook subsequent batches on an already-warmed cookie sheet, start checking them for done-ness a couple minutes earlier.
  10. Remove from oven and allow to cool for about 5-10 minutes.  Then use a spatula to move them to a cooling rack.
  11. Once cool, store these cookies in an airtight container.  They can be stored at room temperature or in the freezer if you won't be eating them all in the next few days.  When eating these cookies from the freezer, I like to re-warm these cookies briefly in a toaster oven, for ooey gooey chocolate yumminess. Storing them in the freezer will also remove the pressure of having to eat them all in a week or so, as they will last for months in the freezer. 


Links to Amazon are affiliate links. If you use these links, your price remains the same, but I earn a small commission. Thanks for supporting this site!

Wednesday, March 16, 2016

Raspberry Chocolate Muffins (grain-free : gluten-free : nutrient-dense)

Sweet-tart raspberries and dark chocolate are a fantastic flavor combination. This grain-free muffin recipe relies on a combination of coconut flour and arrowroot starch, which creates a lighter muffin than using coconut flour alone.  These muffins are moist, yummy, and bursting with flavor!

This recipe is rich in healthy protein and fat. I like to make these muffins using a combination of sucanat and sugar for the sweetener; the lighter taste of sugar allows the bright flavor of raspberries to really "pop" in this recipe. However, sucanat can be used exclusively if you prefer to use only unrefined sweeteners.

Raspberry Chocolate Muffins
Makes 12 muffins
  1. Line a muffin tin with paper cups.  (I prefer If You Care Unbleached Baking Cups because the muffins do not stick to the sides of the cups.) 
  2. Combine the coconut flour, arrowroot starch, salt, and baking soda in a medium bowl. Whisk it all together to break up any lumps.  
  3. Preheat the oven to 325 degrees F.
  4. Combine the butter, sucanat and sugar in a large bowl (a Kitchen-Aid stand mixer works great for this recipe). Cream together for a couple minutes until the mixture turns slightly lighter in color.
  5. In the meantime, combine the eggs, vanilla, and almond extract in a small bowl. (I find that a Pyrex glass measuring cup works great for this because the pour spout makes it easy to add these ingredients to the mixer while it is running.) Do NOT mix up the eggs at this point.
  6. Once the butter and sucanat/sugar have become well-mixed, mix in the eggs one-at-a-time.  With my stand-mixer, I can just pour in each egg while the mixer is still running.  Make sure to scrape down the sides of the bowl once or twice to get everything incorporated well. (It is okay if the mixture looks a bit curdled during this step.)
  7. Add the sour cream to the wet mixture and mix it all well.
  8. Add the dry ingredients and mix well to combine. Because there is no gluten in coconut flour or arrowroot, there is no worry about overmixing this recipe.
  9. Stir or mix in the raspberries and chocolate chunks.
  10. Use a 3-Tb scoop or large spoon to scoop the batter into the muffin cups.
  11. Bake the muffins at 325 degrees F for 45-50 minutes, until a they are golden brown and a toothpick inserted into the middle of a muffin comes out dry. (The baking time will be less if fresh berries are used instead of frozen berries.)
  12. Remove from the oven and allow to cool a bit before serving. I like to freeze half of the muffins, to be re-warmed in a toaster oven as an easy breakfast for my daughter in the coming weeks.
*Except during our local berry season, I find that frozen berries have far superior flavor to the fresh ones sold in grocery stores.


Links to Amazon are affiliate links. If you use these links, your price remains the same, but I earn a small commission. Thanks for supporting this site!

Friday, September 4, 2015

Pumpkin Spice Ice Cream (nutrient-dense : raw : primal : no refined sweeteners)

My son's pumpkin harvest is rolling in, and he has garnered many more pumpkins than I expected. Since it is still fairly hot here, we've been enjoying pumpkin ice cream. Creamy, spicy, and cool: this ice cream is so good!

All of the pumpkin ice cream recipes I found on the 'net involved cooking the cream, eggs and sugar to make a custard base, but I wanted our pumpkin ice cream to be raw and simple to make.  So I've relied on my old standby for sweetening ice cream, which is a combination of maple syrup and raw honey.  With plenty of spices and egg yolks, this ice cream is rich, smooth, and yummy.

This ice cream comes together quickly and easily by just mixing everything in the blender before pouring it into our ice cream maker.  You could also try this method to make ice cream without a machine.

Pumpkin Spice Ice Cream
Makes about 6-7 cups of ice cream
  1. Combine all ingredients in a blender. Add the honey last, and then blend it right away so the honey doesn't have a chance to harden and clump.
  2. Whir for several minutes, until well-combined.
  3. If you don't have an ice cream maker, you can follow these instructions to make ice cream without a machine.
  4. If you do have an ice cream maker, pour mixture into your ice cream maker and follow the instructions for your maker.  I use the Kitchen-Aid ice cream maker attachment, and it works great!
  5. Transfer to the fridge to freeze solid for several hours. 
  6. Scoop and enjoy! If desired, top with chopped candied ginger or crumbled Ginger-O's.
*Since the egg yolks in this recipe will be consumed raw, it is a good idea to make sure the eggs used are from a trusted source.  Salmonella is typically only an issue with unhealthy hens.  Washing the eggs before you crack them will also reduce any potential salmonella risk, since it actually comes from bacteria on the OUTSIDE of the egg shells.  

What is your favorite pumpkin recipe?


Links to Amazon are affiliate links. If you use these links, your price remains the same, but I earn a small commission. Thanks for supporting this site! 

Monday, July 20, 2015

Scrumptious Shortbread Cookies

Buttery, rich, and delicious: I love shortbread cookies!  Storebought shortbread cookies are one of my favorite compromise foods but I wanted to try my hand at making some from scratch. These cookies are fantastic, and really put the storebought competition to shame. Because there are only a few ingredients, this recipe is very simple and easy to make.

These cookies are made with Einkorn flour, which is an ancient variety of wheat that is naturally lower in gluten and higher in protein than modern wheat.  I use white Einkorn flour, since when consumed in moderation, white flours can be a healthy part of the diet. (Did you know that, in traditional cultures, much of the bran and germ was actually discarded after the whole grains were ground into flour?) The nutrient-content of these shortbread cookies is increased through the use of nutrient-dense butter and sucanat; nonetheless I consider these to be a compromise food that is fine when consumed in moderation.

Scrumptious Shortbread Cookies
Makes about 20 cookies
  1. Preheat the oven to 350 degrees F.
  2. Cream together the butter and sucanat using a mixer or stand-mixer, until a bit fluffy and slightly lighter in color. (I love to use my Kitchen-Aid stand mixer anytime I am making cookies.) 
  3. Mix in the vanilla extract. Make sure to scrape down the sides of the bowl once or twice to get everything incorporated well.
  4. In a separate bowl, whisk together the flour and salt.
  5. Mix the flour mixture into the butter mixture until well-mixed.  
  6. Scoop the cookies onto greased cookie sheets (or line the cookie sheets with silpats, which are wonderful since the cookies never stick and are less likely to burn).  I like to use a 1-Tb scoop for consistently pretty cookies, but you could just use a spoon.
  7. Use the back of a fork to flatten the cookies a bit.
  8. Bake for ~15-20 minutes, until the edges are a nice golden-brown color. If you are baking more than one cookie sheet at a time, you may need to swap the position of the cookie sheets for the last ~8 minutes to achieve even cooking of both sheets. 
  9. Allow to cool and serve!  I store these cookies in an airtight container on the counter if they will be consumed within a few days. Otherwise, into the fridge or freezer they go, but they will lose some of their crispiness.
*While I do prefer to use Einkorn flour, the typical all-purpose flour (preferably organic and unbleached) could be substituted in a pinch.

Links to Amazon are affiliate links. If you use these links, your price remains the same, but I earn a small commission. Thanks for supporting this site!

Wednesday, January 14, 2015

Vanilla Ice Cream (nutrient-dense : grain-free : gluten-free)

Moving into the new year, let's not forget that ice cream is a superfood. As I was whipping up a batch of homemade vanilla ice cream last night, I realized I've never shared this recipe with my blog readers. This is the flavor of ice cream I make the most often (vanilla is my husband's favorite flavor), and I've been making it this way for years. Yummy, creamy, sweetness.

Vanilla Ice Cream
Makes about 5 cups of ice cream

  • 2 cups cream, preferably raw and from pastured cows
  • 3/4 cup whole milk, preferably raw and from pastured cows 
  • 1/4 cup raw mild-flavored honey
  • 1/4 cup Grade B maple syrup*
  • 2 raw** egg yolks***
  • 1 Tb organic vanilla extract (or use homemade)
  • 1/4 tsp celtic sea salt
  1. Combine all ingredients in a blender.  Blend for a couple minutes to thoroughly combine everything.(I'm sure you could use a hand mixer instead if you don't have a blender.)
  2. Pour the mixture into your ice cream maker and follow the instructions for your maker.  I use the Kitchen-Aid ice cream maker attachment, and it works great! If you don't have an ice cream maker, you can instead follow these instructions to make ice cream without a machine.
  3. Transfer to the fridge to freeze solid for several hours. Enjoy!
  4. For a special treat, top this vanilla ice cream with homemade hot fudge sauce.
*Combining maple syrup and honey together somehow results in a more neutral flavor than using either sweetener alone; the maple syrup and honey flavors seem to cancel each other out.  It also tastes great with all honey, which makes it more GAPS-friendly.
**Any time you'll be consuming raw eggs, make sure you trust your egg supplier. My egg supplier is my 7-year-old daughter, and I know her hens are healthy so I'm not concerned about the safety of her raw eggs. To err on the side of caution, you can make sure to wash the eggs before you crack them as that would reduce the risk of salmonella.
***The leftover egg whites could be used to make some lime and coconut macaroons!

What is your favorite flavor of ice cream?

Links to Amazon are affiliate links. If you use these links, your price remains the same, but I earn a small commission. Thanks for supporting this site!

Tuesday, December 16, 2014

Gingerbread Custard Cake (grain-free : gluten-free : nutrient-dense)


Creamy and spicy: Gingerbread Custard Cake is a great complement to the holiday season. I developed this recipe with my husband in mind;  he loves gingerbread and likes to eat Custard Cake for breakfast most mornings.  For an extra special treat, this custard cake can be topped with sweetened whipped cream.

This will be my last post until 2015. Happy Holidays and Merry Christmas to you all!

Gingerbread Custard Cake
Serves 8
  1. Melt the butter in a small saucepan over low heat.  Turn off heat and allow to cool a bit.
  2. In a large bowl, combine eggs, sucanat, sour cream, molasses, vanilla, almond extract, spices, orange zest, and salt.  I like to use my immersion blender to mix it all up together, but you could certainly use a whisk or mixer instead.
  3. Add melted butter to wet ingredients and whisk or blend.
  4. Add coconut flour* and blend until well-combined (or use a mixer or whisk until smooth).
  5. Add the applesauce, and whisk well to combine.  I prefer to use a whisk for this step so the applesauce still remains a tiny bit chunky.
  6. Use a bit of cold butter to generously grease an 8X8 glass dish.
  7. Pour the batter into the glass dish and bake at 325° for 70-80 minutes. The custard cake is done when the edges are lightly browned and the center is no longer wet with just a bit of jiggle.
  8. Remove from oven and cool.  Don't cut into this while it is piping hot. This can be served at room temperature or cold. For a special treat, top with a bit of sweetened whipped cream (recipe follows). 
*The coconut flour will need to be sifted if you are not using an immersion blender.   

Sweetened Whipped Cream

  • 2 cups cream, preferably raw
  • pinch of fine ground celtic sea salt
  • 1/2 tsp organic vanilla extract
  • 2-4 Tb raw mild-flavored honey, to taste**
  1. Beat the cream and salt together until the mixture starts to get thick and fluffy.  I like to use my Kitchen-Aid stand mixer with the wire whip attachment, but you could also use a hand mixer.
  2. Add the vanilla extract, and drizzle in the honey while the mixer is running.  Alternatively, you could drizzle in the honey a little at a time and mix between each honey addition. 
  3. If you're using a stand mixer, use a silicone spatula to scrape down the sides of the bowl a few times to make sure you don't have any clumps of honey at the bottom.  I like to beat it until it gets a bit stiff since it will tend to soften up a bit in the fridge over the next few days.
  4. Store the whipped cream in the fridge in an airtight bowl.
**If your raw honey is very crystallized, place it over a bowl of warm water to make it a bit runny.

Links to Amazon are affiliate links. If you use these links, your price remains the same, but I earn a small commission. Thanks for supporting this site!

Tuesday, November 18, 2014

Pumpkin & Chocolate Chip Muffins (nutrient-dense)

A friend recently offered me a pumpkin muffin and I was surprised to find chocolate chips inside. I'd never had pumpkin with chocolate before, and I was enamored of this new flavor combination.  I was inspired to make my own version of Pumpkin & Chocolate Chip Muffins; these muffins are super tasty and will now be a regular part of our Fall breakfasts.

Pumpkin & Chocolate Chip Muffins
  1. Line a muffin tin with paper cups.  (I prefer If You Care Unbleached Baking Cups because the muffins do not stick to the sides of the cups.)
  2. Combine the einkorn, coconut flour, ground nuts, salt, baking powder, baking soda, nutmeg, cinnamon, ginger, and cloves in a medium bowl. Whisk it all together to break up any lumps.  
  3. Preheat the oven to 350 degrees F.
  4. Combine the butter and sucanat in a large bowl (a Kitchen-Aid stand mixer works great for this recipe). Cream together for a couple minutes until the mixture turns slightly lighter in color.
  5. Mix in the molasses until well-combined. 
  6. Combine the eggs, vanilla, and almond extract in a small bowl. (I find that a Pyrex glass measuring cup works great for this because the pour spout makes it easy to add these ingredients to the mixer while it is running.) Do NOT mix up the eggs at this point.
  7. Mix the eggs one-at-a-time into the butter/sucanat mixture.  With my stand-mixer, I can just pour in each egg while the mixer is still running.  Make sure to scrape down the sides of the bowl once or twice to get everything incorporated well. (It is okay if the mixture looks a bit curdled during this step.)
  8. Mix in the pumpkin puree.
  9. Add the dry ingredients a bit at a time.  Because the Einkorn flour does contain gluten, make sure not to overmix or the muffins will be tough. 
  10. Stir or mix in the chocolate chips.
  11. Use a 3-Tb scoop or large spoon to scoop the batter into the muffin cups.
  12. Bake the muffins at 350 degrees F for 27-32 minutes, until a toothpick inserted into the middle of a muffin comes out dry.
  13. Remove from the oven and allow to cool a bit before serving.
 Links to Amazon are affiliate links. If you use these links, your price remains the same, but I earn a small commission. Thanks for supporting this site!