Showing posts with label chicken. Show all posts

Wednesday, August 23, 2017

King Ranch Casserole (gluten-free : nutrient-dense)

King Ranch Casserole is a classic Texas dish made with layers of chicken, peppers, and cheese. As with many regional dishes, there is great debate over exactly what makes the quintessential version of this recipe: some call for corn tortillas, others call for flour tortillas, and others have no tortillas at all. I opted to leave the tortillas out and serve the casserole alongside warmed tortillas.  This recipe is featured in my All Around the USA unit study.

King Ranch Casserole

Serves 9-11
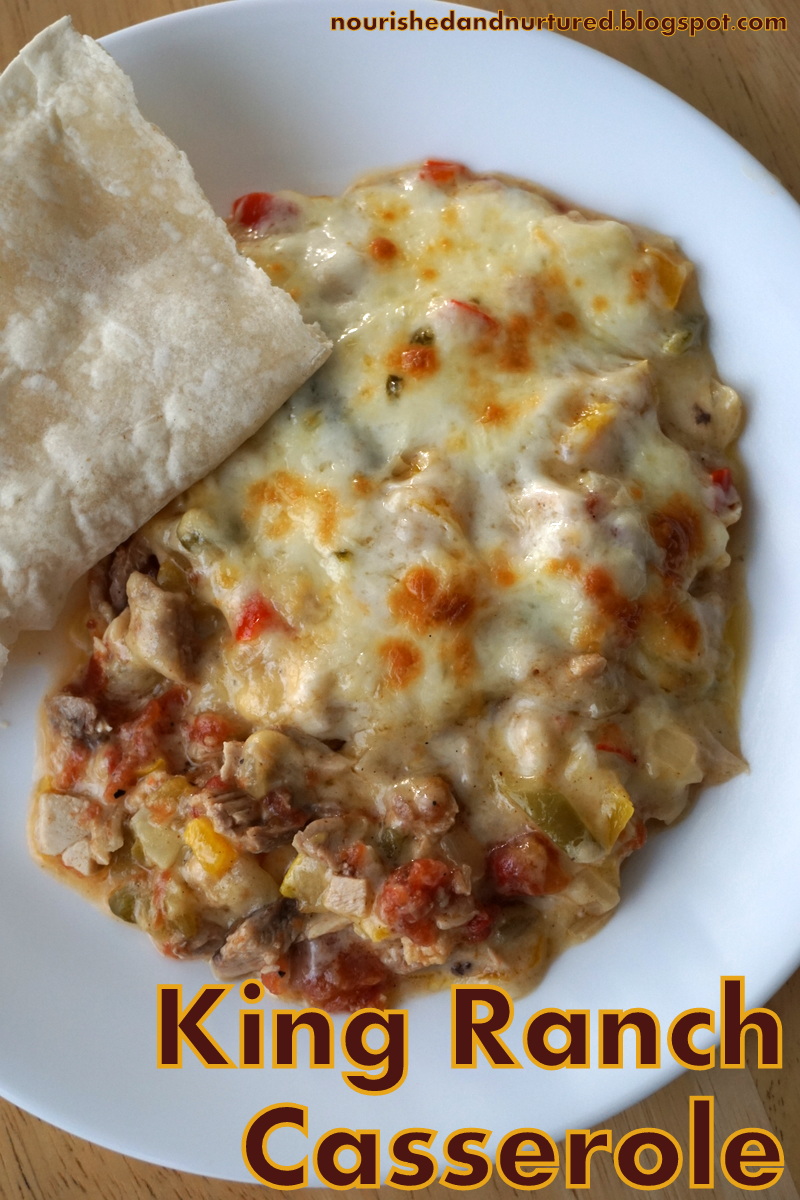
  • For the cooked chicken:
    • 6 skin-on, bone-in chicken thighs
    • 1 carrot, peeled and chopped roughly
    • 1 celery stalk, chopped roughly
    • 1 white onion, in large chunks
    • Celtic sea salt
    • filtered water
  • Chicken mixture:
  • Vegetable mixture:
    • 6 Tb butter
    • 2 large yellow or white onions, chopped
    • 3/4 tsp Celtic sea salt
    • 1 large yellow bell pepper, chopped
    • 1 large red bell pepper, chopped
    • 1 small green bell pepper, chopped
    • 4 medium cloves of garlic, minced
    • 3/4 tsp chili powder
    • 6 Tb white rice flour
  • Creamy gravy:
    • 1&1/2 cups chicken broth, preferably homemade
    • 3/4 cup heavy cream
    • 3/4 tsp Celtic sea salt (or less if your broth is salted)
    • 1/4 tsp pepper
  • Cheese:
    • 8 ounces pepper jack cheese, shredded
    • 10 ounces cheddar cheese, shredded
  • Warmed tortillas, for serving
  • Sour cream, for serving
Cook the chicken: 
  1. Place the carrot, celery, and onion in a 4-qt pot. Add the chicken thighs, cover with filtered water, and add a generous pinch of salt. 
  2. Bring the pot of chicken to a low simmer. Cover the pot and allow the chicken to gently simmer for 40 minutes.
  3. Use tongs to remove the chicken from the pot and allow to cool until it can be handled easily. (The super-delicious broth leftover from cooking the chicken can be used for some other meal later on. It makes fantastic nutrient-dense white rice.)
  4. Once the chicken is cool enough, remove and discard the chicken skin. (Or feed it to the dog!) Remove the chicken meat from the bones, being careful to avoid any cartilage or other chewy bits. The bones can be saved for making chicken bone broth
  5. Chop the chicken into small pieces.
  6. The chicken can be prepared earlier in the day or even a day in advance of the meal. 
To make the casserole:
  1. Combine all of the ingredients for the chicken mixture in a bowl and stir to combine. Set aside.
  2. In a very large, heavy-bottomed skillet, melt the butter over medium high heat. Add the onion and 3/4 tsp salt. Sauté for 10 minutes.
  3. Add the chopped bell peppers to the skillet. Sauté for 10 minutes.
  4. In the meantime, whisk together the ingredients for the creamy gravy in a medium bowl. 
  5. Shred the cheese using a box grater.
  6. Add the garlic to the skillet and sauté for about a minute, just until the garlic is fragrant.
  7. Sprinkle the rice flour and chili powder over the vegetables and stir to combine.
  8. Pour the gravy mixture over the vegetables in the skillet. Stir it all together. Simmer for a few minutes until the liquid thickens up. Turn off heat.
  9. In a 9X13 glass baking dish, spread half of the chicken mixture evenly over the bottom of the dish. Top the chicken with half of the vegetable mixture, then sprinkle half of the shredded cheese on top of the vegetable mixture. Make one more chicken layer, one more vegetable layer, and top it all with the remaining cheese.
  10. Bake the casserole in a 350 degree oven for about 25 minutes, until everything is hot and bubbling. If desired, the broiler can be turned on for the last 3-5 minutes to brown the cheese, but watch it carefully as it can burn easily with the broiler on!
  11. Remove from oven and allow to cool for a few minutes.
  12. Serve alongside tortillas, and top with sour cream if desired.

Links to Amazon are affiliate links. If you use these links, your price remains the same, but I earn a small commission. Thanks for supporting this site!

Friday, June 16, 2017

Hawaiian Chicken Long Rice (grain-free : dairy-free : gluten-free)

Chicken Long Rice is a simple, delicious Hawaiian dish. Chicken thighs are simmered in ginger-and-garlic infused chicken broth, with green onions and bean thread (cellophane) noodles added at the end. My 7-year-old son declared this to be the "best soup he's ever had," and the rest of us really enjoyed it too.

Chicken Long Rice
Recipe adapted from Foodland.com
Serves 5-7
  1. Combine the broth, water, garlic, ginger, salt, and chicken thighs in a heavy-bottomed 4-quart pot.
  2. Bring to a boil and skim off any foam.
  3. Reduce the heat to a low simmer and cover the pot. Allow the chicken to cook for 35-40 minutes, until fully cooked.
  4. Meanwhile, slice the green onions, separating the green parts from the white parts. Slice the white parts about 1/4-inch wide, and the green parts about 1/2-inch wide.
  5. Remove the chicken from the pot and set aside to cool.
  6. Stir the soy sauce, cayenne, and rice vinegar into the broth in the pot. Taste the broth and add more salt as needed.
  7. Add the white parts of the green onions and the noodles to the pot. Allow to simmer for about 10 minutes.
  8. Once the chicken is cool enough to handle, remove the bones and chewy bits. Discard most of the skin (or set it aside for the dog!). Chop the meat into bite-sized pieces.
  9. Add the chicken and onion greens to the pot and bring to a simmer. Cook just long enough to re-warm the chicken. 
  10. Ladle into bowls and enjoy!

Affiliate Disclosure - Links to Amazon are affiliate links. If you use these links, your price remains the same, but I earn a small commission. Thanks for supporting this site!

Wednesday, June 7, 2017

Hawaiian BBQ Huli Huli Chicken (gluten-free : dairy-free : nutrient-dense)

The last stop on our homeschool "trip" around the USA is Hawaii. In searching around for Hawaiian recipes, I found Huli Huli chicken, which is the Hawaiian version of BBQ chicken. The BBQ sauce is actually quite similar to teriyaki sauce, but with the unlikely addition of ketchup.  I developed this Hawaiian-inspired recipe for Huli Huli Chicken last week, and my family absolutely devoured it. This is a recipe we'll definitely be coming back to again and again.

Huli Huli Chicken

Serves 4-6
  1. At least 8 hours before dinner, prepare the marinade. Combine all marinade ingredients in a bowl, stir well, and give a few minutes for all of the dry ingredients to dissolve and become incorporated. 
  2. Stir up the marinade and reserve 1 cup which will be used to make the basting sauce. 
  3. De-bone the chicken thighs. There is a simple tutorial here that shows how to remove the bones. (I save and freeze the chicken thigh bones until I have accumulated enough of them to make a pot of homemade chicken bone broth.)
  4. Cut the de-boned chicken thighs in half. This allows the chicken to have more contact with the marinade and also allows it to cook faster.
  5. Nestle the chicken into the remaining marinade, making sure the chicken is fully submerged. Cover and refrigerate for ~8 hours (and refrigerate the reserved marinade as well).
  6. About 35 minutes before dinnertime, remove the marinating chicken from the refrigerator. 
  7. Preheat the oven to 425 degrees F. Make sure the oven rack is around the second rack of the oven from the top, not too close to the broiler but also not down in the lower half of the oven.
  8. Put the reserved cup of marinade in a small saucepan. Bring to a boil and allow to simmer ~15 minutes, stirring occasionally, until thick enough to easily coat the back of a spoon.
  9. Generously grease a baker's half sheet pan with sunflower oil.
  10. Remove the chicken from the marinade and arrange it on the sheet pan, skin side down. 
  11. Once the oven is preheated, place the chicken pan in the oven and cook for 8-10 minutes.
  12. Remove the sheet pan from the oven, baste the chicken with the thickened sauce, and flip the chicken over. Baste the chicken again and place back in the oven.
  13. Set the oven on broil and allow the chicken to cook for 6-8 minutes. The broiler will nicely crisp up the chicken skin, but be sure to watch the chicken CLOSELY to make sure it does not get burned. 
  14. Remove the chicken from the oven and allow to cool a few minutes before serving. If desired, the remaining thickened sauce can be served alongside the chicken.
  15. Serve and enjoy! Nutrient-dense white rice or pineapple coconut rice would make a great side dish for this meal.

Do you have a favorite Hawaiian-inspired recipe?


Affiliate Disclosure - Links to Amazon are affiliate links. If you use these links, your price remains the same, but I earn a small commission. Thanks for supporting this site!

Friday, May 19, 2017

Cobb Salad (grain-free : gluten-free : nutrient-dense)

As my children and I are wrapping up our unit study on the United States, we're "visiting" the west coast.  Cobb Salad is a California specialty that has become a mainstay salad all over the country.

An easy way to remember the ingredients in Cobb Salad is to use the acronym EAT COBB - Egg, Avocado, Tomato, Chicken, Onion, Bacon, Bleu cheese. My family enjoyed this hearty salad recipe, although it was preferred to substitute goat cheese for the bleu cheese.

Cobb Salad
Serves 4
  • For the chicken:
    • 3 skin-on, bone-in chicken thighs
    • 1 carrot, peeled and chopped roughly
    • 1 celery stalk, chopped roughly
    • 1 white onion, in large chunks
    • Celtic sea salt
    • filtered water
  • For the bacon and eggs:
    • 6 slices of bacon, preferably nitrate-free
    • 4 eggs, preferably from pastured hens
    • filtered water
  • For the salad:
    • 1/2 head romaine lettuce
    • 1/2 head red leaf lettuce
    • 2 small endives, diced
    • 2 ripe avocados, chopped
    • 1 cup cherry tomatoes, sliced in half
    • 3 Tb diced green onions, green parts only
    • 1/2 cup crumbled bleu cheese or goat cheese
  • For the dressing:
Cook the chicken: 
  1. Place the carrot, celery, and onion in a 4-qt pot. Add the chicken thighs, cover with filtered water, and add a generous pinch of salt. 
  2. Bring the pot of chicken to a low simmer. Cover the pot and allow the chicken to gently simmer for 40 minutes.
  3. Use tongs to remove the chicken from the pot and allow to cool until it can be handled easily. (The super-delicious broth leftover from cooking the chicken can be used for some other meal later on. It makes fantastic nutrient-dense white rice.)
  4. Once the chicken is cool enough, remove and discard the chicken skin. (Or feed it to the dog!) Remove the chicken meat from the bones, being careful to avoid any cartilage or other chewy bits. The bones can be saved for making chicken bone broth
  5. Chop the chicken into small pieces.
  6. The chicken can be prepared earlier in the day or even a day in advance of the meal. If so, just allow the chicken to sit out for a few minutes before adding it to the salad, so the chicken isn't refrigerator-cold. 
Cook the bacon:
  1. Cook the bacon until it is nicely crisp. My favorite way to cook bacon is to bake it in the oven at in a 9X13 glass baking dish. It takes about 20-30 minutes at 350 degrees, and seems to cook best on the bottom rack.
  2. When the bacon is done, place it on paper towels to remove the excess grease. Once the bacon is cool enough, it can be chopped or crumbled for the salad. 
  3. The bacon can be cooked earlier in the day or even a day in advance of the meal.
Boil the eggs:

  1. Boil the eggs to your liking. My preferred way to make boiled eggs is as follows: Put the eggs in a small pot and cover with plenty of water. Bring to a boil, then turn off the heat and cover the pot. Set a timer for 15-18 minutes (depending on the size of the eggs). When the timer goes off, pour out the hot water and then add cold water and ice to cool the eggs down quickly (so they don't continue to cook).
  2. Once the boiled eggs have cooled enough to handle, peel them. Chop the eggs into wedges or slices.
  3. The eggs can be boiled and peeled earlier in the day or even a day in advance of the meal.
Prepare the dressing:

  1. Combine the red wine vinegar with all other ingredients except for the olive oil.
  2. Whisk or shake vigorously to mix it all up. I like to use this salad dressing bottle so I can just put on the lid and shake it all together.
  3. Add about 1 tsp of the olive oil and whisk/shake vigorously again. Adding a small amount of oil first helps the dressing become better mixed so it won't separate back into oil and vinegar as quickly.
  4. Add the rest of the olive oil and whisk or shake to combine.

Prepare the salad:

  1. Rip the lettuce into bite-sized pieces and chop the endive. Wash and dry the lettuces and endive. A salad spinner works excellently for this. I use this method to easily wash and dry all of my salad greens.
  2. Chop up the avocado, slice the tomatoes, and dice the scallions.

Bring it all together:

  1. Place a generous amount of lettuce on each plate.
  2. Create stripes over top of the lettuce, adding the avocado, bacon, eggs, bleu cheese (or goat cheese), chicken, and tomatoes. Sprinkle the green onions over it all.
  3. Shake up the dressing and drizzle to taste.
  4. Serve and enjoy!


Affiliate Disclosure - Links to Amazon are affiliate links. If you use these links, your price remains the same, but I earn a small commission. Thanks for supporting this site! 

Thursday, March 9, 2017

Classic Chicken Soup (grain-free : gluten-free : nutrient-dense)

Soup is one of my favorite things about the cool months. I love how simple and nourishing soup can be, and how it can be a complete meal in one pot.  It seems like every year, there is one soup I keep coming back to again and again. This year it's Classic Chicken Soup.

Moist, tender chicken with lots of veggies and just enough salty broth - this is my favorite soup this year. My husband and daughter eat this soup just as it is, while my son and I often like to eat it with a scoop of nutrient-dense white rice added in. Either way, this Classic Chicken Soup is super simple and super yummy.

Classic Chicken Soup

  1. Chop the onion and celery. I always use my favorite Wusthof knife for chopping soup veggies.
  2. In a 4-quart, heavy-bottomed pot, melt the butter. Add the onions and celery, and a little sprinkle of salt. Saute for 8-10 minutes over medium high heat, stirring occasionally. A bamboo spatula works great for this step.
  3. Meanwhile, peel and chop the carrots. (I love my Rada vegetable peeler!)
  4. Add the carrots, chicken thighs, and broth to the pot.  Season with salt and pepper. I use about 1/2 tsp freshly ground pepper and 1&1/2 Tb of salt (but use less salt if your broth is salted; my homemade broth is unsalted). Nestle the chicken thighs down into the broth and bring to a low boil.
  5. Skim off and discard any foam that rises to the top of the broth.  Then reduce the heat to maintain a low simmer.
  6. Simmer for 35 minutes, until the chicken thighs are cooked through.
  7. In the meantime, slice the mushrooms. Cook the (optional) nutrient-dense white rice in a separate pot.
  8. Remove the chicken thighs from the pot and place in a large bowl to cool.
  9. Add the mushrooms to the soup pot. Taste the broth and adjust the salt/pepper as desired.
  10. Once the chicken has cooled long enough to handle easily, remove and discard most of the chicken skin. If you like boiled chicken skin, leave the skin on by all means. But I prefer to get rid of most of the skin at this point. (The dog is happy with my decision since it means he gets to eat chicken skin with his dinner.)
  11. Use a fork or your hands to remove the chicken from the bones.  (I save and freeze the chicken thigh bones until I have accumulated enough of them to make a pot of homemade chicken bone broth.)  Chop the chicken into bite-sized pieces.
  12. Add the chicken back to the pot and cook just long enough to warm it through.
  13. Serve and enjoy! If desired, add a generous scoop of nutrient-dense white rice to each bowl.


What is your current favorite soup? Does your favorite soup change from year-to-year, like mine, or is it always the same?


Links to Amazon are affiliate links. If you use these links, your price remains the same, but I earn a small commission. Thanks for supporting this site!


Tuesday, November 29, 2016

Chicken in Lemon Thyme Gravy (grain-free : gluten-free : nutrient-dense)

Chicken in Lemon Thyme Gravy is a perfect weeknight main dish. It cooks up quick and yummy in less than 30 minutes, and the bone-broth-based gravy is loaded with nutrition.  Everyone in my family loves this recipe, with its succulent meat and flavorful gravy.

Chicken in Lemon Thyme Gravy
Serves 3-4

  1. Debone the chicken thighs. There is a simple tutorial here that shows how to remove the bones. (I save and freeze the chicken thigh bones until I have accumulated enough of them to make a pot of homemade chicken bone broth.)
  2. Cut the chicken into ~1-inch wide strips. Season to taste with salt and pepper.
  3. Combine the sauce ingredients in a bowl. Whisk to combine and break up any lumps from the arrowroot.
  4. Heat a large heavy-bottomed skillet over medium-high heat. Once the skillet is hot, add the coconut oil and swirl to coat the bottom of the skillet.
  5. Add the chicken strips to the hot oil, skin-side facing down. Cover with a splatter screen since the chicken skin will pop and sizzle quite a bit while it cooks. Allow the chicken to cook, undisturbed, for about 3 minutes.
  6. Scrape the skillet with a spatula to loosen up the chicken, and then use tongs to turn the chicken. If the skillet is getting very hot, reduce the heat a bit. Cook for about 2 more minutes. 
  7. Remove the chicken from the skillet and set aside.
  8. Add the butter and garlic to the skillet and saute just until the garlic is fragrant, about 1 minute.
  9. Whisk the sauce into the skillet, being sure to scrape the bottom of the skillet to loosen up any tasty tidbits left from the chicken. 
  10. Bring the sauce to a simmer and cook for a couple minutes.
  11. Add the chicken back to the pan and stir to coat. Allow the chicken to re-warm for a minute or two. Turn off heat.
  12. Serve! Excellent accompaniments for this chicken would be mashed potatoes (recipe coming soon!), a side salad, nutrient-dense white rice, or simple buttered veggies.


Links to Amazon are affiliate links. If you use these links, your price remains the same, but I earn a small commission. Thanks for supporting this site!

Tuesday, May 3, 2016

Parmesan Fried Chicken (grain-free : nutrient-dense : gluten-free : primal)

I am very excited to share this recipe for Parmesan Fried Chicken. With a crispy crust and juicy meat, this amazing recipe has quickly become a family favorite in our house. The ingredients are simple and nutritious: the chicken is coated with a grain-free mixture of Parmesan and arrowroot, and fried to perfection in a combination of butter and coconut oil. I hope you enjoy this recipe as much as my family does!

Parmesan Fried Chicken
Serves 5

  • 5 skin-on chicken thighs
  • 1 cup freshly grated Parmesan cheese, lightly packed
  • 1/2 cup arrowroot starch
  • 1/4 tsp finely-ground celtic sea salt
  • 1/4 tsp paprika
  • 1/4 tsp freshly ground pepper
  • one egg, preferably from pastured hens
  • 1 Tb whole milk
  • 1 Tb grassfed butter
  • 1 Tb refined coconut oil
  1.  Debone the chicken thighs. There is a simple tutorial here that shows how to remove the bones. (I save and freeze the chicken thigh bones until I have accumulated enough of them to make a pot of homemade chicken bone broth.)
  2. Grate the Parmesan cheese. I like to use the small holes on a box grater to grate the Parmesan.
  3. In a pie plate (or other wide-bottomed dish), combine the Parmesan, arrowroot, salt, pepper, and paprika. Stir to combine with a fork.
  4. Break the egg into a medium bowl. Add 1 Tb milk, and beat with a fork until well-combined.
  5. Set up the work-line with chicken, followed by the bowl of egg, followed by the Parmesan mixture.
  6. Dip each chicken thigh into the egg mixture, and then into the Parmesan mixture. Coat all sides of the chicken with the Parmesan mixture.
  7. Once all of the chicken is coated in the Parmesan mixture, melt 1 Tb each of butter and refined coconut oil in a large, heavy-bottomed skillet over medium-high heat. I use a 12-inch stainless steel skillet for this recipe.
  8. Once the butter and coconut oil are shimmery-hot, add the chicken to the skillet.  My skillet is large enough to cook all 5 chicken thighs at once, but if your skillet is smaller, you may need to cook a few at a time. If desired, cover the skillet with a splatter screen to cut down on the mess on the stovetop.
  9. Cook the chicken for about 8-10 minutes, until it has developed a nicely-browned crust. Then flip the chicken and cook the other side for 8-10 minutes. Do NOT move the chicken around much once it is cooking, as that will prevent the crust from cooking properly and make the chicken more likely to stick to the skillet.You may need to reduce the heat to medium if the skillet starts to get overly hot.
  10. Use a probe thermometer to check the temperature in the thickest part of a chicken thigh. The chicken is done when the internal temperature reaches 165 degrees F. This is an important step that ensures the chicken will be cooked perfectly.
  11. Remove the chicken from the skillet and allow it to rest for a few minutes before serving. The rest time allows the juices to redistribute throughout the meat. 
  12. Serve and enjoy! I love to serve Parmesan Fried Chicken with potatoes and simple buttered veggies or coleslaw.


Links to Amazon are affiliate links. If you use these links, your price remains the same, but I earn a small commission. Thanks for supporting this site!


Thursday, July 16, 2015

Chicken Green Chile Crustless Quiche (grain-free : gluten-free : GAPS : primal)

My daughter's egg business is in full-swing now, and she sells ~5 dozen eggs per week. A couple weeks ago, we had some extra eggs piling up in the fridge and I was secretly gleeful that we could have one of our favorite dinners: quiche!  Instead of making our old standby (mushroom cheddar crustless quiche), I came up with a new quiche recipe: Chicken Green Chile Crustless Quiche.

My 5-year-old-son's favorite food is quiche; it's even what he requested for his birthday dinner. My 8-year-old daughter eats quiche, but it is not one of her favorite meals... until now. She melted into a contented puddle when she took her first bite of Chicken Green Chile Crustless Quiche. This recipe is so good, my mouth is watering just thinking about it.

Chicken Green Chile Crustless Quiche
  • 1/4 of a medium white onion, minced
  • 3 Tb butter, preferably nutrient-dense
  • 1/2 cup chopped roasted mild green chile, minus the seeds and skin*
  • 1/2 stalk celery, minced
  • 1/4 tsp celtic sea salt
  • 1/4 tsp dried cumin
  • 1/4 tsp dried oregano
  • one small clove of garlic, minced
  • one dozen (12) eggs, preferably from pastured hens
  • 1 cup leftover cooked chicken, chopped or shredded
  • 4 ounces sharp cheddar, shredded
  • 1 cup plain, whole-milk yogurt, preferably from pastured cows
  • 1 tsp celtic sea salt
  • 1/4 tsp freshly ground pepper 
  • butter, to grease the baking dish
  1. Melt the butter in a well-seasoned 10-inch cast iron skillet over medium-high heat.  Add the onion and a tiny sprinkle of celtic sea salt.  Saute the onion for ~10-15 minutes, stirring as needed but not too often. Let the onion get a bit of browned color, which indicates that it is caramelizing and releasing its natural sweetness.
  2. Add the green chile and celery. Sprinkle with 1/4 tsp celtic sea salt, and saute for about 10 minutes. Reduce the heat to medium if the skillet is becoming overheated.
  3. Add the garlic, cumin, and oregano. Saute for about a minute, until fragrant. Turn off heat and allow to cool while you prepare the rest of the ingredients.
  4. Preheat the oven to 350 degrees F.
  5. Meanwhile, break the eggs into a large bowl.  Beat the eggs slightly. Add the cheddar cheese, chicken, yogurt, 1 tsp celtic sea salt and 1/4 tsp of freshly ground pepper.   Stir well to combine.
  6. Add the cooked veggies to the egg mixture and stir to combine. 
  7. Grease a square 8X8 glass baking dish with butter. Pour the quiche mixture into the baking dish. 
  8. Bake for about 35 minutes, until the quiche is set in the center and beautifully browned on top.
  9. Let cool a bit, then slice and serve!  This pairs wonderfully with hash browns and a green salad dressed with homemade ranch dressing.  
  10. Store leftovers in a covered dish in the fridge.  They reheat well in a toaster oven at 250 degrees for 20 minutes.
 *We live in the land of abundant green chile. I buy it whenever our local healthfood store is roasting it out front, and then freeze it in baggies until use. If you can't buy fresh green chile, you could use fire-roasted canned green chile in a pinch.


Links to Amazon are affiliate links. If you use these links, your price remains the same, but I earn a small commission. Thanks for supporting this site!

Monday, July 13, 2015

Slow Cooker Roasted Chicken (grain-free : nutrient-dense : gluten-free : GAPS : primal)

During the hot summer months, I try to minimize the amount of heat I generate in the kitchen. So instead of using the oven, which heats up the whole kitchen, I use the slow cooker to roast chicken.  The slow cooker can even be placed outside on a covered porch if I really want to prevent any more heat in the kitchen.

I love the ease of roasting chicken in the slow cooker, and the delicious, juicy meat that results. Chicken roasted in the slow cooker does not have crispy skin, but the meat is very moist and flavorful.

Slow Cooker Roasted Chicken
  • one large white onion, roughly chopped
  • 1/2 cup vermouth* or dry white wine (or substitute water)
  • 1/2 tsp celtic sea salt
  • 3 cloves garlic, sliced
  • 2 bay leaves
  • 4 sprigs fresh thyme
  • 3-pound whole chicken, preferably pastured or free-range
  • 1 Tb celtic sea salt
  • 3/4 tsp freshly ground pepper
  • 2 Tb softened butter, preferably nutrient-dense
  1. About 8-10 hours before dinner, add the onion, vermouth, and 1/2 tsp salt to the slow cooker. Cook on HIGH. (If you don't plan to consume the onions along with the chicken, or if you don't mind the onions being a bit crunchy, you could do all of this at the same time as the next step.)
  2. Six hours before dinner, it is time to add the chicken and spices. Sprinkle the garlic, bay leaves, and thyme over the onions in the bottom of the slow cooker. 
  3. Wash the chicken well inside and out with plenty of water. Pat dry. 
  4. Gently lift the skin from over the chicken breast and push the butter in between the skin and the breast. The butter will melt over the chicken breasts while they cook, making them very moist and yummy.
  5. Season the chicken inside and out with one Tb of salt and 3/4 tsp pepper. Place the chicken on top of the onions/spices in the slow cooker.
  6. Cook on LOW for about 5 hours, or until the internal temperature of the chicken has reached 170 degrees. If you cook the chicken too long, it will be dry and overdone.
  7. About 40-60 minutes before dinner, pull the chicken out of the slow cooker and place it in a large bowl. Allow to cool enough that you can handle the chicken without burning yourself. 
  8. Carve the chicken. Set the carcass and any chewy bits/tendons aside; if desired they can be used to start a pot of broth cooking after dinner. Slice the chicken. 
  9. Nestle the chicken back down into the juices in the slow cooker. Reduce the heat to WARM and allow the chicken to soak up the flavorful juices for 20-40 minutes.
  10. Serve and enjoy! Crispy fried potatoes and caramelized green beans compliment the chicken nicely.
*I love to use vermouth, as it doesn't go bad like unused wine. Vermouth is shelf stable, can be used in place of dry white wine in cooking, and can be stored at room temperature indefinitely.

Links to Amazon are affiliate links. If you use these links, your price remains the same, but I earn a small commission. Thanks for supporting this site!

Thursday, February 5, 2015

Mushroom Chicken Stir Fry (grain-free : gluten-free : primal : dairy-free : paleo)

In the mood for Asian food last week, I developed this recipe for Mushroom Chicken Stir Fry.  My whole family was pleased to gobble this down.  This recipe is a great way to use leftover cooked chicken, or it can also be made with raw chicken as well.

Mushroom Chicken Stir Fry
  1. Heat a large skillet over medium heat. Add 1Tb refined coconut oil; once it is melted swirl it around to coat the bottom of the pan. Add the chicken and saute until it is warmed through (if using leftover chicken) or for several minutes until fully cooked (if using raw chicken). I like to use my bamboo spatula for this recipe.
  2. In the meantime, combine all of the sauce ingredients except for the broth and water. Whisk these ingredients all together, and then stir in the broth and water. 
  3. Add the garlic and ginger; saute for 1-2 minutes, until fragrant. Then drizzle the rice wine vinegar and soy sauce over the chicken. Stir to combine. 
  4. Pour the chicken mixture into a bowl and set aside.
  5. Melt 1 Tb refined coconut oil in the skillet. Saute the celery and white parts of the bok choy for 5 minutes over medium heat.
  6. Stir in the mushrooms and sauce. Put a lid on the skillet and allow it to simmer for 4 minutes, stirring occasionally.
  7. Stir in the onions and green parts of bok choy. Allow to cook for another 4 minutes, removing the cover towards the end to allow some of the moisture to cook off.
  8. Stir in the reserved chicken and allow to cook an additional 1-2 minutes to re-warm the chicken.
  9. Serve over nutrient-dense white rice, rice noodles, or grain-free bean thread noodles. Egg drop soup or a green salad would be a great accompaniment for this meal.

What is your favorite Asian-inspired recipe?


    Links to Amazon are affiliate links. If you use these links, your price remains the same, but I earn a small commission. Thanks for supporting this site!

    Thursday, November 6, 2014

    Slow Cooker Chicken and Mushroom Soup (grain-free : gluten-free : nutrient-dense)

    Years ago when I first started using a slow cooker, I was repeatedly disappointed by overcooked, dry chicken. It took me awhile to figure out that, unlike beef roasts which benefit from slow cooking over a long period of time, chicken is best if slow-cooked for only a few hours.

    One of my favorite chicken recipes is chicken and mushroom soup.  The earthy flavor of mushrooms contrasts nicely with the light flavor of chicken. The herbs and vermouth give this soup outstanding flavor. 

    Slow-Cooker Chicken and Mushroom Soup
    Serves 5-7
    • 1 large white onion, diced
    • 1/2 cup vermouth (or dry white wine)*
    • 2 cups chicken broth, preferably homemade
    • 3 to 3&1/2 pound whole chicken
    • 1 lb of brown mushrooms, sliced
    • 4 cloves of garlic, sliced
    • 2 bay leaves
    • 1 tsp of dried thyme
    • 1.5 tsp dried parsley
    • 1 Tb celtic sea salt (or less if your broth is salted)
    • freshly ground pepper
    • 2 T white rice flour or arrowroot
    • 1/4 cup sour cream
    • 1/4 cup filtered water
    1. About 8-10 hours before dinner, add the onion, vermouth, broth, and a sprinkle of salt to the slow cooker. Cook on HIGH.
    2. Six hours before dinner, it is time to add the chicken and mushrooms.  Start by washing the chicken well inside and out with plenty of water. Add the chicken to the slow cooker. Sprinkle the mushrooms around the chicken.
    3. Sprinkle the garlic, bay leaves, thyme, parsley, one Tb of salt, and pepper (to taste) over the chicken and mushrooms. (My broth is unsalted; use less salt if your broth is salted.) Don't worry that there is too little liquid in the pot; the chicken and mushrooms will release a lot of moisture as they cook.
    4. Cook on LOW for about 5 hours, or until the internal temperature of the chicken has reached 170 degrees. If you cook the chicken too long, it will be dry and overdone.
    5. About one hour before dinner, pull the chicken out of the slow cooker and place it in a large bowl. Allow to cool enough that you can handle the chicken without burning yourself. 
    6. Use a fork or your fingers to pull the meat and skin off the chicken. Set the bones and any chewy bits/tendons aside; if desired they can be used to start a pot of broth cooking after dinner. Chop the chicken and skin into bite-sized pieces. 
    7. In a small bowl, whisk together the sour cream, 1/4 cup of filtered water, and arrowroot or rice flour. Whisk this into the soup broth 30-45 minutes before dinner.
    8. Stir the chicken meat/skin back into the pot about 20 minutes before dinner. Reduce the heat to WARM. 
    9. Taste test the broth and adjust the salt as needed. Ladle into bowls and serve! This soup pairs nicely with Cheesy Bread and a side salad. 

    *I love to use vermouth, as it doesn't go bad like unused wine. Vermouth is shelf stable, can be used in place of dry white wine in cooking, and can be stored at room temperature indefinitely.

    Links to Amazon are affiliate links. If you use these links, your price remains the same, but I earn a small commission. Thanks for supporting this site!

    Monday, July 1, 2013

    July 4th Recipe Round-up Including a Recipe for Fried Rats (GAPS : grain-free : Primal : gluten-free)

    The 4th of July has always been one of my family's favorite holidays.  Here in the hot dry desert, the arrival of early July ushers in the monsoon season, when we will get the majority of our 8.5-inches of annual rainfall.  We finally start to see a break from the 100+ degree days, and the 4th of July is a great time to celebrate the change.

    We spend time with family, watch the kids play in water, and enjoy a great meal.  Our July 4th is usually a potluck, so no one has to spend too much time cooking.  Then the evening is topped off with lots of fireworks.

    July 4th Recipes

    All of these recipes are grain-free, and the majority are GAPS-legal, too. The recipe for fried rats is below under "Side Dishes".

    Main Courses
    Side dishes
    • Grilled zucchini or summer squash - Simply slice squash lengthwise about 1/3-inch thick.  Drizzle with oil, sprinkle with salt and pepper, and grill them!
    • Probiotic potato salad
    • Lemon basil chopped summer salad - This salad showcases the flavors of summer's bounty.
    • Fermented bread and butter pickles - This fermented recipe keeps everyone coming back for more, even people who don't usually eat fermented foods.
    • Kale chips - These salty, crispy snacks are a yummy addition.
    • Creamy cukes with beautiful salmon roe - This recipe is extremely simple and delicious. 
    • Raw veggie sticks with homemade ranch dip
    • Summer roasted vegetable medley
    • Fried rats - My friend Linda is always requested to bring this delicious dish to every potluck. And no, this recipe doesn't actually include rats, but the jalapeno stems look like little rat tails. Fried rats are unbelievably scrumptious, and not too spicy if prepared properly.
      • Ingredients: 
        • jalapenos (of roughly the same size), with stems attached and preferably straight rather than curved
        • cream cheese
        • bacon, preferably thick-sliced
      • Method: 
        • Slit the jalapenos down one side, and remove the seeds/membranes/veins using a small spoon. The more of those bits that are left in the jalapenos, the spicier they will be. Be careful, those seeds and bits are so hot that any residual oil on your skin will burn your eyes for days afterwards. I like to wear disposable latex gloves to prevent that, and be very careful not to touch my skin (and especially not lips or eyes) with the spicy stuff.
        • Stuff the jalapenos with cream cheese.  A small butter knife with rounded ends would work well for this. 
        • Wrap a slice of bacon around each jalapeno.  Place them in a baking dish, and bake in a 400-450 degree oven for about an hour, until the jalapenos are fully cooked and the bacon has started to crisp up.
    Desserts

    What foods will be gracing your Independence Day table?

    This post may contain Amazon affiliate links.  If you use these links, your price will be the same but I may earn a small commission.

    Tuesday, April 16, 2013

    Our Adventures in Backyard Chicken Keeping

    This article was originally published in the March/April 2013 issue of Real Food and Health magazine.

    We Decide to Get Chickens

    My family lives on a small suburban plot of less than 1/4 acre, and over the last five years we've dedicated more and more of our yard to growing our own fruits, herbs, and vegetables. In the hot, dry desert where we live, I'm not sure that gardening is any less expensive than buying local produce at the farmer's market. Much has to be done to improve our soil and frequent watering is required during the many warm months. Yet I feel that there is an intrinsic value in knowing how to produce our own food, and in observing the cycles of growth and decay in our own back yard. I want my children to know where their food comes from, and to learn the skills for producing their own food as they grow up. The next logical step was for us to get chickens.

    I've never owned or cared for any farm animals, but with the encouragement and support of a chicken-keeping friend, we decided to take the plunge and get two baby chicks. Springtime comes with lots of baby chicks at our local feed stores, and we were overwhelmed by the loud sound of hundreds of baby chicks peeping. The baby chicks seemed unbelievably tiny and fragile, like irresistible little fluffballs. We selected one Plymouth Barred Rock (known to thrive in our desert climate) and one Araucana (known for their beautiful blue-green eggs). We drove home with the pleasant sound of cheeping emanating from a little cardboard box.


    Sunday, February 3, 2013

    Our Favorite Easy Dinners


    As a follow-on to my post about our easy dinner routine, I thought I'd share a list of our favorite easy dinners.  

    Our Favorite Easy Dinner Meals
    Quick and Easy Stovetop Meals:
    Easy Meals that Freeze Well:
    What are your favorite easy dinners?

    Wednesday, January 23, 2013

    How to Make Bone Broth and My Favorite Glass Container for Freezing Broth

    Bone broth is a wonderful superfood that was a critical part of many traditional diets.  I make sure we always have bone broth in the freezer, and use it liberally in cooking.  Besides using broth for soups, I also incorporate it into many recipes such as curry meatballs and veggies, braised cabbage and sausages, white beans, rice, and veggies such as beets and green beans.

    When I first started making homemade broth over 6 years ago, I followed the recipe in Nourishing Traditions which uses uncooked chicken. But over time, I figured out a much more cost effective and easy method that uses a roasted chicken carcass. Then last year, I started to incorporate some ideas from Nourished Kitchen's post on perpetual broth into my usual method.  So now, I am able to make LOTS of bone broth with just one chicken carcass. 

    How to Make Chicken Broth

    1. Start by roasting a chicken and then picking the carcass clean. We love to eat roasted chicken.  After everyone has eaten their fill, I bring the chicken carcass to the table and pick the meat off the bones.  The meat gets stored in a glass container in the fridge to be used for another meal such as pizza or soup. 
    2. Put the chicken carcass into the slow cooker. All of the bones, juices, leftover skin, and chewy bits go straight into the slow cooker. If I have any on-hand, I also add some chicken feet to the stockpot.
    3. Add some fresh veggies and filtered water. For one chicken carcass, I usually throw in one quartered white onion and two carrots (peeled and cut into 2 or 3 chunks).  Add enough filtered water to cover it all. 
    4. Turn the pot on LOW and cook for 15-24 hours. 
    5. After the broth has cooked at least 15 hours, ladle and strain about half the liquid from the pot.  I especially try to make sure to get most of the fat out of the pot along with the liquid, as I don't think it is a good idea to let the fat keep cooking for an extended period of time. I pour the broth into glass jars for freezing (I talk more about that below).  Anytime after the 1st night of cooking, feel free to dip into the pot to get stock for any cooking needs, or even enjoy a nice warm cup of salted broth first thing in the morning. OPTIONAL: At this point, you could pull out the veggies and pick some more meat/skin off the carcass. There is quite a large amount of meat, skin, and connective tissue that was too tough to eat before making broth, but these parts are wonderfully tender after being simmered in the broth. Add a splash of broth and some salt and pepper to make a large bowl of soup (enough for 2-3 people). This soup can either be eaten right away, or stored in the fridge as an easy meal for later. 
    6. Add more filtered water to the pot and cook the bones some more. And you can throw in some more fresh carrots and onions if you removed them during the previous step. Continue to cook on Low. 
    7. Each day, ladle off some more broth and add fresh water. In this way, you can make lots and lots of broth with just one chicken carcass.  I usually continue this process for about 4-6 days to really stock up the freezer.  And, despite what you may think, the broth does not get watered down with this method.  The broth actually gets more and more rich as the days go by, peaking around day 4 or 5.  This is because the bones continue to break down into the broth over time.  I find that the broth made after the 2nd day has a very concentrated, rich flavor and a deeper brown color, so that I need to use only half as much in recipes (making up the balance with filtered water). 
    8. Strain and freeze the broth (or store in the fridge if it will be used in the next few days). I do not skim the fat off the stock, as it makes the broth more nourishing and flavorful.

    Tips for Freezing  (and Thawing) Broth

    I always freeze my broth in glass containers.  Plastic can leach into foods, especially with changes in temperature, so I don't use plastic for freezing broth. I've definitely had my share of glass jars that have cracked during freezing, but over time I have figured out the tricks to successfully freezing (and thawing) broth in glass jars.
    • Leave plenty of head space.  As the broth freezes, it will expand, so it is important to leave plenty of space above the broth for expansion during freezing. A general rule is to make sure you leave more than 1-inch of space above the liquid in the jars.  You can see in the picture above that I have left lots of space for expansion during freezing.    
    • Let the broth cool to room temperature on the counter without the lids on.  Once the jars are cool enough to touch comfortably, put the lids on and transfer them to the freezer. 
    • Not all jars are created equally.  For freezing large quantities of broth (such as pints or quarts), I find that mason jars work best.  Other jars, such as the ones you buy containing coconut oil, are more likely to crack in the freezer.
    • My favorite jars for freezing broth: tomato paste jars! These jars are great for many reasons: 
      • Since I use plenty of tomato paste to make homemade ketchup, I always have plenty of these little jars around.
      • These small jars don't seem to break as easily as bigger jars.  I've frozen hundreds of these little jars of broth, and only ever had one of them break (because it was overfilled).
      • Small jars are easy to fit into little leftover spaces in the freezer.
      • The amount of broth in small jars is perfect for when I just need a little bit of broth (such as when making caramelized green beans).  And of course, multiple small jars can be used when larger amounts of broth are needed.
      • Small jars thaw very quickly, so even if I didn't plan ahead, I can still use homemade broth in my recipes.
    • To thaw broth in glass jars:
      • If you have time, thaw jars of broth in the fridge overnight.  
      • In a pinch, it also works to thaw jars of broth in a big bowl of water.  The key to thawing jars in water is to make sure you do NOT use hot water initially.  Placing a frozen jar into hot water puts a big thermal shock on the glass, which can cause it to crack.  
        • Start by placing the frozen jar into cool water.  Let it sit for about 10 minutes.
        • Replace the cold water in the bowl with warm water and let it sit a few minutes. 
        • Then you can put hot water into the bowl to speed things up.  
        • There is no need to wait for the broth to completely thaw.  Just wait until there is enough thawed that the remaining chunk of frozen broth can come out into whatever you are cooking.
    Do you have any tips for making and storing broth? 

    This post is part of Pennywise Platter!