Wednesday, May 30, 2012

Lessons Learned as a Baker

Back in the late 90's while I was going to college, I had my first real experience cooking when I worked as a baker in a coffee shop.  The daily menu included lots of breakfast items like scones and muffins, plus desserts such as cookies, cakes, cheesecakes, and pies.  Oh, and yummy quiches, like green chile chicken quiche.

While I was developing my latest cookie recipe a few weeks ago, I was musing that many of the techniques I use today for baking were taught to me back in the coffee shop.  And then I thought that some of you readers might benefit from learning some of these techniques in case your own cooking education has been limited.

  • Measure carefully for baking - When cooking on the stovetop, I rarely measure ingredients (unless I am developing a recipe for the blog). However, for baking, it is very important to carefully measure ingredients.  The proportions of the ingredients in baked goods can make a big difference in the end result.  When measuring ingredients, make sure to flatten them out so that they are nice and level with the top of the measuring cup or spoon. I love to use a Measure All Cup for measuring thick ingredients like honey and nut butter.
  • After mixing ingredients, don't clean utensils by banging them on the rim of the bowl - The process of mixing allows air to be incorporated into baked goods, which can make them more light and fluffy.  If you try to clean the batter off of your utensils by banging them on the rim of the bowl, you may force some of the air back out of the baked goods and end up with a more dense item.
  • Don't open the oven door very often - As they heat up, many baked goods rise to create a more fluffy result.  Opening the oven door can jiggle the baked goods and cause them to "fall" (where they lose all of that nice rise they achieved while being heated). It is especially critical to make sure you don't open the oven door much when cooking items with runny batter, such as cakes and cheesecakes.
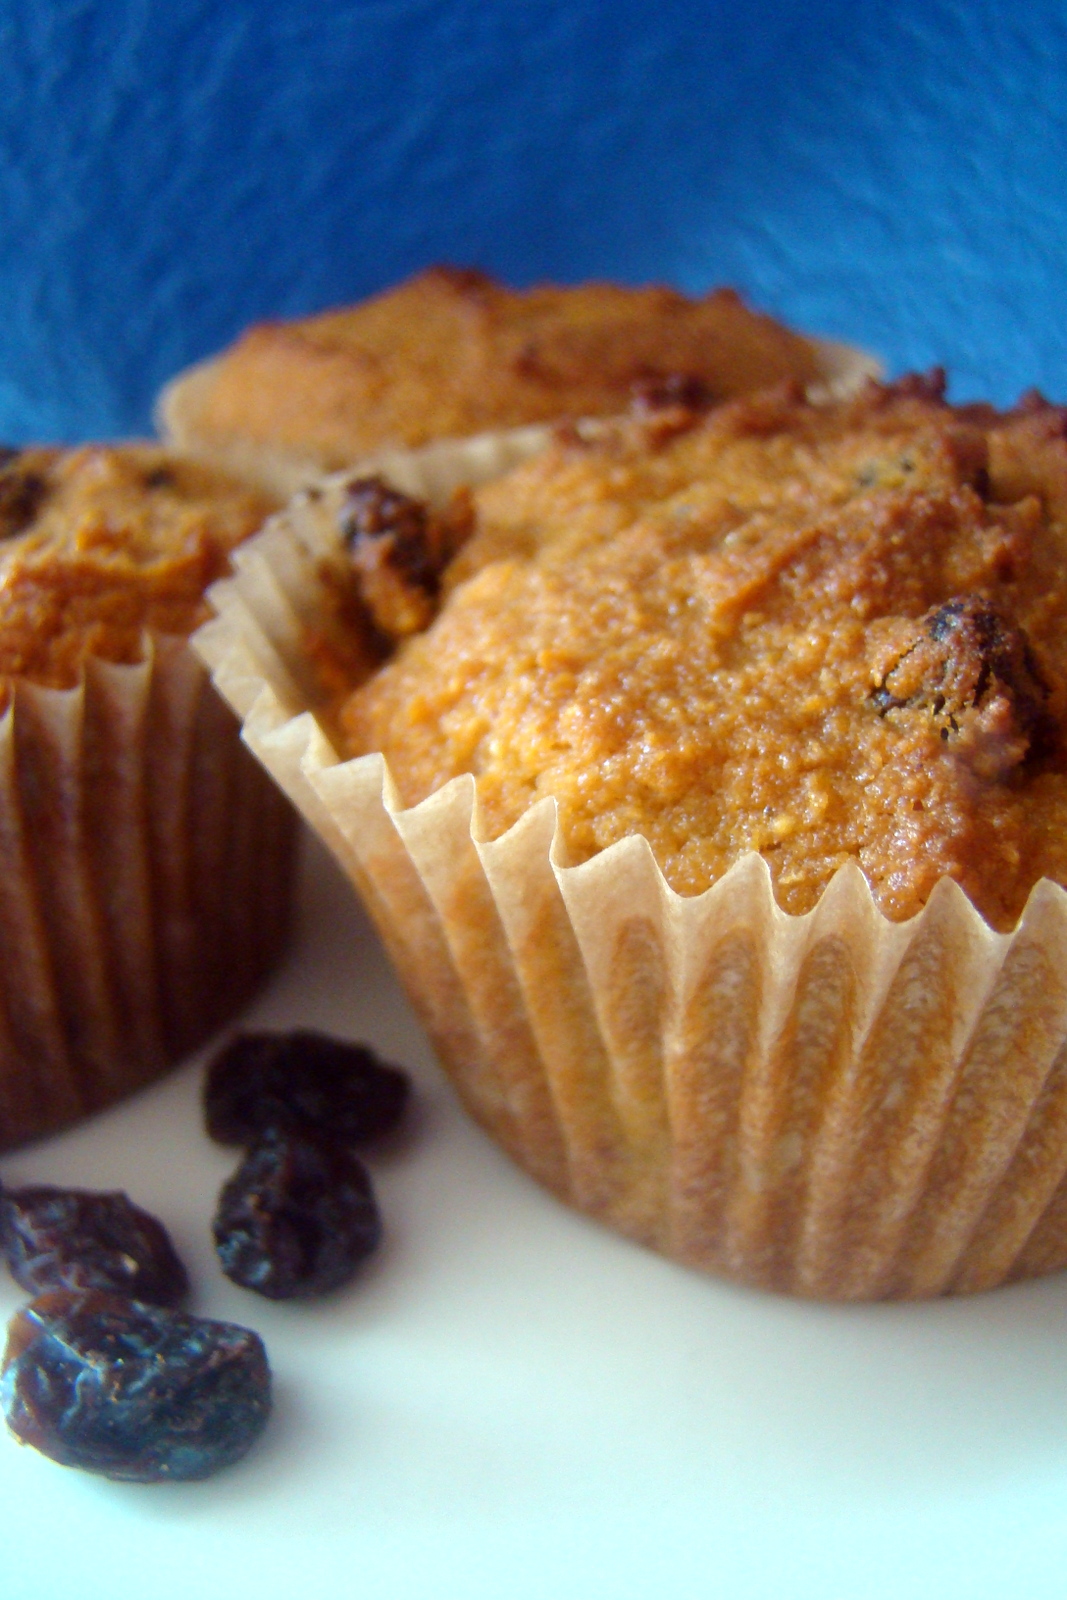
  • Watch cookies carefully - Cookies can very quickly go from nice and chewy to crunchy and overdone if they are cooked just a tad longer.  There is about a 2 minute window when they will be perfect, so watch them closely and check them frequently towards the end of their cook-time. If I am using a new cookie recipe, I will start checking them about 3-5 minutes before the time listed in the recipe.  And if you start another batch of cookies immediately on an already-warmed cookie sheet, they will cook a few minutes quicker than the first batch.
  • Salt is key to enhancing flavor of sweet baked goods - One of the best ways to make desserts taste better is to add an extra pinch of salt.  Salt really does bring out the sweet flavors.  And anytime I use a sweet recipe that does not call for any salt, I make sure to add some anyway.
  • When using a stand mixer, make sure to scrape the sides and bottom occasionally - Stand mixers are great, especially for mixing cookies and cheesecakes.  However, any time you use a stand mixer, make sure you occasionally stop the machine and scrape the sides and bottom of the bowl with a spatula.  Otherwise, you may end up with some little unmixed clumps in the final baked goods.  
  • Feel free to experiment with different fruits and spices, but be very careful about adjusting amounts of flour/sweetener/liquids/leavening agents (such as baking soda and baking powder) - You can very easily experiment with the flavor of baked goods by changing the fruit or spices used.  In some recipes, you can even use widely varying amounts of fruit and still end up with a good product (for instance, zucchini bread cooks well whether I use two small zucchinis or one HUGE one).  But be very careful about experimenting with the amounts of flour, sweetener, liquids, and leavening agents.
  • Break eggs into a separate cup - Occasionally, you may end up with a bit of egg shell in in with your eggs.  If you make sure to break the eggs into a separate cup, you'll be able to easily remove any shell that has fallen in without losing it into the recipe. I like to use a glass measuring cup for my eggs so they can be easily poured into the recipe.
  • Use a stand mixer for granola, whipped cream, cookies and cheesecakes - A stand mixer works especially well for mixing thick batters (such as cookies and granola) as well as batters that require lots of mixing (like cheesecakes, whipped cream, and macaroons).  A stand mixer also makes it easy to add ingredients while the mixer is running, and you can mix as long as necessary without your wrist getting tired from holding a mixer or whisk.
  • Make every drop count with a spatula - A fairly large amount of ingredients can be left clinging to the side of a bowl as you scoop or pour the batter out.  Use a silicone spatula to scrape the bowl and you will be amazed at how much batter comes out! But then the trick is to still leave a little for the kids to lick off :)
 What are some of your tips and tricks for baking?

Sunday, May 27, 2012

Pizza Toasts, including Quick and Easy Homemade Pizza Sauce (GAPS : primal : grain-free : gluten-free)


I have yet to make a grain-free, GAPS-legal pizza crust that I think is worth the time and effort, so my family usually eats pizza casserole instead.  But, with my new grain-free sandwich bread recipe, we are now eating pizza toasts, and they are delicious! The key is to dry out the bread a bit, so that it will stand up to holding the sauce and toppings.

Pizza Toasts
  • Grain-Free Sandwich Bread, sliced about 3/8-in thick (we eat only two pizza toasts for each adult, as they are quite filling)
  • Quick and Easy Homemade Pizza Sauce (recipe follows)
  • Mild cheddar cheese, shredded
  • Favorite toppings of your choice, such as:
    • Sauteed mushrooms
    • Sauteed orange bell pepper
    • Chopped salami or ham
    • Sliced olives
    • Chopped smoked turkey
    • Sauteed onions
    • Chopped pineapple
    • Roasted chicken
    • Sauteed zucchini
    • Parmesan cheese
    • NOTE: any high-moisture veggies such as mushrooms or zucchini will need to be sauteed to release the moisture before adding them to your pizza toasts.  I like to saute mine in butter with a little sprinkle of salt.
  1. Spread out the sliced sandwich bread in a toaster oven or conventional oven. If using a toaster oven, make sure the bread is not directly over the heating element, else it will burn. Set the oven temperature to 200 degrees F, and bake the bread for about an hour.  Turn it once during the hour. 
  2. Meanwhile, mix up the Quick and Easy Homemade Pizza Sauce (recipe below).  Also, saute any veggies you will use as pizza toppings.
  3. Remove the bread from the oven and allow to cool a bit.
  4. Spread each slice of bread with some pizza sauce.  Sprinkle half of the cheese over the sauce.
  5. Add your favorite toppings, and then add the remaining cheese.
  6. Place the pizza toasts on a baking tray or stoneware.  Bake at 300 degrees F for about 5-10 minutes, just until the cheese is nicely melted. 
  7. Serve and enjoy!  A green salad makes a nice accompaniment.

Quick and Easy Homemade Pizza Sauce 
Makes enough for one pizza toast meal for our small family of 2 adults and 2 young kids

  • 1/3 cup of tomato paste from a glass jar
  • 1/2 tsp dried oregano
  • 1/2 tsp dried basil
  • 1/4 tsp onion powder
  • 1/2 tsp garlic powder
  • dash fine-ground celtic sea salt (omit if your tomato paste contains salt)
  • dash freshly ground pepper
  1. Combine all ingredients and stir.  That's it!

Wednesday, May 23, 2012

Finding Time for Yourself


As a stay-at-home mother of two young children, I often find it hard to make any time for myself. It can be easy for me to go about my day-to-day life making no time for reflection, meditation, relaxation, or even my own health.  After all, there is always more to do with the kids, around the house, in the kitchen, or on the blog. 

I find that if I fail to find any time for myself, I am setting myself up to burn-out, lose my temper, and feel dissatisfied.  This doesn't help out anyone in the house! I am still working at finding more time for myself, but these are some ways that have worked well for me.
  • Quiet time: Every afternoon, we have quiet time for about 2 hours. This is a time for everyone in the house to unwind, and I plan to keep having quiet time even as the kids grow older.  It really helps us all to have some quiet time each day.  At this stage, my 2-year-old son takes a nap in our room during quiet time.  My 5-year-old daughter goes to the kids' room with the door shut and the blinds mostly closed.  She often takes a nap during quiet time, but when she doesn't, she is free to do calm activities such as coloring, looking at books, playing with board games or puzzles, or listen to her music CD's.  Since quiet time is a daily habit in our home, there is no struggle to get the kids to do it.  They expect that each afternoon, we will do a quick toy clean-up, and then they will have some snacks, go to the bathroom, and go to quiet time.  I use this time to catch a quick nap (my son is not sleeping through the night yet), read a book, fold laundry in blessed solitude, or do yoga.
  • Get up early: Getting up before the kids in the morning can provide a great time for calm reflection. I do some of my best planning, praying, and meditating early in the morning before the kids are awake.
  • Take the kids for a walk: Taking the kids for a walk can be a wonderful way to get physical activity along with the kids.  I try to make sure we go for walks at times when I won't feel rushed or impatient if the kids want to dawdle a bit.  When the kids were younger, I would push the eldest in the stroller while carrying the baby on my back.  Nowadays, my eldest rides her scooter or run bike, and I typically push her brother on his trike (which has a push-handle for me to use). Walking is great for getting us out of the house on days when we're all in a funk, and it works wonders for our mental states to be out in fresh air admiring the sky, trees, or even the ants on the sidewalk.
  • Go for a walk alone: On particularly rough days, I will leave my kids home with my husband after dinner and go for a short walk by myself.  It is amazing what 20 minutes of alone-time can do to cheer me up at the end of a bad day.  It gives me time to work through the rough emotions of the day and find a place of calm and contentment.
  • Play hide-n-seek and find a REALLY good hiding place: If your kids are old enough to play hide and seek, you can play with them while finding some time for yourself.  The key is to find a really good hiding place.  Then while the kids look for you, you'll have a few minutes to take some deep breaths and calm your mind.  This method can be a real mood-changer in our house, since the kids are happy that I am playing with them and I can get a few moments to myself.
  • Put on a favorite CD for the kids and go take a bath: During busy weeks, one of the best ways for me to find a little relaxation is to take a quick bath. To make sure that I will have some peaceful time to myself, I get the kids set up with their favorite CD to listen to, get out some toys that are usually kept in the closet, and then I will sneak away to have a bath.  (If I tell them I am going to bathe, they will inevitably want to join me, which isn't always what I'm going for.)  Then I can relax in the bath for perhaps 10-20 minutes while they play.
  • Talk with a friend who has kids: My number one criterion in choosing playmates for my kids is that I like the parents. This way, whenever the kids are having a play date, I have time to converse with other adults that I like spending time with.  I look forward to these play dates as much as the kids do, and it is always refreshing to talk with other parents.  I've been able to develop some true friendships this way, which has really helped to prevent the social isolation that can come along with being a stay-at-home parent.
I try to make it a habit to find some time for myself.  As the seasons come and go, sometimes I do better at finding time for myself than other times.  Sometimes it helps to plan it out by writing it on my to-do list for the day, and other times I naturally find time with the ebb and flow of the day.

What ways work for you to find time for yourself?

Sunday, May 20, 2012

Mushroom and Cheddar Crustless Quiche (GAPS : grain-free : primal)

Mushrooms and cheddar cheese pair wonderfully with eggs in this crustless quiche recipe.  The mushrooms are sauteed in butter to remove moisture, and then the whole quiche is baked in a cast iron skillet in the oven.  This makes a hearty meal for any time of day.

Mushroom and Cheddar Crustless Quiche
  • 6 oz cremini mushrooms, sliced
  • 1/2 cup (1 stick) butter
  • 1/2 tsp celtic sea salt
  • freshly ground pepper
  • 1 Tb green onion (green part only), minced
  • 1 medium clove garlic, minced
  • 12 eggs, preferably from pastured hens
  • 1 tsp celtic sea salt
  • 1 cup packed shredded white cheddar cheese
  • 4 thin slices of salami, minced
  • 1 cup plain whole milk yogurt
  • 1/2 tsp fresh thyme leaves
  • dash of ground nutmeg
  1. Melt the butter in a well-seasoned 10-inch cast iron skillet over medium heat.  Add the mushrooms and sprinkle 1/2 tsp celtic sea salt over them.  Add a dash of freshly ground pepper.  Saute the mushrooms for 5-10 minutes, until they have released their moisture and cooked down a bit.
  2. Add the green onion and garlic, and saute for a minute or so, until they are fragrant.  Turn off heat and allow to cool some.
  3. Meanwhile, break the eggs into a large bowl.  Add 1 tsp celtic sea salt and a sprinkle of freshly ground pepper.  Add the cheddar cheese, minced salami, yogurt, thyme, and nutmeg. Stir to combine.
  4. Stir the egg mixture into the skillet with the mushrooms.
  5. Place the skillet into a 350 degree F oven, and bake for 35 minutes, until the quiche is set in the center and beautifully browned on top.
  6. Let cool a bit, then slice and serve!  This pairs wonderfully with a green salad dressed with vinaigrette.  
  7. Store leftovers in a covered dish in the fridge.  They reheat well in a toaster oven at 250 degrees for 20 minutes.

Wednesday, May 16, 2012

Homemade Scrubby Bathroom Cleaner

This recipe for bathroom cleaner requires only 4 ingredients, and is much more pleasant to use than those toxic cleaners from the store.  It is incredibly easy to make! This cleaner works very well for scrubbing out bathtubs, sinks, and even toilets!  I use it as an all-purpose cleaner for the bathroom.

Homemade Scrubby Bathroom Cleaner

  • 1/2 cup Kosher Salt (I buy this at the supermarket)
  • 1 cup Arm and Hammer Super Washing Soda* (the cheapest place I have found this is Alice.com, where it is less than $4/box)
  • 1 cup 20 Mule Team Borax (I buy this at Target in the detergent aisle)
  • 1 cup Dr. Bronner's Sal Suds
  • 2 cups water
  1. In a large bowl, combine the salt, washing soda, and borax.  Whisk to break up any lumps.
  2. Add the Sal Suds and water.  Whisk to combine.
  3. Using a funnel, pour into the container of your choice.  I store mine in an old half-gallon milk container, which makes it easy to pour and stores easily under the bathroom sink.
  4. To use the cleaner, simply pour out a little bit and then scrub with a brush or rag.  A little bit of cleaner goes a long way! Rinse clean with plenty of water. 
*I haven't tried it, but I bet you could substitute plain old baking soda for the super washing soda.  I already keep the super washing soda on-hand for making homemade laundry detergent.  Let me know if you try it with baking soda, and how it turns out!

This post is part of Frugal Days, Sustainable Ways!

Sunday, May 13, 2012

Lemon Lime Custard Cake (grain-free : primal)

Lemon and lime give this custard cake a wonderful, fresh flavor.  It is rich, and especially tasty with some whipped cream, sour cream, or vanilla ice cream on top.  We enjoyed this for breakfast as well as dessert.

Lemon Lime Custard Cake
  • 1/2 cup butter
  • 1/2 cup plus 2 Tb honey
  • 8 oz softened cream cheese
  • 1 Tb vanilla extract
  • 1/2 tsp celtic sea salt
  • 4 eggs, preferably from pastured hens
  • one small lime
  • one large lemon
  • 3 Tb coconut flour
  • Garnish: whipped cream, sour cream, or vanilla ice cream
  1. Melt the butter in a small saucepan over low heat.  Turn off heat, stir in the honey, and allow to cool a bit.
  2. Meanwhile, beat the cream cheese in a large bowl until light and fluffy.  Beat in the vanilla extract, eggs, and salt.
  3. Use a microplane rasp or other fine grater to zest the lime and the lemon.  Then use a reamer to juice both the lime and the lemon.  My small lime yielded about 1 Tb plus 2 tsp of lime juice, and my large lemon yielded about 4 Tb of lemon juice.  
  4. Pour the lemon juice, lime juice, and both zests into the butter/honey.  Stir a bit.
  5. Beat the butter/honey mixture into the cream cheese.
  6. Measure out the coconut flour into a small bowl and whisk to break up any clumps.  Then beat the coconut flour into the cream cheese mixture.
  7. Butter a glass pan.  I used an 8X8 square glass dish.
  8. Pour the batter into the buttered pan.
  9. Bake in a 300 degree F oven for about 45-50 minutes, until the edges have browned a little and the middle is bubbling nicely.
  10. Remove from the oven and allow to cool to room temperature. Cover the dish. Then transfer to the fridge and chill for several hours.
  11. Top the custard cake with some whipped cream, sour cream, or vanilla ice cream.  Enjoy!

Friday, May 11, 2012

Raisin Muffins (grain-free : GAPS : primal : paleo : gluten-free)

As we head into summer, sometimes it is hard to find fresh fruit in season.  Why not try some raisin muffins?  My daughter especially loves these muffins since she loves raisins.  They are cinnamon-y and delicious!

Raisin Muffins
Makes 12 muffins
  1. Melt butter or coconut oil in a small saucepan over low heat. Turn off heat and allow to cool slightly. 
  2. Meanwhile, combine the eggs, salt, vanilla extract, cinnamon, and baking soda in a large bowl.  If using an immersion blender, pulse a few times to combine. Otherwise, mix to combine with a whisk or mixer.
  3. Add the honey to the butter (or coconut oil) and stir slightly.  Pour this mixture into the wet ingredients and blend well with immersion blender or mixer.
  4. Measure out the coconut flour.  Since coconut flour clumps, it will need to be sifted if you are not using an immersion blender.*
  5. Pour the coconut flour into the bowl with the wet ingredients.  Use an immersion blender or mixer to thoroughly combine all ingredients, making sure there are no lumps.  (Since coconut flour does not contain gluten, there is no worry of over-mixing it).
  6. Fold in the raisins.
  7. Line a muffin tin with paper cups.  Scoop the muffin batter into the paper cups.  I like to use a 3-Tb scoop for this, but you could just use a large spoon.
  8. Bake muffins in 325 degree oven for about 35-45 minutes, until muffins are set and a toothpick inserted in the middle comes out clean.  If you are in a time-crunch, you could bake them at 350 degrees initially, but you'll need to reduce the heat after a bit so they won't burn before being set in the middle.
  9. Remove from oven and cool.  Delicious with a pat of butter and a big glass of raw milk or milk kefir!  Pair these muffins with bacon or eggs for a hearty meal.
Time-saving tips:
*Pure baking soda is GAPS-legal, however it is a strong alkalizer so it can reduce stomach acid (and GAPS people typically already have low stomach acid).  My family avoided using baking soda for the first few months on GAPS just in case.
**If you use an immersion blender to combine the ingredients, you can skip the step of sifting the coconut flour.  This also gives you less dirty dishes!
***While you are at it, why not make a double batch of muffins and throw one dozen into the freezer?  It doesn't take much more time, and they will make a very easy breakfast for some other week.

Tuesday, May 8, 2012

Another Diet and Health Update

A couple months ago, I posted my results after two months on the Matt Stone's Diet Recovery program. Since people keep asking how things are going, I thought a detailed blog post was in order.  It has been two months since the last update.
  
Month 3
During the 3rd month I wanted to really slow down the weight gain, so I cut back the ice cream a bit.  Previously, I was eating it twice a day (which REALLY helped me to maintain steady energy levels), so I dropped this back to only eating it once a day at breakfast.  I had a bit more exercise this month and observed that it can really have a detrimental effect on my body temps.  I continued to manage my mild joint pain by eating a mostly GAPS-legal diet (probably about 95%), with the exceptions being potatoes once or thrice a week and homemade popcorn occasionally.

Not-so-good progress
  • Waking body temperatures are a good indicator of the state of the body's metabolism, so I've been tracking my temps to see how I am progressing on restoring metabolism (which is one of the main premises of the Diet Recovery program). Back in February, my waking body temperatures plummeted after a high-intensity burpee workout. In the first half of the March, my temps stayed low, and then fell even further after I spent a week working hard physically to build a chicken coop (but it sure was a fun week for me and the kids).  
  • Unlike the previous two months when I had normal menstrual cycles, my menstrual cycle in March dropped to only 23 days with very little bleeding.  This is a sign that my hormones are out of whack (and this should be helped by restoring my metabolism).
  • My energy levels were more variable once again, with some very low energy (lethargy) spells.  This is a problem I've been struggling with for over a year.  Overall, my energy levels in March were still much better than before I started the Diet Recovery program, but they were worse than the previous month.
Good progress
  • Weight gain was only a few pounds.  This brought the total gain since January to around 10-12 pounds. 
  • Protandim (an herbal supplement) was recommended to me by someone from our local WAP group, who had very good results with using it to help his adrenal/thyroid problems (it even got him off his thyroid meds).  I don't normally take any supplements; just my fermented cod liver oil and dessicated liver pills. But I figured I may as well try the Protandim to see.  I was surprised to note that my constipation and heartburn improved (better than they've been in years, and even better than when I saw good improvements from RRARFing on lots of potatoes/starches).  I also noticed that my hands and feet seem even toastier (and sometimes REALLY warm) since I started taking it.  
  • Once I started taking Protandim, my waking body temps started creeping up, even though I had decreased my ice cream consumption (high-fat ice cream is a huge metabolism booster). 
Month 4
During the 4th month, I wanted to stop the weight gain as I was not comfortable with gaining weight month after month (and my jeans were now too tight).  I continued eating a mostly GAPS-legal diet, although I increased my consumption of non-GAPS foods a bit during this month (still at least 90-95% GAPS, though). I continued to take a nap every day.  I started to do more yoga and walking. I continued to take Protandim.

I also changed my eating habits a bit after reading Geneen Roth's "Women Food and God".  I started paying more attention to my body's fullness cues, rather than just eating meals mindlessly. I was amazed to see that I get full much earlier than I've ever noticed, and have started to reduce the amount of food I put on my plate to correspond to how much my body actually wants to eat. I also started trying to really listen to what my body was telling me about what it wanted to eat, rather than what I thought I should eat. (This is something Matt Stone and Dr. Natasha Campbell McBride advocate as well.)  Rather than making myself eat some "healthy" scrambled eggs with breakfast, I've been listening to my body's cues, which have led to eating lots of grain-free cookies, and much less ice cream. I've noticed that first thing in the day, my body wants sweet carb foods, like cookies, and then later around mid-morning my body wants a savory meal.  My body also wants to eat more frequently, with smaller meals. 

I stopped checking my weight so frequently in April (which is another thing Matt Stone recommends), and vowed to only check it after the month was over. I've noticed previously that I tend to gain weight when I keep checking it frequently, but I am usually more stable or will even lose weight if I don't check it so frequently. 

Not-so-good progress
  • I avoided vigorous exercise for a few weeks, during which time my body temperatures started to come up into the normal range. I then did a slow-motion strength training regime (only about 20 minutes long).  Once again, my temperatures plummeted from working out.
  • Still having some energy problems, although my energy levels were better this month than in March.
Good progress
  • My temperatures recovered about a week after my strength training workout, and have continued to stay in the normal range for the last couple weeks!  This is a huge step for me, as it indicates that my metabolism is recovering.  
  • My moods have been much more stable when my temperatures are in the normal range.
  • I am able to do moderate yoga workouts and walk a mile or two without having any negative effect on my temperatures. 
  • My menstrual cycle in April was only 25 days long with very little bleeding.  I was glad to see the number of days increased slightly this month. 
  • I did not gain any weight, and actually lost a pound or two!! 
Looking Ahead
I feel like I have turned a corner in restoring my metabolism!  I am hopeful that this will help with my chronic heartburn and energy problems. I'm going to avoid doing any strength or interval workouts for the next few weeks and then see if I can slowly reintroduce these workouts without having a detrimental effect on my temperatures and metabolism.  In the mean time, I will keep up with yoga and walking.  I'll also keep taking Protandim, as that seems to really help my body progress in healing.

It has been very a interesting process of learning to trust my body instead of my mind in determining what I will eat.  I've been enjoying having more freedom with food, and will continue to listen to my body's cues on what to eat and how much to eat.  I will also only allow myself to check my weight once a month, rather than obsessing over what number appears every few days. 

Have you made any changes to your diet?  What were the results?

Sunday, May 6, 2012

Slow-Cooked Cajun-Spiced Beef Roast (GAPS-legal : primal : paleo : gluten-free)


This cajun-spiced beef roast recipe cooks all day, resulting in tender, flavorful meat. This recipe can be thrown together in just a few minutes in the morning, and the delicious aroma will pervade the house all day. The flavor of the herbs and spices pairs wonderfully with the rich flavor of the beef. 

Cajun-Spiced Beef Roast
Serves 8 generously
  • 4-5 pound beef roast, such as rump roast, pike's peak roast, or arm roast
  • 3 Tb cold butter, divided in half and chopped roughly (or more if your roast is lean)
  • 1 medium onion, sliced
  • 5 medium cloves garlic, minced
  • 1/2 Tb packed minced fresh oregano, or 1/2 tsp dried oregano
  • 1/2 Tb packed fresh thyme leaves, or 1/2 tsp dried thyme
  • 1 Tb ground paprika
  • 3 bay leaves
  • dash of cayenne pepper (or more if you like spicy foods)
  • 1 Tb plus 1 tsp chunky celtic sea salt
  • 3/4 tsp freshly ground pepper
  1. Spread the onion over the bottom of a large slow cooker or oven-safe pot.  Strew the bay leaves over the onion.  Sprinkle about half the butter over the top.
  2. If your beef roast is not quite thawed all the way, make a criss-cross on the top with a sharp knife.  You can also cut the roast in half, if you like, so more will be down in the yummy juices while cooking.
  3. Combine the remaining spices, herbs, garlic, salt, and pepper in a small bowl. Rub the herbs over the beef roast.
  4. Place the roast on top of the onion in the pot. Sprinkle the remaining butter over the top of the roast.
  5. Turn the slow-cooker on LOW, or place the pot in a 225 degree F oven, for 8-10 hours.
  6. About 30-60 minutes before meal time, pull the roast out onto a cutting board. Slice the meat thinly across the grain.
  7. Return the meat to the pot and nestle it down into the juices. Taste the sauce and add salt and pepper as needed. Turn the heat to "WARM" (or return to the oven, and just turn it off) and let it sit for 30 to 60 minutes.  This step allows the meat to soak up the juices and get super moist.
  8. Serve with your choice of side dishes, such as a green salad, roasted potatoes, or simple buttered veggies.  Leftovers freeze well for an easy weeknight meal!

Wednesday, May 2, 2012

Grain-free Sandwich Bread (GAPS : primal : gluten-free)

(I've moved! You can see this recipe at my new website here!)

After many tries, I have finally perfected my recipe for grain-free sandwich bread.  This bread stays together well, and works great for packing lunches to go. Since it is made with almond flour and coconut flour, this bread is quite filling.  

My family has been very happy to get to eat sandwiches once again with this bread. It works great for both savory sandwiches (like meat and cheese) and sweet sandwiches (like nut butter and jelly). It is also good with hamburgers (although I've gotten so used to eating them bunless that I prefer only one piece of bread with my burgers now).   This bread can be made into toast by using a toaster oven on 250 degrees for about 15-20 minutes (make sure the bread is not directly over the heating element, or it will burn). 

Grain-Free Sandwich Bread
Makes 1 loaf
  1. Melt butter in a small saucepan over low heat.  Turn off heat and allow to cool a bit.  Then stir in the honey and vinegar.
  2. Break the eggs into a medium bowl.  Add the salt, baking soda, almond flour, and butter mixture.  Mix together with an immersion blender or hand mixer. 
  3. Measure out the coconut flour.  It will need to be sifted if you are not using an immersion blender.
  4. Using an immersion blender or handheld mixer, mix the coconut flour into the other ingredients very well.  There is no worry of over-mixing this recipe since there is no gluten in it.
  5. Pour the batter into a well-buttered loaf pan.  I used a 9X5 glass pan.
  6. Bake at 300 degrees for about 50-60 minutes.  It will be done when it is set in the middle (you can lightly touch it, or check to see if a toothpick comes out clean).
  7. Let cool for about 15-20 minutes, and then use a spatula or knife to go around the edges.  Invert the pan and move the bread to a cooling rack.  Cool completely.
  8. Wrap tightly with plastic wrap. Store in the fridge or freezer. I like to slice it fairly thinly with a Rada bread knife, place parchment paper between the slices, and store it in the freezer.
This post is part of Traditional Tuesdays, Fat Tuesday, Monday Mania and Pennywise Platter!