Showing posts with label preservation. Show all posts

Monday, June 29, 2015

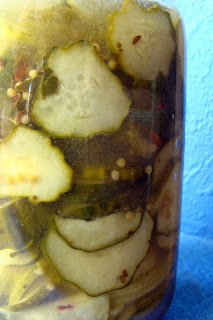
Fermented Bread and Butter Pickles (GAPS : primal : gluten- and grain-free : paleo)


This recipe for bread and butter pickles is the best fermented veggie I've had. Grown-ups love them, my kids love them, even people who don't typically eat fermented veggies love them.  These pickles are crispy and delicious. Even if you've disliked every fermented veggie you've tried, give these a shot!

This recipe is my favorite way to use up the abundant squash and zucchinis at this time of year. And, you can even reuse the brine and spices for another batch once the pickles are gone.

Fermented Bread and Butter Pickles
Makes 1 quart
  • 3-4 medium cucumbers (OR zucchinis or summer squash*)
  • 1 tsp mustard powder
  • ~20 celery leaves, a stalk of celery, OR a 1/4 tsp of dried celery seed
  • 1/2 cup raw mild honey
  • 1/2 cup raw apple cider vinegar
  • 1.5 Tb celtic sea salt
  • 2 Tb whey
  • 1 Tb mild pickling spice**
  • Equipment needed: quart mason jar or Fido jar, rock for weighing down the cucumbers (boil the rock in water for several minutes to make sure it is very clean), cloth tea bag (optional)
  1. In a medium bowl, combine mustard powder, honey, vinegar, salt, and whey.  Stir well to dissolve the honey and salt.  You may need to leave this sitting for an hour or two to get everything to dissolve and combine well.
  2. Wash the cucumbers and celery well.
  3. Remove and discard the ends from the cucumbers.  Slice the cucumbers evenly; I've used my favorite knife, a mandoline, or the food processor and they all worked wonderfully. 
  4. Add the celery leaves/stalk (if using) to the bottom of the jar.
  5. Put the pickling spice and celery seed into a cloth tea bag.  This makes it so that you won't have spices stuck to the pickles when it is time to eat them.  If you don't have a cloth tea bag, you could just put the spices in the bottom of your jar.  
  6. Add the cucumber slices to the jar, packing them down tightly.  Put in the cloth bag of spices around the middle of the jar and then keep packing in the cukes.
  7. Pour the honey/vinegar mixture over the cucumber slices.  
  8. Pack down the cucumbers so that they are covered by the liquid. If your cucumbers keep floating up to the top, try weighing them down.  I use a rock from my yard to hold the cukes down (I originally boiled the rock in water for a few minutes to make sure it was nice and clean, and then cooled it down before putting it on top of the cucumbers.)  There should be at least 1-inch of head space at the top of the jar.
  9. Scrape any spices or cucumber bits that are stuck to the jar back down into the liquid.  Then use a clean cloth or paper towel to wipe the inside of the jar above the liquid.  (This will help in making sure that the ferment works well and no funky stuff grows at the top of the jar.)
  10. Put a lid on the jar and leave at room temperature for 2 days; then transfer to the refrigerator. You can taste-test a pickle slice to make sure they are ready before moving them to the fridge. If you'd like them a little more pickled, leave them out for another day.
  11. Enjoy!  Once your pickles are all gone, don't throw out that brine and the remaining spices.  Rather, chop some more cucumbers, pack 'em into a clean jar, pour the brine/spices over them, and ferment again! The flavor of the second batch will be a little muted, but still totally tasty!
*Zucchinis and summer squash make great pickles too, BUT they will be soft instead of crispy.
**I buy Frontier brand mild pickling spice from the bulk section at the natural foods store.  If you can't find pickling spice, blog reader Brian has shared his recipe for pickling spice as follows:
Makes enough for 6 quarts of pickles
4 TBS yellow ground mustard
3 tsp cinnamon
1 TBS allspice
1 TBS dill weed
1 TBS celery seed
1 TBS red pepper flakes
1 tsp cloves
1 tsp caraway seed
1 tsp ground ginger


Links to Amazon are affiliate links. If you use these links, your price remains the same, but I earn a small commission. Thanks for supporting this site!

Friday, March 6, 2015

Planting Fruit Trees

Fruit trees are one of the easiest ways to grow our own food. Few foods can rival fruit that is fresh-picked from a tree.With very little maintenance, fruit trees will grow and thrive, producing more and more food each year. 

We moved to a larger property about a year ago. Bees buzzing around fruit blossoms have become a herald of Spring for me, so it was bittersweet leaving behind the apple, plum, and apricot trees at our old home. They were just finally starting to produce a good amount of fruit, and we missed being able to pick fruit in our own yard last year. So it's time to plant some new fruit trees!

The Right Time for Planting Trees

Here in the desert Southwest, Spring, Winter, and Fall are the best times to plant fruit trees. The intense summer heat and lack of rain can be too much for newly-planted trees, so it is best to give them some time to get established before summer arrives. We planted four apple trees last autumn, and today my children helped me plant two more apple trees plus two peach trees. 

Inspired by his sister's chicken egg business, my 5-year-old son has been planning to have an apple business.  He has been saving money for trees little by little, but given that it will take several years for any substantial apple harvest, my husband and I decided to go ahead and get some trees in the ground for him last Fall.  With the help of a recent birthday gift from grandma, my son now has one more apple tree for his business. He is very proud of his three apple trees, and asks many people if they would like to be his apple customers.

Tips for Planting Fruit Trees

Whenever I have gardening questions, I always rely somewhat on my mother to point me in the right direction.  She has a truly stunning backyard and much experience with gardening here. I also found many helpful pointers in my Extreme Gardening: How to Grow Organic in the Hostile Deserts and Rainwater Harvesting for Drylands and Beyond, Volume 2 books. Here are some tips we implemented in planting our new fruit trees:

  • I used my Sunset Western Garden book to select varieties of apple and peach trees that are suited for our climate zone.
  • Because apple and peach trees need a certain amount of winter chill in order to produce a good amount of fruit, our trees are planted in the coolest part of our yard.
  • The planting holes were dug to about the same depth as the roots of the trees, but several times larger around.
  • The soil that was used to backfill the planting holes was not amended; this way, the trees will adapt right away to our sandy soil. 
  • Each tree was planted slightly below the level of the surrounding ground, so that water will pool around the trees.
  • I created a half-circle rain-harvesting berm around each tree to capture rain water. These are oriented so that the water flowing over the slightly-sloped ground during our July-August rainy season will naturally collect around the fruit trees.   
  • There is a ~3-inch layer of composted manure around the base of each tree, to increase water retention and provide nutrients throughout the coming months.  I made sure the compost is not in direct contact with the tree trunks.
  • Each tree was planted with the graft (where the rootstock and fruit tree are joined) facing East, to protect it from the wind. 
  • Because we have high winds in the Spring, I placed some heavy rocks at the base of the trees to prevent them lifting up from the ground when the high winds hit.
  • Regular water will be provided to the trees because it does not rain here very often at this time of the year. Over time, I will move the watering source away from the trees to encourage the roots to spread out further and further.


Companion Planting with Fruit Trees

One of my favorite things about the Extreme Gardening book is that is provides companion planting suggestions for each type of plant.  For instance, it lists the following as good companion plants that can be planted "thickly around the tree(s)" that we planted:
  • Apple companion plants:
    • Artemisia
    • Chives
    • Garlic Chives
    • Marigolds
    • Nasturtiums
    • Onions
  • Peach companion plants:
    • Basil
    • Chives
    • Garlic Chives
    • Nasturtiums
    • Onions
    • Strawberries
    • Tansy
Because our fruit trees are planted outside of our fenced yard, I will only be planting companion plants that rabbits don't prefer to eat.  So we will plant marigolds and green onions around the apple trees, and we will plant basil and green onions around the peach trees.

Looking Ahead

We are planning to plant many more fruit trees on our property over the coming years. Pears, plums, and apricots for sure, and maybe some pecans, pistachios, and almonds. I love the idea of having a food forest, and am very interested to see how the rainwater harvesting techniques pan out.


What homesteading tasks are you working on this Spring?

Sunday, October 26, 2014

Make Your Own Pumpkin Puree


With Halloween and Thanksgiving just around the corner, it's time to make pumpkin puree.  Homemade pumpkin puree is much more tasty than the canned variety. 

My method for homemade pumpkin puree is simple: bake whole, scoop, and puree!  Each year, I make lots of pumpkin puree, to be stored in the freezer.  Lots of pumpkin pie clafoutis, pumpkin spice bread, and pumpkin crumble will keep us happy over the winter.

You can use any type of winter squash you like, such as pumpkin, hubbard squash, and butternut squash. My favorite type of pumpkin to use for puree is NOT the sugar pie pumpkin. It is actually a variety of pumpkin called the Long Island Cheese. This pumpkin has vibrant orange flesh and excellent sweet flavor.


Recipe: Homemade Pumpkin Puree


Baking whole pumpkins is the easiest way to cook them. It does take a while, but it is so much easier than trying to cut up a raw pumpkin as they are VERY hard before they are cooked. 
  1. Place the whole pumpkins on your oven rack. I place a cookie sheet underneath just in case of any drips.  
  2. Bake for several hours at 200 degrees F.  A ten pound pumpkin will take about 3 hours to cook.  Larger pumpkins will take closer to 4 hours. A small pie pumpkin should be done in 1-2 hours. 
  3. To test for doneness, wrap your hands with a dish towel and gently squeeze the pumpkins.  Check them on multiple sides (and you may even need to rotate the pumpkins partway through if you cook more than one at a time, like I do). If the pumpkins are soft enough to squeeze a bit, then they are done!
  4. Remove from the oven and place on a cookie sheet or large baking tray (such as a 9X13 glass dish). Carefully use a knife to make a slice down one side of the pumpkin, slicing all the way down to the bottom. This allows the water and heat in the pumpkin to be released.  Let cool for awhile.
  5. Once cool enough to touch, finish cutting the pumpkin in half. This is amazingly easy to do since the pumpkin has already been cooked. Scoop out and discard the seeds and stringy bits.  
  6. Being careful to not get any of the skin, scoop the soft flesh out with a spoon and place it into a food processor.  Let the food processor whir the flesh to make a beautiful puree. This may take several batches depending on the size of your pumpkin and food processor.
  7. Store the puree in airtight containers.  Keep it in the fridge if it will be used in the next few days. Otherwise, store it in the freezer, where it will last for many months.  
What are your favorite ways to use pumpkin puree?

Wednesday, June 19, 2013

Picking and Preserving Cherries

Each June, my family has a tradition of driving up into the mountains to pick cherries. We live in the very hot, very dry desert of southern New Mexico where it is too hot for cherries to grow. With just a 1&1/2 hour drive, we can pick cherries in a much cooler climate up in the mountains.  With temperatures at our house topping out over 100 degrees most days right now, it is a wonderful treat to drive up into the forest and enjoy the cooler weather.


This year, a late frost made the cherry harvest much smaller than usual, so that the U-Pick farm we usually visit was not open for regular hours. However, we were able to make an appointment to pick cherries there, and in a few hours we picked about 16 pounds of cherries.  Because these cherries were picked at the peak of ripeness, their flavor is far superior to anything we could buy in the store.


Now most of the cherries are in the freezer so we can enjoy them for the next few months.  In the past, I would often pit many cherries to freeze, but it was very time consuming and very messy.  Nowadays, I just pack the cherries (with stems still attached) into quart-sized freezer bags.  We thaw them a few at a time whenever we want to eat some, and they are most often eaten with some plain, whole milk yogurt. 


Do you have any family traditions for harvesting foods during their peak season?


--------------------------------------------------------------------------------------------------------

This week, my grain-free eCookbook, Nourishing Eats, is featured in a real foods eBook bundle from my affiliate partner, the Nourished Living Network. From June 17-24 only, you can get 5 eBooks with a retail value of $69.80 for only $14.97. Click here to see more details about this eBook bundle.

Thursday, May 23, 2013

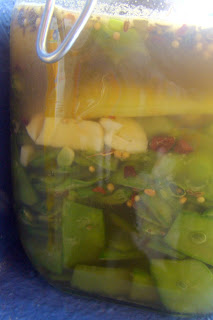
Sweet and Sour Snow Peas (fermented : grain-free : GAPS : primal)

Since my mom had her usual bumper crop of snow peas this spring, I came up with a new fermented veggie that is especially loved by my 3-year-old son: sweet and sour snow peas!  These are deliciously crispy, tangy, and sweet, with just a little tad of a spicy bite from some added garlic.  What a yummy way to get some probiotics.

Sweet and Sour Snow Peas
  • ~3.5 cups of snow peas
  • 3 medium cloves of garlic
  • 1 tsp mustard powder
  • 1 stalk of celery, OR a generous pinch of celery seed
  • 1/2 cup raw mild honey
  • 1/2 cup raw apple cider vinegar
  • 1.5 Tb celtic sea salt
  • 2 Tb whey
  • 1 Tb pickling spice*
  • Equipment needed: quart mason jar or Fido jar, rock for weighing down the peas (boil the rock in water for several minutes to make sure it is very clean)
  1. In a medium bowl, combine mustard powder, honey, vinegar, salt, pickling spice, celery seed (if using) and whey.  Stir well to dissolve the honey and salt.  You may need to leave this sitting for an hour or two to get everything to dissolve and combine well.
  2. Wash the peas and celery stalk well. Remove and discard the ends from the peas. 
  3. Peel the garlic and check to make sure it looks very good. (I would not use any garlic that has brown spots in a fermented food, as I want to make sure I'm not introducing any molds to the jar.) Slice the garlic.
  4. Pack the peas, celery, and garlic into the jar.
  5. Pour the honey/vinegar/spice mixture over the veggies.  
  6. Pack down the veggies so that they are covered by the liquid. If your peas keep floating up to the top, try weighing them down.  I use a rock from my yard to hold the peas down (I originally boiled the rock in water for a few minutes to make sure it was nice and clean, and then cooled it down before putting it on top of the veggies.)  There should be at least 1-inch of head space at the top of the jar.
  7. Scrape any spices or veggie bits that are stuck to the jar back down into the liquid.  Then use a clean cloth or paper towel to wipe the inside of the jar above the liquid.  (This will help in making sure that the fermentation process goes well and that no funky stuff grows at the top of the jar.)
  8. Put a lid on the jar and leave at room temperature for 2 days; then transfer to the refrigerator.
  9. Enjoy!  These peas make a great probiotic side dish, or a crispy snack any time.
  10. Once your peas are all gone, don't throw out that brine and the remaining spices.  Rather, prepare some more veggies (such as peas, onions, zucchini or cucumber slices), pack 'em into a clean jar, add some fresh spices, pour the brine over them, and ferment again! This is a great way to make the most of the brine ingredients.
*I buy Frontier brand mild pickling spice from the bulk section at the natural foods store.  The pickling spice is a mixture of organic yellow mustard, organic cinnamon chips, organic allspice, organic dill seed, organic celery seed, organic bay leaf, organic mild chilies, organic cloves, organic caraway, and organic ginger root.

Thursday, May 16, 2013

Homemade Freezer Waffles (soaked whole grain : gluten-free : nutrient-dense)

Freezer waffles are one of my family's staple breakfast foods.  We make a very big batch once every 4-6 weeks, and then we have the convenience of eating them for breakfast any time we'd like. Whether topped with butter and syrup, butter and jam, or even nut butter and jam, we all love to eat waffles for breakfast.

Years ago, I made freezer waffles from soaked spelt and soaked oatmeal.  Now that we avoid gluten and try to limit most grains (since they can cause behavior problems in our daughter), I developed a new freezer waffle recipe based on millet, arrowroot, and coconut flour.  Even though I use whole millet in this recipe, a grain grinder is NOT required as a blender works wonderfully to grind the millet.

These waffles hold together well and can be warmed in the toaster oven or toaster.  Like most freezer waffles, they need to be watched carefully to make sure they don't burn. I've given recipe amounts for the both the huge batch that I make as well as a smaller amount in case you want to start with less.

Tuesday, March 26, 2013

How to Make Flavored Kombucha Tea

We've been brewing our own kombucha tea for several years now.  We brew multiple gallons of kombucha at a time, and over the last year or so we've experimented quite a bit with making different flavors. Making flavored kombucha tea is really quite simple to do, but there are some subtle differences to making each flavor the best it can be.

Start with Some Finished Kombucha

To make flavored kombucha, you need to start with some plain kombucha. You can see my recipe for making kombucha tea here. We pour the finished kombucha into 2-cup jars and flavor each jar individually. We like to save bottles from the GT's kombucha sold in stores for this purpose, and we also use mason jars.  If you want your kombucha to be extra fizzy, Fido jars work well.  I wouldn't recommend using bottles with very small openings with this method, as it will be particularly difficult to clean them out and make sure that all the flavoring bits are removed.

Our Favorite Flavors

These are the flavors we keep making time and time again. With all of these flavors, a short fermenting time on the counter helps develop the flavors and create a bit of fizz.  The ideal fermenting time varies a bit with each flavor, so read below for specific details.  All of the amounts listed below correspond to a 2-cup (16-ounce) jar of plain kombucha.
  • Raspberry - Raspberry kombucha is slightly sweet and delicious.  This is a great flavor to use for people who haven't learned to love the tanginess of kombucha quite yet.
    • I find that frozen raspberries have the best flavor and the least chance of any mold contamination. The berries you use must be absolutely mold-free, else the kombucha will be nasty.
    • Add ~6 raspberries to each jar. 
    • Leave the jar to ferment on the counter for 2 days and then transfer to the refrigerator.
    • When pouring the raspberry kombucha from each jar, a fork can be used to keep the berries from falling into each drink.  Our backyard chickens absolutely love to eat these kombucha-flavored berries, but they would also be a great addition to the compost heap.

  • Fresh Ginger - Fresh ginger added to kombucha makes an amazingly refreshing drink.
    • Use either a garlic press or a juicer to prepare the ginger. I do not recommend chopping/mincing the ginger for use in kombucha because it is rather fibrous.  Using a garlic press or juicer will remove most of the fibrous material, and the kombucha is much better without it. I slice the ginger into roughly 1/4-inch pieces before pressing it in my garlic press. 
    • Add the pressed/juiced ginger to each jar of kombucha.  Even a small amount (< 1/8 tsp) of ginger per jar is delicious, but for the best flavor I like to use a larger amount (~1/4 tsp).
    • Leave the jar to ferment on the counter for 1-2 days and then transfer to the refrigerator.
    • We drink this kombucha and the ginger bits without straining it.
  • Lemon - Lemon kombucha is superb!  Such a simple, fresh flavor.
    • Use a reamer to juice some lemons. Don't be tempted to just squeeze the lemons, as you will get MUCH more juice using a reamer. It is fine if there is pulp along with the juice, but be sure to remove any lemon seeds.
    • Add 1-3 tsp lemon juice per jar. Using 3 tsp will give you a nicely tart drink, whereas 1 tsp of lemon juice adds a more mild flavor.
    • Only allow lemon kombucha to sit on the counter for 12-15 hours. If it sits out longer, it will grow lots of little SCOBY bits that aren't desirable for drinking.
    • We drink lemon kombucha without straining out the pulp.
  • Lemon Ginger - Lemon and ginger combine to make a very tasty drink.
    • Prepare the ginger and lemon juice using the same methods described for the lemon and ginger kombuchas.
    • Add 1/4 tsp ginger and 2 tsp lemon juice to each jar.
    • Only allow ginger lemon kombucha to sit on the counter for 12-15 hours. If it sits out longer, it will grow lots of little SCOBY bits that aren't desirable for drinking.
  • Lemon Raspberry - Lemon raspberry kombucha is reminiscent of raspberry lemonade, but with a delicious tanginess.
    • Prepare the lemon juice using the same method described for the lemon kombucha.
    • Add 6 raspberries and 2 tsp lemon juice to each jar.
    • Only allow lemon raspberry kombucha to sit on the counter for 12-15 hours. If it sits out longer, it will grow lots of little SCOBY bits that aren't desirable for drinking.
  • Triple Tasty! Ginger, Lemon, and Raspberry - For an extra flavor punch, try combining all three flavorings.
    • Prepare the ginger and lemon juice using the same methods described for the lemon and ginger kombuchas.
    • Add 4 raspberries, 1/4 tsp ginger, and 2 tsp lemon juice to each jar.
    • Only allow triple kombucha to sit on the counter for 12-15 hours. If it sits out longer, it will grow lots of little SCOBY bits that aren't desirable for drinking.

Some Flavors We Haven't Enjoyed

There are a few flavors of kombucha we have tried that did not turn out so well: strawberry, orange, blueberry, and blackberry.  They are still drinkable, but nearly as tasty as our favorite flavors.

Do you brew your own kombucha?  Do you enjoy it plain, or flavored?  What is your favorite flavor?

This post is part of Fat Tuesday! 

Wednesday, January 23, 2013

How to Make Bone Broth and My Favorite Glass Container for Freezing Broth

Bone broth is a wonderful superfood that was a critical part of many traditional diets.  I make sure we always have bone broth in the freezer, and use it liberally in cooking.  Besides using broth for soups, I also incorporate it into many recipes such as curry meatballs and veggies, braised cabbage and sausages, white beans, rice, and veggies such as beets and green beans.

When I first started making homemade broth over 6 years ago, I followed the recipe in Nourishing Traditions which uses uncooked chicken. But over time, I figured out a much more cost effective and easy method that uses a roasted chicken carcass. Then last year, I started to incorporate some ideas from Nourished Kitchen's post on perpetual broth into my usual method.  So now, I am able to make LOTS of bone broth with just one chicken carcass. 

How to Make Chicken Broth

  1. Start by roasting a chicken and then picking the carcass clean. We love to eat roasted chicken.  After everyone has eaten their fill, I bring the chicken carcass to the table and pick the meat off the bones.  The meat gets stored in a glass container in the fridge to be used for another meal such as pizza or soup. 
  2. Put the chicken carcass into the slow cooker. All of the bones, juices, leftover skin, and chewy bits go straight into the slow cooker. If I have any on-hand, I also add some chicken feet to the stockpot.
  3. Add some fresh veggies and filtered water. For one chicken carcass, I usually throw in one quartered white onion and two carrots (peeled and cut into 2 or 3 chunks).  Add enough filtered water to cover it all. 
  4. Turn the pot on LOW and cook for 15-24 hours. 
  5. After the broth has cooked at least 15 hours, ladle and strain about half the liquid from the pot.  I especially try to make sure to get most of the fat out of the pot along with the liquid, as I don't think it is a good idea to let the fat keep cooking for an extended period of time. I pour the broth into glass jars for freezing (I talk more about that below).  Anytime after the 1st night of cooking, feel free to dip into the pot to get stock for any cooking needs, or even enjoy a nice warm cup of salted broth first thing in the morning. OPTIONAL: At this point, you could pull out the veggies and pick some more meat/skin off the carcass. There is quite a large amount of meat, skin, and connective tissue that was too tough to eat before making broth, but these parts are wonderfully tender after being simmered in the broth. Add a splash of broth and some salt and pepper to make a large bowl of soup (enough for 2-3 people). This soup can either be eaten right away, or stored in the fridge as an easy meal for later. 
  6. Add more filtered water to the pot and cook the bones some more. And you can throw in some more fresh carrots and onions if you removed them during the previous step. Continue to cook on Low. 
  7. Each day, ladle off some more broth and add fresh water. In this way, you can make lots and lots of broth with just one chicken carcass.  I usually continue this process for about 4-6 days to really stock up the freezer.  And, despite what you may think, the broth does not get watered down with this method.  The broth actually gets more and more rich as the days go by, peaking around day 4 or 5.  This is because the bones continue to break down into the broth over time.  I find that the broth made after the 2nd day has a very concentrated, rich flavor and a deeper brown color, so that I need to use only half as much in recipes (making up the balance with filtered water). 
  8. Strain and freeze the broth (or store in the fridge if it will be used in the next few days). I do not skim the fat off the stock, as it makes the broth more nourishing and flavorful.

Tips for Freezing  (and Thawing) Broth

I always freeze my broth in glass containers.  Plastic can leach into foods, especially with changes in temperature, so I don't use plastic for freezing broth. I've definitely had my share of glass jars that have cracked during freezing, but over time I have figured out the tricks to successfully freezing (and thawing) broth in glass jars.
  • Leave plenty of head space.  As the broth freezes, it will expand, so it is important to leave plenty of space above the broth for expansion during freezing. A general rule is to make sure you leave more than 1-inch of space above the liquid in the jars.  You can see in the picture above that I have left lots of space for expansion during freezing.    
  • Let the broth cool to room temperature on the counter without the lids on.  Once the jars are cool enough to touch comfortably, put the lids on and transfer them to the freezer. 
  • Not all jars are created equally.  For freezing large quantities of broth (such as pints or quarts), I find that mason jars work best.  Other jars, such as the ones you buy containing coconut oil, are more likely to crack in the freezer.
  • My favorite jars for freezing broth: tomato paste jars! These jars are great for many reasons: 
    • Since I use plenty of tomato paste to make homemade ketchup, I always have plenty of these little jars around.
    • These small jars don't seem to break as easily as bigger jars.  I've frozen hundreds of these little jars of broth, and only ever had one of them break (because it was overfilled).
    • Small jars are easy to fit into little leftover spaces in the freezer.
    • The amount of broth in small jars is perfect for when I just need a little bit of broth (such as when making caramelized green beans).  And of course, multiple small jars can be used when larger amounts of broth are needed.
    • Small jars thaw very quickly, so even if I didn't plan ahead, I can still use homemade broth in my recipes.
  • To thaw broth in glass jars:
    • If you have time, thaw jars of broth in the fridge overnight.  
    • In a pinch, it also works to thaw jars of broth in a big bowl of water.  The key to thawing jars in water is to make sure you do NOT use hot water initially.  Placing a frozen jar into hot water puts a big thermal shock on the glass, which can cause it to crack.  
      • Start by placing the frozen jar into cool water.  Let it sit for about 10 minutes.
      • Replace the cold water in the bowl with warm water and let it sit a few minutes. 
      • Then you can put hot water into the bowl to speed things up.  
      • There is no need to wait for the broth to completely thaw.  Just wait until there is enough thawed that the remaining chunk of frozen broth can come out into whatever you are cooking.
Do you have any tips for making and storing broth? 

This post is part of Pennywise Platter!

Saturday, September 15, 2012

Apple Season!

Fresh apples are a wonderful treat at this time of year.  I try to avoid buying apples at other times of year when they are not in season (like during the spring and summer).  Eating fruit as it comes in season is a great way to ensure that the fruit you buy will always be fresh and delicious, rather than picked and then transported for weeks from some far away locale.  This year, our two apple trees provided us with plenty of apples right from our back yard.

Enjoy them now
We love to eat apples raw, and there are also some great ways to cook with apples.  Some of our favorite ways to cook with apples are:

  • Apple clafoutis is one our top five grain-free breakfasts. 
  • Cooked apples make a delicious side dish alongside pork or chicken.  Simply combine chopped apples with some butter, a dash of salt, and a bit of honey if desired. Then cook for about an hour over low heat.
  • Caramel apples are a delicious treat!
  • Apple cinnamon muffins are another beloved grain-free breakfast in our home.  

Preserve some apples
To extend our apple enjoyment, I like to preserve lots of apples.  An apple corer-peeler-slicer is essential to save time.  My favorite ways to preserve apples are:
  • Dried apples: Core and slice the apples; then dry them in a dehydrator or oven at the lowest temperature.  We like to dry them until they are nice and crispy.  Dried apples make a great snack, and they can also be used to make apple raisin snack bars.
  • Spiced apple butter: Throw cored apples (whole or sliced, with the peel on) into a slow cooker and let them cook all day.  Add spices like cinnamon, vanilla, ginger, and cloves.  Add a pinch of salt and some honey if desired.  Then blend it all with an immersion blender until it is nice and smooth.  I store apple butter in small jars in the freezer rather than canning it. It is wonderful stirred into a bowl of yogurt, on buttered toast, or on top of some homemade ice cream.
  • Apple worms: Rather than throwing the apple peels into the compost bucket, I combine them with a dash of maple syrup and sometimes sprinkle them with a touch of cinnamon. Then dry them in the oven for several hours at 200 degrees F.  The result is a wonderful, crispy snack!  My kids gets a kick out of eating these "worms".
  • Frozen raw apples: In a large pot or bowl, combine cold filtered water and some sea salt (I use 1/4 cup salt to one gallon water). Core, peel, and slice the apples, and then chop them a bit more into smaller pieces.  As each apple is prepared, drop the pieces into the salt water.  Once all the apples are immersed, give them a stir. Drain into a colander and do NOT rinse the apples.  Put the apples into quart freezer bags, and transfer to the freezer. Frozen appples are  wonderful in the middle of winter cooked into clafoutis or an apple crisp. 
  • Frozen cooked apples: Peel, core, and slice apples.  Cook them over low heat with a dash of salt and a little butter or coconut oil.  When they are nice and soft, they are done!  Scoop them into glass jars or bowls and freeze them.  These make a great quick side dish or treat.  
  • Apple core and peel jelly: Leftover apple cores and peels can be cooked to make a simple apple jelly.  I combine the peels and cores of about 20 apples with about 6 cups of water.  Cook over at a low simmer for about an hour, then strain.  The resulting apple liquid can be combined with sweetener of your choice to make jelly.  I use Pomona's pectin, which allows you to use any sweetener you like in much lesser quantities than traditional jelly recipes.
What are your favorite apple recipes? Are you preserving any apples this year?

Sunday, January 29, 2012

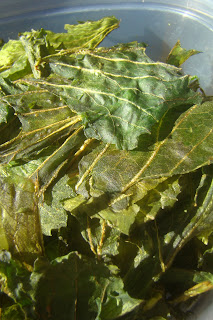
Basic Kale Chips (GAPS-legal, grain-free, paleo/primal)


I just harvested our first bunch of kale from the garden, so we made kale chips this week.  The kids and I love kale chips; they are so crispy and delicious.  They are a little bit time-consuming to make, but a wonderful way to eat your greens!  I like to send the kids outside with their portion because the chips are a bit delicate so they can make lots of little crumbs while they are eating.

Basic Kale Chips
  • One bunch kale
  • 1-2 Tb refined coconut oil, melted and cooled slightly
  • finely ground celtic sea salt
  1. Rip or cut the tough stems off the kale.  Discard the stems or save them for another purpose.
  2. Wash the kale and then dry it well.  I like to use either a salad spinner or a couple towels to dry the kale.  If you do not dry it well, it will steam rather than crisping in the oven.
  3. Rip the kale into chip-sized pieces and place it onto a couple baking sheets in a single layer.  Try not to have much overlap of the pieces of kale, or they won't cook properly into chips.
  4. Drizzle the melted coconut oil onto the kale.  Try to use just enough oil to coat the kale, but not too much or the chips will be overly greasy.  Use your hands to thoroughly mix the oil onto the kale leaves. 
  5. Sprinkle the kale with a generous amount of celtic sea salt.
  6. Bake the kale chips in a 250 degree oven for about 30-45 minutes.  They are done when they are nice and crispy.  They are wonderful straight from the oven.  
This post is part of Frugal Days, Sustainable Ways, Fat Tuesday and Monday Mania!

Thursday, December 1, 2011

Tallow Container Candles

Tallow, which is rendered beef fat, was traditionally used to make candles hundreds of years ago.  The last time I rendered some tallow, I found that making tallow candles is very easy! We've been enjoying the soothing light created by these tallow candles in the evenings.  And I have not noticed any beefy smell from these candles. They would also make a wonderful Christmas present!

Tallow Container Candles
Equipment and ingredients needed:
  • hot glue gun and glue sticks
  • small mason jars (or other glass containers of your choice)
  • cotton wick material
  • pure tallow
  • spoons and clothespins (for centering the wicks in the jars)
  1. Plug in your glue gun so it can start warming up.  I like to place it over a paper towel to catch any little drips.
  2. Cut wicks to the appropriate size for your containers.  Make sure you leave a bit extra to be glued onto the bottom of the jar, as well as for holding the wick in the center of the jars.  It worked well for me to make the wicks about 2 inches longer than the height of my jars.
  3. Use hot glue to glue the wicks to the middle of the bottom of the jars.
  4. Use a spoon and clothespin to stand the wick upright in the jar.  Try your best to get the wick right in the middle of the jar.OF course, if you pull too hard the glue wil detach from the bottom of the jar.
  5. Melt the tallow.  I actually just scooped it right off the top (once it had been strained) the last time I rendered tallow, which saved the step of melting it.
  6. Pour the tallow into the jars.  Let them sit for several hours or overnight to harden before you remove the spoons and clothespins.
  7. Allow the candles to fully harden before you light them.  This will take at least 12 hours. Beware that the tallow does not get super-hard like paraffin candles from the store (I'm sure this depends on just how cool your house is in the winter).
  8. Trim the wicks and light the candles. Enjoy the soothing atmosphere of candlelight! 
This post is part of Frugal Days, Sustainable Ways, Fat Tuesday, Monday Mania, Fight Back Friday and Handmade Christmas Gift Carnival!

    Friday, November 25, 2011

    Two Ways to Render Beef Tallow

    Beef tallow is a wonderfully healthy fat for cooking.  It is very heat stable, even for frying. Beef tallow from grassfed animals contains conjugated linoleic acid (CLA), which is a fatty acid proven to help in the fight against cancer.

    Making your own tallow is easy, if a bit time-consuming.  The most difficult part is chopping the meat into very small pieces, but a food processor makes this easier. Once the fat is finely chopped, you can render it on the stovetop or in a slow cooker.  Both methods work well.

    When we place our yearly order for beef, we make sure to request the fat from the butcher.  If you don't buy beef in bulk, you could check with a butcher to see if you can buy some beef fat. They may even give it to you for free!

    How to Render Tallow
    Ingredients needed: raw beef fat
    Equipment needed: food processor, slow cooker (optional)
    1. Make sure your beef fat is cold.  This will make it much easier to chop with your knife, and the fat must be cold when you put it into the food processor.
    2. Chop up beef fat into 1-2-inch pieces using a sharp chef's knife.  Both cubes and small strips will work. Remove and discard any meaty bits from the fat. 
    3. To chop the fat into very small pieces, use a food processor.  The best way I found to do this is to drop the chunks of fat into the food processor while it is running.  This keeps the fat from binding up the blade of the food processor.  My food processor has a hole in the pusher lid that can be used to drop food in while the processor is running.  Drop in the fat a bit at a time, in fairly rapid succession. You don't want to over-chop the fat, as it will turn into a sticky paste.  Ideally, the fat will look shredded when you are done processing it.  If you are making a lot of tallow, plan to do several batches in the food processor. 
    4. To render the tallow on the stovetop, place the finely chopped fat into a heavy-bottomed pot.  Use the lowest possible heat, and stir occasionally. I was surprised at how quickly the fat started to melt down on the stovetop, even with the tiniest flicker of flame under it.  Continue to cook the fat until all that remains is meaty-looking pieces. It took about 1.5 hours for my tallow to render on the stovetop.
    5. To render the tallow using a slow cooker, set the cooker on low.  You may want to stir it every hour to speed things up a bit.  Continue to cook the fat until all that remains is meaty-looking pieces. It took about 3.5 hours for my tallow to render in the slow cooker. 
    6. Allow the rendered fat to cool slightly, and then pour it through a fine mesh strainer to remove the meaty bits. 
    7. Transfer the tallow to the fridge and cool completely.  
    8. Scoop the pure tallow from the top of the container and store in airtight containers.  I like to put the bit from the bottom of the bowl (that had little tiny flecks of meat) into the fridge and use that up first.  The pure tallow does not need to be refrigerated.
    This post is part of Pennywise Platter, Frugal Days, Sustainable Ways, Fat Tuesday, Monday Mania and Fight Back Friday!

      Thursday, November 10, 2011

      Make Your Own Pumpkin Puree

      My kids, Hubbard squash, and Cinderella pumpkin
      Thanksgiving is just around the corner, so it is time to make pumpkin puree.  My method is simple: bake, scoop, and puree!  This year, I made 16 pints of pumpkin/winter squash puree, to be stored in the freezer.  Lots of pumpkin pie clafoutis, pumpkin bread, and butternut squash soup will keep us happy over the winter.

      Recipe: Homemade Pumpkin Puree
      You can use any type of winter squash you like, such as pumpkin, hubbard squash, and butternut squash.  Hubbard squash and Cinderella-type pumpkins are my favorites for making pies.  They have such a beautiful orange color and much more flavor than your typical big round pumpkin.

      This year, I figured out that baking pumpkins whole is the easiest way to cook 'em. It does take a while, but it is so much easier than trying to cut up a raw pumpkin as they are VERY hard before they are cooked.  
      1. Place the whole pumpkins on your oven rack (I placed a cookie sheet underneath just in case of any drips).  
      2. Bake for several hours at 200 degrees F.  My 11-pound hubbard squash took about 4 hours to cook, and the others took about 3 hours.
      3. To test for doneness, wrap your hands with a dish towel and gently squeeze the pumpkins.  Check them on multiple sides (and you may even need to rotate the pumpkins partway through if you cook more than one at a time, like I did). If the pumpkins are soft enough to squeeze a bit, then they are done!
      4. Remove from the oven and place on a cookie sheet or large baking tray (such as a 9X13 glass dish).  Carefully use a knife to make a slice down one side of the pumpkin, slicing all the way down to the bottom.  This will allow the water and heat in the pumpkin to be released (and I was amazed at how much liquid came pouring out).  Let cool for awhile.
      5. Once cool enough to touch, finish cutting the pumpkin in half. This is amazingly easy to do since the pumpkin has already been cooked. Scoop out and discard the seeds and stringy bits.  
      6. Being careful to not get any of the skin, scoop the soft flesh out with a spoon and place it into a food processor.  Let the food processor whir the flesh to make a beautiful puree (and of course this may take several batches depending on the size of your pumpkin and food processor).
      7. Store the puree in the fridge if it will be used in the next few days. Otherwise, store it in the freezer. 
      This post is part of Sunday School, Frugal Days, Sustainable Ways, Real Food Wednesday, Fat Tuesday, Monday Mania, Fight Back Friday and Pennywise Platter!