Wednesday, September 28, 2011

Pesto and Dried Tomato Egg Cups (GAPS-legal, gluten- and grain-free)


Egg cups are at the top of the list for easy grain-free breakfasts in our household.  They are so easy to prepare and the leftovers reheat well for use during the busy weekdays. I often make up new variations so we won't tire of this breakfast staple.  This pesto and dried tomato variation is super tasty. My one-year-old scarfs these down.

Pesto and Dried Tomato Egg Cups
Makes 12 muffin cups
  • 7 large eggs, preferably from pastured chickens
  • 1/2 c. whole milk kefir (you could substitute whole milk or plain yogurt instead)
  • 1/4 tsp. freshly ground pepper
  • 1/4 tsp. salt
  • 2 Tb packed minced fresh basil
  • 6 oz mild cheddar cheese, shredded
  • 1/3 c. finely grated Parmesan cheese
  • 1 small clove garlic, minced
  • 2-3 Tb butter 
  • 1/4 cup dried tomatoes, chopped if necessary (I use some that I made in the dehydrator, but any store-bought ones would work; if you use the ones packed in oil you'll want to drain them well and pat them dry first)
  1. In a medium bowl, lightly beat eggs by hand with a whisk or fork. 
  2. Add all remaining ingredients (except butter and tomatoes) and stir to combine. 
  3. Line a muffin tin with paper cups (or you could grease it instead, but using the paper cups makes clean up much easier as well as allowing to reheat the muffins easily in the toaster oven). 
  4. Add a small dollop of butter (no more than 1/2 tsp) to each paper cup. Scoop egg mixture into muffin tins, filling each one about 3/4 full. I like to use a 3-Tb scoop for this.
  5. Sprinkle the dried tomatoes over each egg cup.
  6. Bake at 325 degrees F for about 18-25 minutes, until set. They will puff up while baking, but then deflate once removed from the oven. If I am making these to serve as breakfasts for later in the week, I will pull them out of the oven when the muffins on the side are set, but the ones in the middle still have a little jiggle.
  7. Cool slightly and serve.  Reheat leftovers by placing them in a toaster oven set at 225 degrees F for 20 minutes. 
This post is part of Fat Tuesday at Real Food Forager, Monday Mania at The Healthy Home Economist, Fight Back Friday at Food Renegade, Pennywise Platter at The Nourishing Gourmet and Real Food Wednesday with Kelly the Kitchen Kop!

    Sunday, September 25, 2011

    Fried Green Tomatoes (GAPS-legal, grain-free)

    As summer draws to a close, it is time to harvest green tomatoes before they freeze.  My favorite way to eat green tomatoes is battered and fried.  With a little experimenting, this year I learned how to make them grain-free and delicious!  Everyone in my family gobbled them up.  The hardest part is not eating them all straight out of the pan.

    Fried Green Tomatoes
    • green tomatoes
    • one egg (you may need more eggs if you're making a large batch)
    • coconut flour
    • salt and pepper
    • butter and refined coconut oil (or use all coconut oil)
    1. Slice the green tomatoes about 1/8-1/4 inch thick.  If they're too thin, you won't get that great zingy flavor of the tomatoes; if you make them too thick, the tomatoes will not cook enough before the batter burns.
    2. Break an egg into a bowl and beat it lightly with a fork.
    3. Put some coconut flour into a pie plate bowl (a pie plate works particularly well, but you could use a bowl instead).  Coconut flour is rather expensive, so I start with only about 1/4 cup and then add more if needed.
    4. Season the tomatoes and the coconut flour with plenty of salt and a little pepper. 
    5. To make battering easy, line up your tomatoes, then the egg, and then the coconut flour. 
    6. Melt a couple tablespoons of butter and refined coconut oil in a heavy-bottomed skillet over medium heat. 
    7. Dip the sliced green tomatoes first in the beaten egg, and then in the coconut flour.   Make sure they are well-covered with the egg and coconut flour.
    8. Pan-fry the battered tomatoes in the butter/coconut oil mixture in batches.  Let the tomatoes just hang out without moving them around; otherwise you'll lose most of the batter into the pan. You'll know it is time to turn them when the edges start to turn golden brown.  
    9. Line a plate or cooling rack with a paper towel or clean cloth.  As the tomatoes are done, place them on the towel to drain the excess oil.
    10. Between each batch in the pan, clean out the pan to remove all the little bits and remaining oil.  Otherwise, subsequent batches will have a burnt flavor since the coconut flour burns somewhat easily.
    11. Serve and enjoy!  These make a great side dish or starter course.  Make sure to add a little sprinkle of salt to the finished tomatoes if they need a little flavor kick.
    This post is part of Fight Back Friday at Food Renegade, Pennywise Platter at The Nourishing Gourmet, Real Food Wednesday with Kelly the Kitchen Kop, Fat Tuesday at Real Food Forager and Monday Mania at The Healthy Home Economist!

    Tuesday, September 20, 2011

    How to Prepare Your Gut and Birth Canal for Pregnancy and Birth

    A note from Sarah: I did not know about the importance of healthy bacteria prior to having my children. As I've learned more and more, I've wished I had this information 5 years ago!

    The baby's gut
    While in the womb, babies have a sterile gut; their guts have not been populated with bacteria.  As a baby is being born, it ingests some fluid from the mother's birth canal. This means that the bacteria in the birth canal actually begins the process of populating the baby's gut. 

    In our modern age of widespread antibiotic and pharmaceutical use, it is common for women to have abnormal bacteria in their bodies, and thereby in their birth canals as well. For instance, birth control pills "devastate beneficial bacterial flora in the gut leaving it vulnerable to colonization and dominance from pathogenic strains." As described in Gut and Psychology Syndrome (GAPS), improper gut bacteria can lead to small problems such as allergies and eczema, as well as big problems like autism, rheumatoid arthritis, diabetes, and cancer. Because the baby's gut is populated by fluid from the birth canal, women who have improper gut bacteria can unknowingly pass serious problems onto their newborn babies.

    Changes to make during preconception
    Ideally, both of the parents (and especially the prospective mother) should try to ensure that their gut bacteria is healthy before conceiving a child.  The GAPS Diet allows the gut to heal and become populated by beneficial bacteria. According to Dr. Natasha Campbell McBride,
    "If there are no serious digestive problems present, allergies, chronic fatigue, lethargy or any other typical GAPS symptoms in the partners, then I recommend following the full GAPS diet for 4-5 months prior to conception.
    If there is pronounced GAP Syndrome in any of the parents, particularly in the mother, follow the whole GAPS nutritional protocol until you are much healthier and feel that you are ready to conceive and go through pregnancy."
    What if you are already pregnant?
    If you are already pregnant, don't panic! Dr. Natasha Campbell McBride recommends the following:   
    "If you are already pregnant go straight into the Full GAPS Diet. However, read carefully the section on the Introduction Diet and follow the recommendations for introducing fermented foods, as they need to be introduced gradually (if you never had them before)."
    Preparing the birth canal
    Since the baby will be ingesting fluid from the birth canal, it is essential to make sure that beneficial bacteria is present.  In the weeks leading up to delivery, this can be accomplished by applying plain yogurt or kefir to the vaginal area every day after showering.  Additionally, Dr. Natasha Campbell McBride recommends inserting a probiotic capsule at bedtime once per week (or alternatively you could insert a piece of natural fabric that has been soaked in yogurt or kefir; remove the fabric from the vagina after several minutes).

    Birth location and method
    In addition to the fluid ingested by the baby in the birth canal, bacteria in the environment will populate the baby's system.  This is one more reason that birthing at home can have great benefits for the baby. Instead of being exposed to a plethora of random germs in a hospital, a baby born at home will only be exposed to the bacteria present at home.

    A natural birth ensures that the baby will have the opportunity to ingest the mother's bacteria, just as it was designed to do.  Whenever possible, use of antibiotics should be strictly avoided during and after birth, as these would wipe out any beneficial bacteria the baby ingests (and antibiotics are passed through breastmilk as well). Babies born by cesarean section may not have the opportunity to ingest beneficial bacteria from the birth canal (depending on whether the water was already broken and how far the baby descended during labor). Thus babies born by c-section may have their guts populated by the bacteria present in the hospital instead of the mother's bacteria.    

    Breastmilk provides beneficial bacteria
    Breastmilk, and especially colostrum, provides beneficial bacteria that can populate the baby's gut. Breastfeeding also provides antibodies to the baby that help prevent and cure illnesses.  Learning how to breastfeed can be stressful, so you may want to be prepared to contact a lactation specialist or La Leche League chapter after the birth.

    This post is part of Fight Back Friday at Food Renegade, Monday Mania at The Healthy Home Economist, Pennywise Platter at The Nourishing Gourmet, Real Food Wednesday with Kelly the Kitchen Kop and Fat Tuesday at Real Food Forager!

    Friday, September 16, 2011

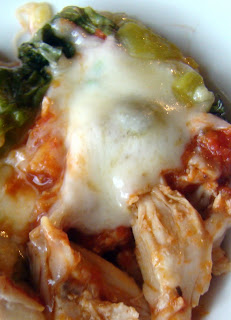
    Crustless Chicken Pizza Casserole (GAPS-legal and grain-free)

    Everyone in my family loves pizza. While we have eaten and enjoyed a few different recipes for grain-free pizza crust, the recipe I make most often is a crustless chicken pizza casserole.  It is very easy to make, and enjoyed by all.  Of course, you'll need to eat it with a fork, but on the plus side, you can add as many toppings as you like without worrying about overloading the crust!

    Crustless Chicken Pizza Casserole
    Serves 4
    • 2 cups leftover cooked chicken, chopped or shredded into bite-size pieces
    • 6-8 oz pizza sauce, preferably homemade (use more if you like your pizza very saucy)
    • 8-12 large fresh basil leaves (optional) 
    • 8 oz shredded low-moisture mozzarella or mild cheddar cheese (mozzarella is not GAPS-legal)
    • 4 oz grated Parmesan cheese
    • Pizza toppings of choice (I like sauteed mushrooms and onions with green chile, nitrate-free salami, and fresh garlic)
    • NOTE: any high-moisture veggies such as mushrooms or zucchini will need to be sauteed to release the moisture before adding them to your pizza casserole.  I've used raw onions that were very finely diced with no problem, but of course they are tastier if you saute them anyway.
    • Homemade ranch dressing, for dipping (optional)
    1. Spread chicken over the bottom of an 8-inch square casserole dish.  
    2. Spread the pizza sauce over the chicken.  Add the optional basil leaves.
    3. Sprinkle half of the mozzarella (or cheddar) cheese over the sauce.
    4. Add your pizza toppings.
    5. Add the remaining half of the mozzarella or cheddar cheese.  Sprinkle the Parmesan cheese over the top. 
    6. Bake in an oven or large toaster oven at 350 degrees F for about 20-30 minutes, until the cheese is bubbly.
    7. Remove from the oven and allow to cool a bit before serving. My family loves to dip this pizza casserole in homemade ranch dressing!  A side salad or veggie sticks make an excellent accompaniment.
    This post is part of Grain-Free Carnival, Pennywise Platter at The Nourishing Gourmet, Real Food Wednesday with Kelly the Kitchen Kop, Fat Tuesday at Real Food Forager, Fight Back Friday at Food Renegade and Monday Mania at The Healthy Home Economist!

      Sunday, September 11, 2011

      Nourishing Alternatives to Lotion, Including Recipes for Whipped Body Butter and Hard Lotion

      This post is the third in a series on healthy skincare for the whole family. For more about healthy skincare, check out the Pregnancy and Parenting Index.

      Since we avoid conventional lotion, my family uses nourishing alternatives to moisturize our skin.  My favorites are coconut oil, body butter, and hard lotion.

      Unrefined Coconut Oil
      Unrefined coconut oil is a wonderful moisturizer for your skin.  It contains lauric acid, which is antimicrobial and antiviral, so it is also great for acne-prone skin.  Coconut oil also has a great, light scent. I like to use unrefined coconut oil as a moisturizer all over my body, including my face.

      When I first tried using coconut oil as a moisturizer, I wasn't very happy with the results.  I ended up feeling oily and looking shiny, yet still having dry skin.  I finally figured out that the trick to using coconut oil as a moisturizer is to apply it while your skin is still wet from a shower or bath. I know this sounds strange, but the coconut oil is absorbed much more readily this way.  I keep a container of coconut oil in the shower so I can apply it right away WITHOUT towel-drying first (I do like to shake a bit of the water off first), and then allow my skin to just air dry. To use coconut oil as a face moisturizer, I use only the residual oil on my hands after moisturizing my body; this results in a nice, light moisture on my face without being overly oily. 

      Homemade Alternatives to Lotion
      Since I only shower every other day (which is a great way to reduce the need for lotion), I use homemade body butter and hard lotion if I need any moisturizer on days when I haven't showered.

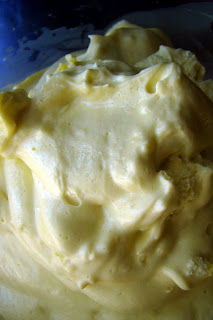
      Recipe: Homemade Whipped Body Butter
      Whipped body butter is a wonderful moisturizer that applies very easily and leaves your skin very soft. It is easy to make body butter at home. It does take a little while to whip up but if you have a stand-mixer you can just walk away and check back periodically. One thing to note: if this gets warmed up and melts after you've made it, it will not re-solidify into body butter as it will lose the whipped consistency.

      Ingredients:
      • 4 oz shea butter I buy this in bulk at my natural foods co-op)
      • 2 oz unrefined coconut oil 
      • 1 Tb arrowroot powder
      • Optional: 10 drops jasmine essential oil plus 5 drops lavender essential oil (or use any oils you like)
      Method:
      1. Gently melt the shea butter and coconut oil over very low heat.
      2. Stir in the arrowroot powder.
      3. Pour the mixture into the bowl of a stand-mixer. Use the whisk attachment to whip the mixture until it gets lighter in color and fluffy. This can take quite awhile; if you are in a rush, you can cool the outside of the bowl with ice or an icepack to speed things up.
      4. Scoop the body butter into a lidded container and store at room temperature.

      Recipe: Homemade Hard Lotion and Lip Balm
      Hard lotion is a great all-over body moisturizer, and it is also wonderful to use on any very dry areas such as your feet and hands. I like to keep a bar by the kitchen sink since my hands get dry from so much time spent in the kitchen. The same recipe can also be used to make lip balm. This recipe comes from MadeOn Lotion and if you prefer, you can buy hard lotion instead of making it yourself.

      Ingredients:

      • One part unrefined coconut oil
      • One part shea butter (I buy this in bulk at my natural foods co-op)
      • One part beeswax (if you have any local honey producers, you can probably get the best price by buying this directly from the beekeepers)
      • Optional: small amount of essential oil such as peppermint, lavender, or jasmine 
      • NOTE: you can make the lotion harder by adding more beeswax or softer by adding more coconut oil. 
       Method:
      1. Using small crock pot (set on Warm) or double boiler over low heat, melt the beeswax
      2. Add the shea butter and allow to melt. 
      3. Add the coconut oil and allow to melt.  
      4. Stir well to combine. If desired, add essential oils and stir a bit more.
      5. Pour the melted ingredients into small plastic containers, lip balm tubes, or even a mini-muffin tin.  
      6. Work quickly to clean up the pot and spoons while they are still warm.  I find the best plan is to wipe them with a clean cloth or paper towel immediately.  If you leave them to cool, the beeswax will be very hard to clean off!
      7. Allow the melted lotion to harden at room temperature and then remove from the containers.  I like to make enough to last for many months, so I just store the extra in the fridge until I'm ready to use it.
      8. To apply the lotion, warm the lotion bar by rubbing it in your hands and then spread over your skin.
      This post is part of Traditional Tuesdays, Seasonal Celebration, Handmade Christmas Gift Carnival, Frugal Days, Sustainable Ways, Fight Back Friday at Food Renegade, Pennywise Platter at The Nourishing Gourmet, Real Food Wednesday with Kelly the Kitchen Kop, Fat Tuesday at Real Food Forager and Monday Mania at The Healthy Home Economist!

        Wednesday, September 7, 2011

        Ginger Pear Muffins (GAPS-legal, grain- and gluten-free)

        Pear season has arrived.  I've happily adapted an old favorite breakfast into a grain-free recipe for ginger pear muffins.  The pears melt wonderfully into the batter as the muffins bake, and the flavor is divine.

        Ginger Pear Muffins
        Makes 12 muffins
        • 1/2 cup butter or unrefined coconut oil
        • 1/2 cup honey
        • 3/4 tsp celtic sea salt 
        • 6 eggs, preferably pasture-raised
        • 3/4 cup coconut flour  
        • 1 tsp dried ground ginger (or 1 Tb minced fresh ginger)
        • 1.5 cups chopped ripe* pears, about 1/4-inch dice (leave the skin on)
        1. Melt butter or coconut oil in a small saucepan over low heat. Turn off heat and allow to cool slightly. Add the honey and give a gentle stir. 
        2. Combine the eggs and salt in a large bowl. Stir with a fork or whisk. 
        3. Add the butter (or oil) and honey mixture to the eggs.  (If the butter and honey were overheated, make sure to let them cool a bit so they won't cook the eggs.) Add the ginger and blend well with immersion blender or mixer.
        4. Measure out the coconut flour.  Since coconut flour clumps, it will need to be sifted if you are not using an immersion blender
        5. Pour the coconut flour into the bowl with the wet ingredients.  Use an immersion blender or mixer to thoroughly combine all ingredients, making sure there are no lumps.  (Since coconut flour does not contain gluten, there is no worry of over-mixing it). 
        6. Add the pears, and use a spoon to fold them into the batter.
        7. Line a muffin tin with paper cups.  Scoop the muffin batter into the paper cups.  I like to use a 3-Tb scoop for this, but you could just use a large spoon.
        8. Bake muffins in 325 degree oven for about 40-50 minutes, until muffins are set and a toothpick inserted in the middle comes out clean.  If you are in a time-crunch, you could bake them at 350 degrees initially, but you'll need to reduce the heat after a bit so they won't burn before being set in the middle.
        9. Remove from oven and cool.  
        Delicious with a pat of butter and a big glass of raw milk or milk kefir!

        *If your pears are a bit hard and not quite ripe, put them in a paper bag on the counter for several days to ripen.

        This post is part of Fat Tuesday at Real Food Forager, Monday Mania at The Healthy Home Economist, Fight Back Friday at Food Renegade, Pennywise Platter at The Nourishing Gourmet and Real Food Wednesday with Kelly the Kitchen Kop! 

        Sunday, September 4, 2011

        My Family's Favorite Homemade Ketchup (and it's GAPS-legal!)

        Homemade ketchup is much more nourishing than ketchup from the store.  We've enjoyed a few different fermented ketchup recipes (including the one in Nourishing Traditions), but I wanted something a bit more basic, without the strong flavor imparted by the fish sauce.  This recipe is bursting with tomato flavor, with just the right tang from the cider vinegar and garlic.  My family prefers this ketchup to the other recipes I've tried. Since this recipe includes whey, it is also a great probiotic condiment. It will keep for several months in the fridge.

        This recipe is also a great base for homemade cocktail sauce.  Just add a bit of prepared horseradish to taste, and then dip away!

        My Family's Favorite Homemade Ketchup
        Makes about 3.5 cups ketchup
        • Three 7-oz jars of tomato paste, preferably in glass jars to avoid BPA
        • 1/4 cup plus 2 Tb raw honey
        • 3 Tb raw apple cider vinegar 
        • 3 small garlic cloves, pressed
        • 6 Tb whey
        • 2&1/4 tsp finely ground celtic sea salt
        • pinch cayenne pepper
        • Equipment needed: one quart mason jar, or two pint mason jars
        1. Combine all ingredients in a bowl (if using a quart mason jar, you can save on dirty dishes by mixing this up directly in the jar). Stir well to combine. If using pint mason jars, pour the ketchup into the jars.
        2. Ensure that the top of the ketchup is at least 1-inch below the top of the jar(s). 
        3. Using a clean cloth or paper towel, wipe the top of the jar above the ketchup clean. 
        4. Put lid on jar and leave at room temperature for 3 days; then transfer to the refrigerator.  It will keep for several months in the fridge.
        This post is part of Fat Tuesday at Real Food Forager, Fight Back Friday at Food Renegade, Pennywise Platter at The Nourishing Gourmet, Real Food Wednesday with Kelly the Kitchen Kop and Monday Mania at The Healthy Home Economist!