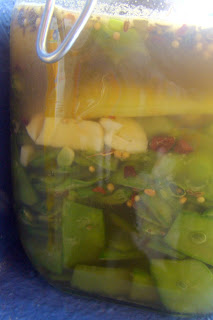
 Since my mom had her usual bumper crop of snow peas this spring, I came up with a new fermented veggie that is especially loved by my 3-year-old son: sweet and sour snow peas! These are deliciously crispy, tangy, and sweet, with just a little tad of a spicy bite from some added garlic. What a yummy way to get some probiotics.
Sweet and Sour Snow Peas
- ~3.5 cups of snow peas
- 3 medium cloves of garlic
- 1 tsp mustard powder
- 1 stalk of celery, OR a generous pinch of celery seed
- 1/2 cup raw mild honey
- 1/2 cup raw apple cider vinegar
- 1.5 Tb celtic sea salt
- 2 Tb whey
- 1 Tb pickling spice*
- Equipment needed: quart mason jar or Fido jar, rock for weighing down the peas (boil the rock in water for several minutes to make sure it is very clean)

- In a medium bowl, combine mustard powder, honey, vinegar, salt, pickling spice, celery seed (if using) and whey. Stir well to dissolve the honey and salt. You may need to leave this sitting for an hour or two to get everything to dissolve and combine well.
- Wash the peas and celery stalk well. Remove and discard the ends from the peas.
- Peel the garlic and check to make sure it looks very good. (I would not use any garlic that has brown spots in a fermented food, as I want to make sure I'm not introducing any molds to the jar.) Slice the garlic.
- Pack the peas, celery, and garlic into the jar.
- Pour the honey/vinegar/spice mixture over the veggies.
- Pack down the veggies so that they are covered by the liquid. If your peas keep floating up to the top, try weighing them down. I use a rock from my yard to hold the peas down (I originally boiled the rock in water for a few minutes to make sure it was nice and clean, and then cooled it down before putting it on top of the veggies.) There should be at least 1-inch of head space at the top of the jar.
- Scrape any spices or veggie bits that are stuck to the jar back down into the liquid. Then use a clean cloth or paper towel to wipe the inside of the jar above the liquid. (This will help in making sure that the fermentation process goes well and that no funky stuff grows at the top of the jar.)
- Put a lid on the jar and leave at room temperature for 2 days; then transfer to the refrigerator.
- Enjoy! These peas make a great probiotic side dish, or a crispy snack any time.
- Once your peas are all gone, don't throw out that brine and the remaining spices. Rather, prepare some more veggies (such as peas, onions, zucchini or cucumber slices), pack 'em into a clean jar, add some fresh spices, pour the brine over them, and ferment again! This is a great way to make the most of the brine ingredients.

1 comment:
I did this with a bumper crop of sugar snap peas last year and my husband ate a whole jar by himself. I was delighted as he usually does not like fermented vegetables on a daily basis.
Post a Comment