Showing posts with label nuts. Show all posts

Sunday, October 2, 2016

Chocolate Chip Banana Bread (grain-free : gluten-free : nutrient-dense)

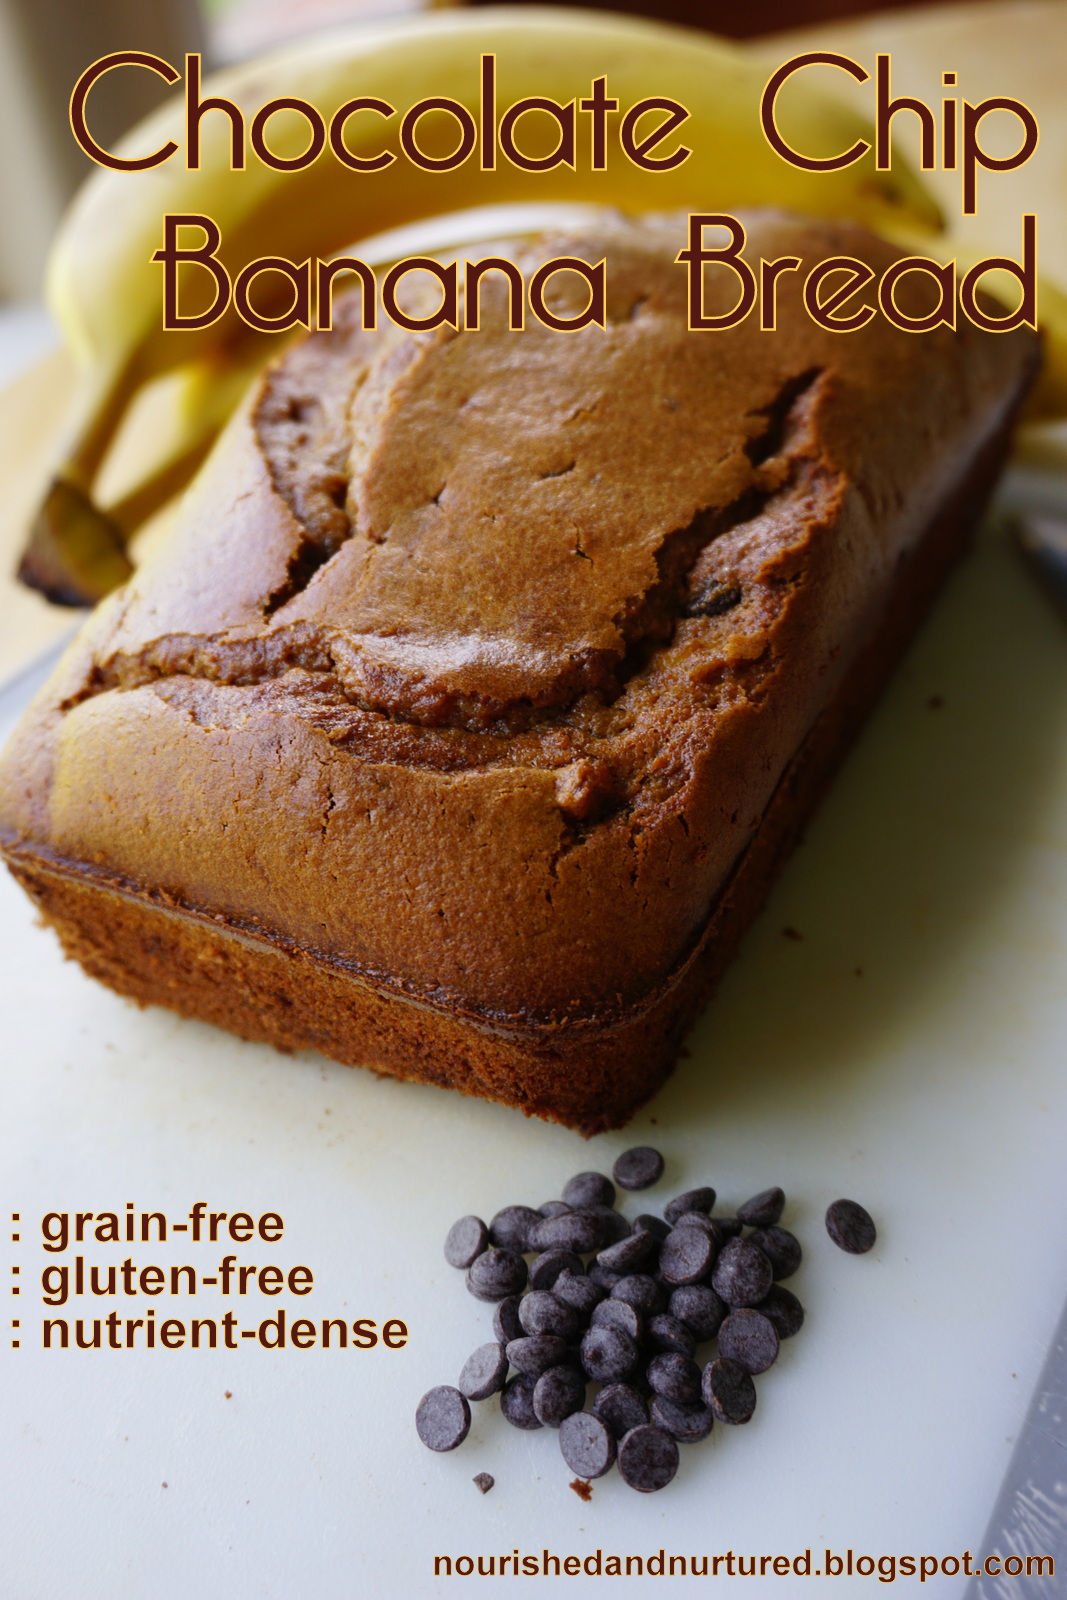
Although my daughter's tolerance for grains has improved to where she can now eat several servings per week of non-gluten grains, I still like to create grain-free recipes that she can enjoy without limitations.  My latest grain-free recipe is Chocolate Chip Banana Bread.

This recipe includes coconut flour, nut butter, plenty of eggs and butter, and a touch of sucanat (unrefined sugar).  The bananas and chocolate chips give this bread a moist punch of yummy flavor. We all loved eating this bread, and devoured over half the loaf in one sitting.


Chocolate Chip Banana Bread
  1. Preheat the oven to 325 degrees F.
  2. Melt the butter in a small saucepan over low heat.  Turn off heat and let cool for a few minutes.
  3. In the meantime, combine the sucanat, eggs, salt, baking powder, vanilla, cinnamon, and nutmeg in a medium bowl.
  4. Add the butter to the bowl and blend it all together well using an immersion blender.
  5. Add the coconut flour and almond butter.  Blend well with an immersion blender.
  6. Stir in the mashed banana and chocolate chips with a spoon or spatula. 
  7. Pour the batter into a well-buttered loaf pan.  I used a 9X5 glass pan.
  8. Bake at 325 degrees for about 40-50 minutes.  It will be done when it is set in the middle and no longer wet-looking.  You can check for doneness by inserting a toothpick in the middle; when the toothpick comes out with just some tiny crumbs, the bread is done.
  9. Remove from the oven and let cool a few minutes. Then you can use a trick I learned from my days as a baker that helps ensure that bread loaves will be easily released from the pan: let the loaf cool while the loaf pan is lying on its side, and switch it to the other side about halfway through cooling.  This allows gravity to aid in the process of liberating the bread from the side of the pan. 
  10. Once the bread is no longer hot, use a spatula or knife to go around the edges of the pan. Cool completely and then invert the pan to release the bread.
  11. I like to slice the bread with a Rada bread knife, which works superbly for this type of bread. Leftovers can be stored in the refrigerator or freezer. I place parchment paper between the slices, and store it in the freezer. 
 
 
Links to Amazon are affiliate links. If you use these links, your price remains the same, but I earn a small commission. Thanks for supporting this site!

Monday, August 17, 2015

Ginger Pear Muffins (nutrient-dense)

Here in the desert southwest, local pear and apple season has arrived.  I always seem to be taken a little off-guard when the first apples and pears start arriving at our natural foods co-op and farmer's market, as it is still hot and definitely still summertime here. But with our long growing season, these traditional fruits-of-Fall are starting to attain ripeness already.

I brought home a small haul of beautiful green Bartlett and Comte pears the week before last. Unlike apples and peaches, pears are picked when green and then ripen to full sweetness and softness off the tree. So the pears I bought were still bright green and hard. By Saturday, after about nine days on the counter, the pears were soft and the skin was turning a nice yellow-green color. It was time for baking.

One of my absolute favorite flavor combinations is Ginger and Pear. Those two flavors are good on their own, but when combined they are fantastic. This recipe for Ginger Pear Muffins uses my currently-preferred combination of Einkorn flour, coconut flour, and ground crispy nuts.  (For a grain-free ginger pear muffin recipe, click here.) These muffins are so very good that they won't stay around long.


Ginger Pear Muffins
  • 1/2 cup plus 1/3 cup organic einkorn flour 
  • 1/3 cup organic coconut flour
  • 1/4 cup ground crispy pecans or almonds (or substitute almond meal)
  • 1/2 tsp celtic sea salt 
  • 1 tsp dried ground ginger (or 1 Tb minced fresh ginger)
  • 1 tsp aluminum-free baking powder
  • 1/2 tsp baking soda
  • 6 Tb grassfed butter, at room temperature
  • 3/4 cup of sucanat (or use a combination of sucanat and sugar for a lighter flavor)
  • 3 eggs, preferably from pastured hens
  • 1/4 cup organic sour cream, preferably from pastured cows
  • 1&1/4 cup diced ripe pears (they don't need to be peeled)
  1. Line a muffin tin with paper cups.  (I prefer If You Care Unbleached Baking Cups because the muffins do not stick to the sides of the cups.)
  2. Combine the einkorn, coconut flour, ground nuts, salt, baking powder, baking soda, and ginger in a medium bowl. Whisk it all together to break up any lumps.  
  3. Preheat the oven to 350 degrees F.
  4. Combine the butter, sucanat and sugar in a large bowl (a Kitchen-Aid stand mixer works great for this recipe). Cream together for a couple minutes until the mixture turns slightly lighter in color.
  5. In the meantime, crack the eggs into a small bowl. (I find that a Pyrex glass measuring cup works great for this because the pour spout makes it easy to add these ingredients to the mixer while it is running.) Do NOT mix up the eggs at this point.
  6. Once the butter and sucanat/sugar have become well-mixed, mix in the eggs one-at-a-time.  With my stand-mixer, I can just pour in each egg while the mixer is still running.  Make sure to scrape down the sides of the bowl once or twice to get everything incorporated well. (It is okay if the mixture looks a bit curdled during this step.)
  7. Add the sour cream to the wet mixture and mix it in well.
  8. Add the dry ingredients a bit at a time.  Because the Einkorn flour does contain gluten, make sure not to overmix or the muffins will be tough.  The batter will become rather thick, but don't worry about it.
  9. Stir or mix in the pears.
  10. Use a 3-Tb scoop or large spoon to scoop the batter into the muffin cups.
  11. Bake the muffins at 350 degrees F for 23-27 minutes, until they are golden brown and a toothpick inserted into the middle of a muffin comes out dry.
  12. Remove from the oven and allow to cool a bit before serving.

What is your favorite pear recipe?


Links to Amazon are affiliate links. If you use these links, your price remains the same, but I earn a small commission. Thanks for supporting this site!

Tuesday, November 18, 2014

Pumpkin & Chocolate Chip Muffins (nutrient-dense)

A friend recently offered me a pumpkin muffin and I was surprised to find chocolate chips inside. I'd never had pumpkin with chocolate before, and I was enamored of this new flavor combination.  I was inspired to make my own version of Pumpkin & Chocolate Chip Muffins; these muffins are super tasty and will now be a regular part of our Fall breakfasts.

Pumpkin & Chocolate Chip Muffins
  1. Line a muffin tin with paper cups.  (I prefer If You Care Unbleached Baking Cups because the muffins do not stick to the sides of the cups.)
  2. Combine the einkorn, coconut flour, ground nuts, salt, baking powder, baking soda, nutmeg, cinnamon, ginger, and cloves in a medium bowl. Whisk it all together to break up any lumps.  
  3. Preheat the oven to 350 degrees F.
  4. Combine the butter and sucanat in a large bowl (a Kitchen-Aid stand mixer works great for this recipe). Cream together for a couple minutes until the mixture turns slightly lighter in color.
  5. Mix in the molasses until well-combined. 
  6. Combine the eggs, vanilla, and almond extract in a small bowl. (I find that a Pyrex glass measuring cup works great for this because the pour spout makes it easy to add these ingredients to the mixer while it is running.) Do NOT mix up the eggs at this point.
  7. Mix the eggs one-at-a-time into the butter/sucanat mixture.  With my stand-mixer, I can just pour in each egg while the mixer is still running.  Make sure to scrape down the sides of the bowl once or twice to get everything incorporated well. (It is okay if the mixture looks a bit curdled during this step.)
  8. Mix in the pumpkin puree.
  9. Add the dry ingredients a bit at a time.  Because the Einkorn flour does contain gluten, make sure not to overmix or the muffins will be tough. 
  10. Stir or mix in the chocolate chips.
  11. Use a 3-Tb scoop or large spoon to scoop the batter into the muffin cups.
  12. Bake the muffins at 350 degrees F for 27-32 minutes, until a toothpick inserted into the middle of a muffin comes out dry.
  13. Remove from the oven and allow to cool a bit before serving.
 Links to Amazon are affiliate links. If you use these links, your price remains the same, but I earn a small commission. Thanks for supporting this site!

Thursday, October 23, 2014

Peanut Butter Cookies (grain-free : gluten-free : nutrient-dense)

During the hot summer months, I craved light foods such as salads and raw veggies. Now that the weather is getting cooler, my tastes are changing and I find myself wanting more comfort foods. These peanut butter cookies fit the bill: they are chewy in the middle, crispy on the edges, and super tasty.


Peanut Butter Cookies
Makes 30-40 cookies

  1. Set your oven racks so that none are in the bottom third of the oven.  Preheat the oven to 325 F.
  2. In a medium bowl, combine the salt, baking soda, baking powder, ground nuts, and coconut flour. Whisk or sift well to combine and break up any lumps.
  3. In another bowl (or stand-mixer), beat the softened butter and sucanat together for a couple minutes, until well mixed. (I love using my Kitchen-Aid stand mixer for making cookies as it makes it very easy to add the ingredients while the mixer is running.)
  4. Add the peanut butter to the butter mixture and mix to combine. (I love to use a Measure All cup for measuring peanut butter and other thick ingredients such as honey and sour cream.)
  5. In the meantime, combine the eggs, vanilla, and almond extract in a small bowl. (I find that a Pyrex glass measuring cup works great for this because the pour spout makes it easy to add these ingredients to the mixer while it is running.) Do NOT mix up the eggs at this point.
  6. Once the butter, sucanat, and peanut butter have become well-mixed, mix in the eggs one-at-a-time.  With my stand-mixer, I can just pour in each egg while the mixer is still running.  Make sure to scrape down the sides of the bowl once or twice to get everything incorporated well.
  7. While the mixer is running, add the dry ingredients.  Since coconut flour does not contain gluten, there is no worry of over-mixing it!
  8. Scoop the cookies onto greased cookie sheets (or line the cookie sheets with silpats, which are wonderful since the cookies never stick and are less likely to burn).  I like to use a 1-Tb scoop for consistently pretty cookies, but you could just use a spoon. Do NOT flatten the cookies as they will spread plenty while cooking.
  9. Bake the cookies at 325 F for about 15-18 minutes (or a few minutes longer if you are cooking them on stoneware). They are done when the edges get a bit dark and crispy.
  10. Remove from oven and allow to cool for about 5-10 minutes.  Then use a spatula to move them to a cooling rack.
  11. Once cool, store these cookies in an airtight container.  They can be stored in the refrigerator or freezer if you won't be eating them all in the next few days.  They are nice and chewy straight from the fridge, and even soft enough to eat straight out of the freezer!  Storing them in the freezer will also remove the pressure of having to eat them all in a week or so, as they will last for months in the freezer.
*I used to avoid consuming peanut butter because of the potential for aflatoxins. However, now that I am consuming a more sustainable, less restrictive diet, I have added small amounts of peanut butter back into my diet. Rather than obsessing over every detail of my diet, I'm finding a place of balance that can be sustained for the long term.  

Links to Amazon are affiliate links. If you use these links, your price remains the same, but I earn a small commission. Thanks for supporting this site!

    Sunday, August 3, 2014

    Morning Glory Muffins

    While my husband could happily eat the same foods over and over, I myself crave variety. These Morning Glory Muffins are my latest favorite. I've combined some of great flavors: zucchini bread, carrot cake, and raisin muffins. The result is a delicious, nutrition-packed muffin that makes for a fantastic breakfast.

    Morning Glory Muffins
    Makes 12 muffins
    1. Melt the butter in a small pan over low heat.  Then turn off heat and allow to cool a bit.
    2. In a large bowl, combine the coconut flour, ground nuts, Einkorn flour, sucanat, baking soda, baking powder, salt, cinnamon, ginger, and nutmeg. Whisk it all together well and break up any lumps.
    3. Preheat the oven to 350 degrees F.  Line a muffin tin with paper liners. (I love to use If You Care unbleached muffin papers because the muffins do not stick to them!)
    4. In a medium bowl, combine the eggs and sour cream. 
    5. Peel and shred the carrots using a box grater. Then shred the zucchini. Stir the melted butter, carrots, and zucchini into the sour cream and eggs.
    6. Zest the lemon using a microplane zester. Add the lemon zest, vanilla, almond extract, and raisins to the egg mixture. Stir well to combine.
    7. Using an electric mixer, mix the wet ingredients into the dry ingredients. Mix just long enough to combine, and do not overmix.
    8. Divide the batter among the 12 muffin cups. I find that a 3-Tb scoop makes this very easy and effortless.
    9. Bake the muffins at 350 degrees F for 25-30 minutes, until they are medium brown on top.
    10. Remove from the oven and allow to cool a bit before serving.
    11. Serve alongside a glass of raw milk and enjoy! I typically refrigerate the leftovers and re-warm them in the toaster oven before serving.

    Links to Amazon are affiliate links. If you use these links, your price remains the same, but I earn a small commission. Thanks for supporting this site!

    Monday, May 26, 2014

    Fresh Fruit Crumble (gluten-free : nutrient-dense)


    Crispy and sweet on top, warm and juicy underneath: fresh fruit crumble is a great way to make the most of seasonal fruits. I prefer to make fruit crumbles instead of pies most of the time, as crumbles are so much easier to put together. With just a few little tweaks, the same recipe can be used for a variety of different fruits.

    Fresh Fruit Crumble
    Serves 6-8
    • Sweetened Whipped Cream (recipe follows) or Vanilla Ice Cream (optional)
    1. One trick to making a crispy crumble topping is to make sure that the butter stays cold.  Keep the butter in the fridge until just before you are going to use it.
    2. Combine all fruit filling ingredients except for the fruit, and stir until well-mixed.
    3. Add the fruit into the mixture and stir to combine. 
    4. Grease an 8X8 square glass baking dish with a bit of butter.  Pour in the fruit filling.
    5. Preheat the oven to 350 degrees F.
    6. Chop the cold butter into approximately 1/2-inch cubes.  Place the chopped butter in the fridge to stay cold while you assemble the rest of the ingredients.
    7. Combine the remaining crumble topping ingredients in a medium-large bowl and stir to combine.
    8. Add the chopped butter to the dry ingredients. Use a pastry cutter or two knives to cut the butter into the dry ingredients, until there is a uniform, crumbly consistency. Note: a food processor does not work very well for this recipe, so use a pastry cutter or two knives instead.
    9. Spread the crumble topping evenly over the fruit in the baking dish.
    10. Bake for about 30-40 minutes, until the fruit is bubbling nicely and the topping has reached a medium brown color.
    11. Allow to cool for at least 30 minutes before serving.
    12. Sweetened whipped cream or vanilla ice cream are fantastic served alongside warm fruit crumble.
    Sweetened Whipped Cream
    • 2 cups raw cream
    • pinch of fine ground celtic sea salt
    • 1/2 tsp organic or homemade vanilla extract
    • 2-4 Tb raw mild-flavored honey, to taste*
    1. Beat the cream and salt together until the mixture starts to get thick and fluffy.  I like to use my Kitchen-Aid stand mixer with the wire whip attachment, but you could also use a hand mixer.
    2. Add the vanilla extract, and drizzle in the honey while the mixer is running.  Alternatively, you could drizzle in the honey a little at a time and mix between each honey addition. 
    3. If you're using a stand mixer, use a silicone spatula to scrape down the sides of the bowl a few times to make sure you don't have any clumps of honey at the bottom.  I like to beat it until it gets a bit stiff since it will tend to soften up a bit in the fridge over the next few days.
    4. Store the whipped cream in the fridge in an airtight bowl.
    *If your raw honey is very crystallized, place it over a bowl of warm water to make it a bit runny.

    Wednesday, May 2, 2012

    Grain-free Sandwich Bread (GAPS : primal : gluten-free)

    (I've moved! You can see this recipe at my new website here!)

    After many tries, I have finally perfected my recipe for grain-free sandwich bread.  This bread stays together well, and works great for packing lunches to go. Since it is made with almond flour and coconut flour, this bread is quite filling.  

    My family has been very happy to get to eat sandwiches once again with this bread. It works great for both savory sandwiches (like meat and cheese) and sweet sandwiches (like nut butter and jelly). It is also good with hamburgers (although I've gotten so used to eating them bunless that I prefer only one piece of bread with my burgers now).   This bread can be made into toast by using a toaster oven on 250 degrees for about 15-20 minutes (make sure the bread is not directly over the heating element, or it will burn). 

    Grain-Free Sandwich Bread
    Makes 1 loaf
    1. Melt butter in a small saucepan over low heat.  Turn off heat and allow to cool a bit.  Then stir in the honey and vinegar.
    2. Break the eggs into a medium bowl.  Add the salt, baking soda, almond flour, and butter mixture.  Mix together with an immersion blender or hand mixer. 
    3. Measure out the coconut flour.  It will need to be sifted if you are not using an immersion blender.
    4. Using an immersion blender or handheld mixer, mix the coconut flour into the other ingredients very well.  There is no worry of over-mixing this recipe since there is no gluten in it.
    5. Pour the batter into a well-buttered loaf pan.  I used a 9X5 glass pan.
    6. Bake at 300 degrees for about 50-60 minutes.  It will be done when it is set in the middle (you can lightly touch it, or check to see if a toothpick comes out clean).
    7. Let cool for about 15-20 minutes, and then use a spatula or knife to go around the edges.  Invert the pan and move the bread to a cooling rack.  Cool completely.
    8. Wrap tightly with plastic wrap. Store in the fridge or freezer. I like to slice it fairly thinly with a Rada bread knife, place parchment paper between the slices, and store it in the freezer.
    This post is part of Traditional Tuesdays, Fat Tuesday, Monday Mania and Pennywise Platter!

    Friday, April 13, 2012

    Peanut Butter Chocolate Chip Cookies Perfected! (grain-free : gluten-free : GAPS version)


    I am really, really excited about this cookie recipe, as the taste and texture is like the cookies I remember from the days before we were eating grain-free. Straight out of the oven, these cookies are wonderfully crispy on the edges and chewy in the middle.  After a day or two on the counter (or in the fridge), they are nicely soft and chewy.  These cookies don't have a strong coconut flavor, and have also been enjoyed by people that are not eating a grain-free diet.

    The GAPS diet does allow cocoa to be eaten occasionally once digestive symptoms have subsided.  The challenge to making these cookies GAPS-legal is finding chocolate chips that are sweetened with honey, as other sweeteners are not allowed on GAPS.  I used dairy-free, soy-free chocolate chips, but they still aren't GAPS-legal because of evaporated cane juice as a sweetener. You could easily omit the chocolate chips, or even replace a little of the coconut flour with cocoa if you prefer.


    Peanut Butter Chocolate Chip Cookies
    Makes about 3 dozen cookies
    1. Set your oven racks so that none are in the bottom third of the oven.  Preheat the oven to 325 F.
    2. In a medium bowl, combine the salt, baking soda, coconut flour, and almond flour.  Whisk well to combine and break up any lumps of coconut flour.
    3. Beat the softened butter for a couple minutes, until it is light and fluffy.
    4. Add the honey and continue to beat for a few more minutes until the honey is incorporated very well.  If you are using a stand-mixer, make sure you scrape the sides and bottom a couple times to get everything incorporated well.
    5. Add the peanut butter and vanilla. Mix well, scraping the bowl as needed.
    6. Add the eggs one at a time while the mixer is running.  The easiest way to do this is to break all of the eggs into a bowl or cup and then just pour them in one-at-a-time.  Let each egg get incorporated before adding another one.
    7. While the mixer is running, add the dry ingredients a little at a time.  Since coconut flour does not contain gluten, there is no worry of over-mixing it!
    8. Stir in the optional chocolate chips and pecans. 
    9. Scoop the cookies onto greased cookie sheets (or line the cookie sheets with silpats, which are wonderful since the cookies never stick and are less likely to burn).  I like to use a 1-Tb scoop for consistently pretty cookies, but you could just use a spoon.
    10. Press down the cookies slightly with a spoon or fork. Skip this step for subsequent batches baked on already-warm cookie sheets, as those cookies will spread more on their own.
    11. Bake the cookies at 325 F for about 16-20 minutes (or a few minutes longer if you are cooking them on stoneware). They are done when they are golden brown on top and a little darker brown on the edges.
    12. Remove from oven and allow to cool for a few minutes.  Then use a spatula to move them to a cooling rack.
    13. Once cool, store these cookies in an airtight container.  They can be stored in the refrigerator or freezer if you won't be eating them all in the next few days.  They are nice and chewy straight from the fridge, and even soft enough to eat straight out of the freezer!  Storing them in the freezer will also remove the pressure of having to eat them all in a week or so, as they will last for months in the freezer.

    *I used dairy-free, soy-free chocolate chips, but they are still not GAPS-legal. To make this recipe GAPS-legal, you may have to omit the chocolate chips or try to make your own using honey as a sweetener.  Or, you could replace a little of the coconut flour with cocoa and have the whole cookie be chocolate flavored.
    **I love using my Kitchen-Aid stand mixer for making cookies as it makes it very easy to add the ingredients while the mixer is running.

    This post is part of Monday Mania, Pennywise Platter, Fat Tuesday and Fight Back Friday!

    Wednesday, April 4, 2012

    Peanut Butter Chocolate Chip Cookies (grain-free, gluten-free, primal, GAPS-option)

    My husband always requests cookies for his birthday.  Last year, we had chewy cinnamon almond cookies, but this year I wanted to develop a new chocolate chip cookie recipe.  These cookies are not very dense, and for whatever reason they are much tastier after being refrigerated (and they are even soft enough to eat straight out of the freezer). Chocolate and peanut butter = Yum!

    The challenge in making these GAPS-legal is to find chocolate chips that are GAPS-legal.  The chocolate chips I used are dairy-free and soy-free, but they do still have evaporated cane juice as a sweetener so they are not GAPS-legal.  You could just omit the chocolate chips to make them fully GAPS-legal, and they are quite yummy that way too. And you can see that they are very pretty without the chocolate chips.

    Peanut Butter Chocolate Chip Cookies
    Makes about 3 dozen cookies
     
    1. Set your oven racks so that none are in the bottom third of the oven.  Preheat the oven to 325 F.
    2. In a medium bowl, combine the salt, baking soda, coconut flour, and almond flour.  Whisk well to combine and break up any lumps of coconut flour.
    3. Beat the softened butter for a couple minutes, until it is light and fluffy.
    4. Add the honey and continue to beat for a few more minutes until the honey is incorporated very well.  If you are using a stand-mixer, make sure you scrape the sides and bottom a couple times to get everything incorporated well.
    5. Add the peanut butter and vanilla. Mix well, scraping the bowl as needed.
    6. Add the eggs one at a time while the mixer is running.  The easiest way to do this is to break all of the eggs into a bowl or cup and then just pour them in one-at-a-time.  Let each egg get incorporated before adding another one.
    7. While the mixer is running, add the dry ingredients a little at a time.  Since coconut flour does not contain gluten, there is no worry of over-mixing it!
    8. Stir in the optional chocolate chips and pecans. 
    9. Scoop the cookies onto greased cookie sheets (or line the cookie sheets with silpats, which are wonderful since the cookies never stick and are less likely to burn).  I like to use a 1-Tb scoop for consistently pretty cookies, but you could just use a spoon.
    10. If you like, press down the cookies slightly with a spoon or fork.  In the pictures above, the plain peanut butter cookies were not pressed down, and you can see that they are nicely rounded on top.  Pressing down will give you a flatter cookie, like the chocolate chip ones in the top picture.
    11. Bake the cookies at 325 F for about 16-20 minutes (or a few minutes longer if you are cooking them on stoneware). They are done when they are golden brown on top and a little darker brown on the edges.
    12. Remove from oven and allow to cool for a few minutes.  Then use a spatula to move them to a cooling rack.
    13. Once cool, store these cookies in an airtight container in the refrigerator or freezer.  They are nice and chewy straight from the fridge, and even soft enough to eat straight out of the freezer!  Storing them in the freezer will also remove the pressure of having to eat them all in a week or so, as they will last for months in the freezer.

    *I used dairy-free, soy-free chocolate chips, but they are still not GAPS-legal. To make this recipe GAPS-legal, you may have to omit the chocolate chips or try to make your own using honey as a sweetener.
    **I love using my Kitchen-Aid stand mixer for making cookies as it makes it very easy to add the ingredients while the mixer is running.

    Wednesday, January 4, 2012

    Grain-free Cinnamon Raisin Bread (GAPS-legal, primal, gluten-free)

    While looking for a little variety in our breakfast options, I was reminiscing about the sprouted cinnamon raisin bread we enjoyed prior to the GAPS Diet.  So I developed this recipe for grain-free cinnamon raisin bread, and it is wonderful!  This is my daughter's new favorite breakfast, and I love that it is less sweet than the muffins I typically make.

    My favorite way to serve this is to toast it and spread it with softened butter.  If you want to make toast, use a toaster oven and try to keep the bread from being directly over the heating element.  I'm not sure whether this bread would stand up to a regular toaster, as it is fairly soft and the coconut flour can burn easily.

    Cinnamon Raisin Bread
    • 1/2 cup (1 stick) butter
    • 1/4 cup honey
    • 5 eggs, preferably from pastured hens
    • 1/4 tsp finely ground celtic sea salt
    • 1/4 tsp baking soda
    • 1 tsp vanilla
    • 1/2 tsp ground cinnamon
    • pinch nutmeg
    • 1/3 cup coconut flour (this should be sifted if you are not using an immersion blender)
    • 1/4 cup almond flour, preferably from crispy nuts
    • 1/2 cup raisins
    1. Melt the butter in a small saucepan over low heat.  Turn off heat, add the honey, and give a little stir.
    2. In a medium bowl, combine the eggs, salt, baking soda, vanilla, cinnamon, and nutmeg.  Blend well using an immersion blender or hand mixer.
    3. Add the butter and honey, and blend well.
    4. Add the coconut flour and almond flour.  Blend well with an immersion blender or hand mixer.
    5. Fold in the raisins with a spoon or spatula.
    6. Butter two small loaf pans, or line them with parchment paper.  I used loaf pans that were 7.5X3.75X2.25 inch.  Although the batter would all fit into a larger loaf pan, it will cook better as two smaller loaves so that the coconut flour will not be overcooked before the middle is set.
    7. Pour the batter into the loaf pans.
    8. Bake the loaves at 325 degrees F for about 25-35 minutes, until the middle of each loaf is set and the top has started to turn a nice golden brown color.  I like to cook this bread for a few minutes past when the middle is set so that the bread will be nice and dry for toasting.
    9. Remove from the oven and cool completely before removing from the loaf pans.
    10. Store in the fridge or freezer.  I like to use a good bread knife to cut each loaf into many slices.  I then place a small square of parchment paper between each slice, wrap it all in plastic wrap, and store it in the freezer.  The parchment paper ensures that I can easily pull out just one slice at a time.  This bread freezes very well, and makes great toast!
    This post is part of Fat Tuesday, Monday Mania and Frugal Days, Sustainable Ways!

      Wednesday, November 16, 2011

      Pumpkin Spice Bread (GAPS-legal, grain-free, nut-free option)


      Pumpkin spice bread is a favorite Fall food in our house. This is a rich, moist bread recipe that has optional nuts and raisins. Without the nuts and raisins, it has a very soft texture (preferred by my husband).  With the nuts and raisins, it has a more hearty texture (preferred by the kids and myself).  

      Pumpkin Spice Bread
      Makes 2 loaves or 24 muffins
      • 1 cup butter, preferably from grassfed cows
      • 3/4 cup honey
      • 6 eggs
      • 1/4 cup whole milk yogurt
      • 1 Tb vanilla extract
      • 1 Tb cinnamon
      • 1 tsp ground nutmeg
      • dash ground ginger
      • dash ground cloves
      • 1 tsp celtic sea salt
      • 1/2 tsp baking soda
      • 1 cup coconut flour
      • 2 cups pumpkin puree, preferably homemade
      • 1/2 to 3/4 cup crispy pecans (optional)
      • 1/2 to 3/4 cup raisins (optional)
      1. Melt the butter in a small pot over low heat.  Turn off heat, add honey, and stir slightly. Allow to cool a bit.
      2. Combine eggs, yogurt, and vanilla in a bowl.  Mix well using an immersion blender or hand mixer.
      3. Add butter/honey mixture to egg mixture.  If you are using an immersion blender, go ahead and add the spices, salt, and baking soda now as well.  Mix thoroughly with the immersion blender. If you are not using an immersion blender, just mix the honey/butter into the egg mixture very well with a hand mixer. 
      4. If you are not using an immersion blender, the coconut flour must be sifted.  Then whisk in the spices, salt, and baking soda.
      5. Thoroughly mix the coconut flour into the wet ingredients using an immersion blender or hand mixer. Because coconut flour does not contain gluten, there is no worry of overmixing it.
      6. Stir in the pumpkin puree. Then fold in the optional nuts and raisins.
      7. Pour the batter into two buttered loaf pans (mine are 8.5 X 4.5 X 2.5).  Alternatively, line two muffin tins with paper cups and then fill with the batter.  
      8. Bake loaves for 1 hour and 20-30 minutes at 325 degrees. You may need to cover the loaves with foil partway through if they are getting too dark.  Bake muffins for about 40-50 minutes. This is a very moist recipe, so leave it in the oven a few minutes longer than you think to make sure it gets baked thoroughly.
      9. Cool. Serve it plain, with a smear of butter, or even topped with some honey buttercream frosting for a special treat! 
      This post is part of Fat Tuesday, Monday Mania, Fight Back Friday, Pennywise Platter, Frugal Days, Sustainable Ways and Real Food Wednesday!

        Monday, August 22, 2011

        Peach Blueberry Clafoutis (GAPS-legal, grain- and gluten-free)

        Since we are enjoying the summer bounty of local peaches, I came up with this recipe for peach blueberry clafoutis.  It is simple to make and tastes wonderful.  You can eat it warm, but it is especially good chilled.  Leftovers make a great breakfast.  For a special treat, add some whipped cream or ice cream on top.

        Peach Blueberry Clafoutis
        1. In a small saucepan, melt one stick of butter.  Turn off heat and add honey. Give it a little stir but don't worry too much about getting it mixed well. Allow to cool.
        2. Wash the peaches and rub gently to remove most of the fuzz.  Then remove the pits and thinly slice the peaches (leaving the skin on).
        3. In a medium bowl, combine eggs, sour cream, nutmeg, salt, and vanilla.  I like to use my immersion blender to mix it all up together, but you could certainly use a whisk or mixer instead.
        4. Add butter/honey mixture and almond flour.  Whisk or blend until smooth. Using the immersion blender is great because it further grinds the almond flour (which doesn't get particularly fine when I grind it in the food processor).
        5. Butter an 8X8 glass dish or two glass pie plates. Arrange the sliced peaches on the bottom of the pan, then sprinkle the blueberries on top.
        6. Pour the liquid mixture over the top of the fruit. (Note: the fruit will float up while it is cooking.)
        7. Bake at 325° for 45-55 minutes, until clafoutis is set in the center and the top is nicely browned.
        8. Allow to cool and then transfer to the fridge. Let chill for several hours and then serve. (You could also eat it warm, but it is much tastier cold.)
        *Crispy almonds are nuts that have been soaked in water with a little salt for 12-24 hours and then dried in the dehydrator until crispy (which usually takes about 24 hours at 155 degrees F in my Nesco dehydrator). Soaking the nuts neutralizes phytic acid and enzyme inhibitors. Phytic acid blocks absorption of minerals such as calcium and magnesium; enzyme inhibitors make nuts hard to digest. I make a large batch of crispy nuts, grind them into flour in the food processor (don't grind too long or you will make almond butter instead of flour), and store the flour in the freezer. This way, the flour is always ready when I need it.

        **Time-saving tips:

        • For a delicious and easy breakfast throughout the week, double this recipe and cook in either two 8X8 dishes or one 9X13 dish (it will of course take longer to cook in the bigger dish).  Once cooled slightly, scoop into individual glass dishes and store in the refrigerator.  On subsequent mornings, just pull out one of the small glass containers and eat cold.
        • Since the oven will already be heated, you may as well throw in a pack of bacon, some egg muffins, baked bacon and eggs, or even a spaghetti squash for later in the week.  I abhor an empty oven, so I'm always adding more items once it is on.  Bacon bakes very well, especially if you put it on the bottom rack, and it also reheats well for later in the week.
        This post is part of Fight Back Friday at Food Renegade, Pennywise Platter at The Nourishing Gourmet, Real Food Wednesday with Kelly the Kitchen Kop, Fat Tuesday at Real Food Forager, Slightly Indulgent Tuesdays at SS&GF and Monday Mania at The Healthy Home Economist